Take a look at these cool homemade Ice Cream costumes shared with us by costume enthusiasts from around the world. Along with the adult and children costume ideas here, you’ll also find loads of homemade costume ideas and DIY Halloween costume inspiration for your next costume project. Enjoy!
Latest Ice Cream Costumes
- Homemade Cake Costume Made from Coffee Filters!
 It truly is amazing what you can do with a couple hundred coffee filters, some hot glue, duct tape, and … Read more
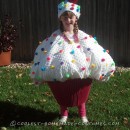
 - Sweetest Toddler Cupcake Costume – No Sew and Budget Friendly!
 The inspiration for this Cupcake costume came from my 2 year old daughter, Vivian. Vivian loves everything about cupcakes: helping Mommy … Read more
 - Coolest Homemade Baby Cupcake in a Stroller Costume
 We wanted our 7 month old daughter to be a cupcake for her first Halloween. But, since she’s so young … Read more
 - Top 11 DIY Mouth-Watering Cake Costume Ideas You Can Make on a Diet
 If you love cake decorating and prefer to eat frosting with a spoon, you’ve come to the right place. Take … Read more
 - Cutest Homemade Cupcake Girl Costume
 My Daughter was as sweet as a cupcake so we decided to dress her up like one as well. For … Read more
 - Adorably Delicious DIY Pink Shopkins Cupcake Costume
 Materials Used Here’s what I used to make my pink Shopkins Cupcake costume: Toy storage tub, white pantyhose, polyester stuffing, … Read more
 - Adorable Baby Cupcake Costume
 This costume turned out better than I imagined. The idea came from daddy. Right after Malia was born (in February) … Read more
 - Mommy and Me Babywearing Costume: The Baker and her Cupcake
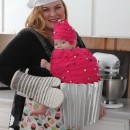 I love babywearing! My seven month-old daughter, Ellie, loves being close to mommy and feeling secure while exploring new things … Read more
 - Super Cute Last Minute “Piece of Cake” Toddler Costume
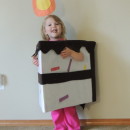 We always think outside the box for our costumes. We want something different that makes the kids stand out. This … Read more
 - Cute Cupcake Bakery Family Group Costume
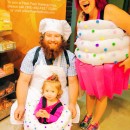 My family decided to be cupcakes with my husband, Andy, being the baker. I was set on dressing up our … Read more
 - Cupcake Cutie Costume
 This year I was given the honor of making my niece Tessa’s Halloween costume! I am a huge cupcake fanatic. … Read more
 - Cutest Old Man and Cupcake Costumes
 My 1 1/2 year old boy is an old man. We took clothes that he already had then got some … Read more

Featured Costumes
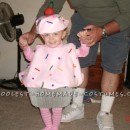
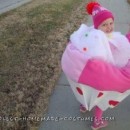
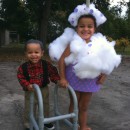
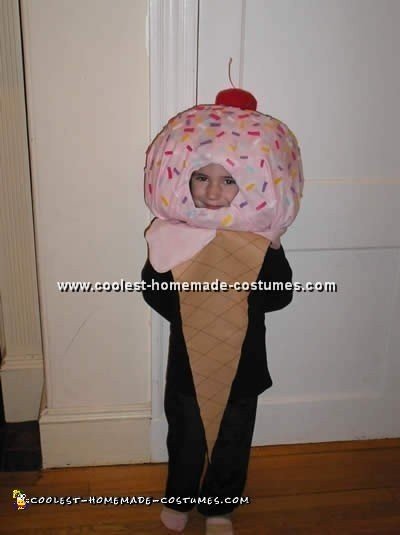
Ice Cream Children costume by Candice P., Brackettville, TX
(This children costume is supposed to be worn by suspenders and should come to thigh height on a nine year old child but the model in the photo is only three years old so he is not tall enough to give a true view of how it will be worn).
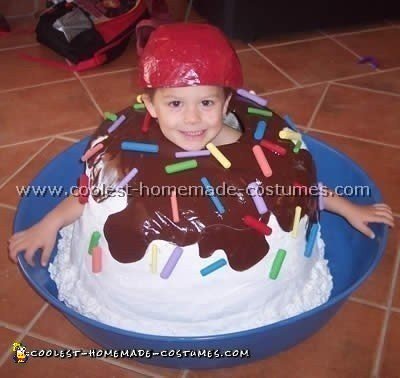
Ice Cream Sundae Materials: Lots of news papers for paper Mache, flour and water for paste, Vaseline, Great Stuff foam in a can, skinny wooden dowels, about two or three different sizes for sprinkles, assorted acrylic paints for sprinkle colors, can of spray paint in desired flavor, color box cutter, small piece of vinyl table cloth painted brown with spray paint for fudge sauce-cut into a “drippy” shape, hot glue and gun, masking tape or duck tape, suspenders, bendable wire, large commercial kitchen vent from a roof-top (dish) and spray paint in desired color for dish.
My husband is a roofer so he was able to bring me a large vent from a commercial restaurant roof that he was tearing off. It would have been trashed but he brought it home hoping to use as a dog food bowl. Then we decided it would be perfect for this children costume. I stuffed a large trash bag full of sheets and towels to make it round for the ice cream shape. Then, I greased the bag entirely with the Vaseline to allow the paper Mache to slide off when complete. I also got a ball cap to the make the right size of cherry hat. Afterwards, I stuffed the hat to give it a round shape then covered with a plastic grocery sack then greased like the larger bag.
Apply the paper Mache to both prepared shapes allowing every layer to dry completely. You should make about four or five or more layers to reach good sturdiness and durability. You should cut strips of news paper about an inch or two wide. Dip in paste that is half water and half flour. Adding some salt to the mix will prevent mold. It is very messy but you will have a rock-hard shell when it is dry.
When it is the shape and thickness that you desire then gently shake the bag from the shell. It should slide out easily but you can cut the bag open on the bottom and pull out the contents to free the paper Mache if necessary. The same with the cherry hat. Do not remove from shaped bag unless you are done putting wet paper Mache on it. If you continue to apply the Mache after you have removed the bag from inside you may loose a lot of shape. Try to apply the paper Mache to the hat little by little to form a cherry shape. I twisted some paper and then taped it into a ring shape then glued to the very top of the hat.
Then I continued to cover with layers of paper Mache to make it look like the “bellybutton” part that the cherry stem comes out of. When everything is dry, poke a hole at the top and stick a piece of wire in for the stem. Bend the end and glue the bend section with lots of hot glue to the inside of the hat so that the stem is nice and stiff (does not wiggle around in the hole). Then spray paint red. Wrap the stem wire with masking tape tapering out to the end so that it is thicker and then paint green. You can attach some elastic as a chin strap to the insides.
Making Holes for the Arms and Head
When you’ve got the perfect ice cream shape cut holes at appropriate sizes for arms and head. You can reinforce the cut edges and bottom edge of scoop with duck tape for extra durability and comfort. Get your can of good stuff and carefully apply around the bottom edge of the ice cream. This makes it look like a real ice cream scoop.
Be careful because the foam comes out quickly and can make a big mess if you squeeze the trigger too hard. Don’t put too much because the foam expands and gets about twice as big as it looks when wet. Spray paint desired color. Take the fudge vinyl and glue it directly to the top of the ice cream scoop. Don’t worry about covering the head hole. Once glued down pierce hole in middle of vinyl that covers hole. Then cut like a pizza to the edge where the hole ends in triangles that hang down inside. Then dot some glue in the center of each triangle and fold inside and fasten to the inside of costume.
Take dowels saw them in about 2″ sections and sand ends till smooth and slightly rounded. Then divide between the number of colors you will paint them. Try to make each color with the same amount of sprinkles to make it look even. Glue them randomly with hot glue onto the fudge and ice cream. Place them in all different directions and try to keep like colors scattered away from each other. Then my husband cut a large hole in the bottom of the roof vent for legs, then we spray painted the color of our choice. Bright colors are always best! We attached four hooks near the leg hole on the vent. This gives the suspenders a place to attach to. The bowl will be put on first then the ice cream scoop then the cherry on top.
Thanks to all the great children costume ideas on this site!
Total Spent: $20
Cool Popsicle Children Costume Idea
Children costume by Candice P., Brackettville, TX
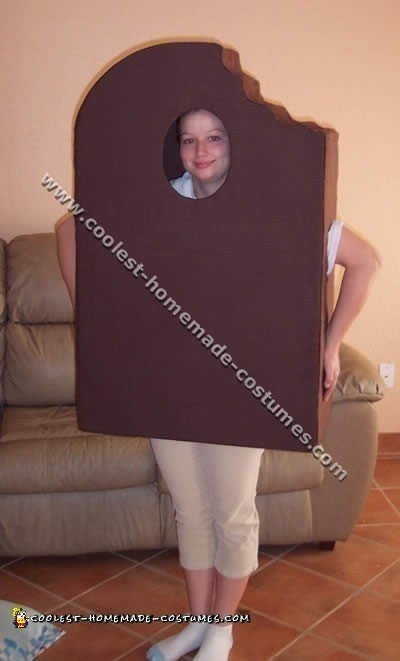
For the making of this children costume you will need two large sheets of cardboard, the same size (like the box that a new refrigerator or other large item may be shipped in), Styrofoam pieces, hot glue and gun box, cutter, sharp scissors, pencil or marker, measuring tape, about three yards brown flannel or similar fabric or color fabric of your flavor choice to upholster finished cardboard “skeleton” and an old pair of overalls with good straps.
Find out what size you need for the children costume then draw the shape of the front and backs of your pop on cardboard. Find out about where you want the face hole. Mark it and cut a hole using a plastic bowl to trace. Find an appropriate size for your needs. You can squeeze a thin plastic ice-cream or margarine container to give you a nice face-shaped oval. Also, you may want to ask some one to hold the bowl for you while you trace. You can draw a bite in the top if you desire but it makes the costume more difficult. Both front and back must be the same size or it will turn out looking crooked. Cut out.
Find out how thick you will need the children costume from back to front for the sides. Then use that measurement to cut two rectangles the same size from the cardboard for the two sides of the ice-pop. It should be as tall as the front and back pieces from the bottom to just before the top begins to curve or become round. Remember to allow about four inches to both sides of one rectangle so that it can be folded into a “[” shape. The two small sides will be glued in between the front and back pieces.
Take the Styrofoam and cut many pieces as best as you can to the same width as the costume will be front and back. They should be long and skinny like short little 2×4 pieces. While the costume “skeleton” is laying down on either the front or the back glue the Styrofoam planks that you’ve cut in between the front and the back standing end on end. Place them side by side leaving as few gaps as possible. Glue them to follow the curved pattern of the front and back.
Make sure that the surface of the Styrofoam that will form the curvy top is as smooth and straight as possible when glued correctly. The flat side of each plank that will be showing at the top should come all the way to the end of the cardboard that you are gluing to; level with both the front and back of the pop. Use a ruler to check to see it is flush with top and bottom pieces. You can use duct tape or masking tape to re-enforce the edges that have been glued together.
I used a can of “great stuff” to fill in gaps between my Styrofoam planks for the round top. Then I shaved the canned foam down with a knife after it completely dried to give the top a more smooth appearance. If you will be making a bite out of the top you can draw a very large bite shape to match the scale (size) of the pop on a large piece of Styrofoam that is the same thickness from front to back. Carve out bite with knife as best as you can. Glue in between front and back to match. Find appropriate size for arm holes needed and determine where they should be placed for the individuals comfort. Draw them on both sides with identical placement. Cut with box knife.
Upholstering the Costume
Now you are ready to upholster. Place fabric on back. Smooth out and cut around the box in the shape needed but allowing about an inch or so too big. While the smoothed out fabric is in place lift corner at bottom and place a dot of hot glue then replace fabric and carefully press. About another inch or inch and a half away from the first glue dot lift side of fabric and repeat.
Repeat process all along the sides until you reach the opposite side of where you started. Do the same to the front. Don’t worry about covering your hole. Once it is glued in the same fashion as the back then locate the covered face hole. Pierce directly in center and cut hole open like a pizza to make little triangles that will hang down. Don’t cut them off! Carefully dot some glue of the back of the middle of each triangle fold inward and glue to the inside of the costume. Repeat until every hanging triangle is attached.
Measure enough fabric to cover the sides from on side on the bottom all the way up the top and cover the curve and back down the other side to the bottom. Leave enough on both ends to tuck inside the bottom of the costume. Make sure that the width of the fabric on the sides will have a few inches of extra length so that it can be folded at the actual width measurement and ironed so that there will be a smooth fold for the seams that you will see from the front and back of the costume. If you do not fold it and do it this way you will end up seeing jagged choppy frayed edges of fabric all along the top of your costume. You will do the arm holes the same as the face hole.
Once you are done covering with fabric take the old pair of overalls, cut them so that all you have is the part that covers your chest area. Glue the back and strap parts of the overalls to the inside of the costume about where your shoulders should be. Glue the knob part that the straps hook to in the front so that the straps can easily be hooked to the front and stay hooked when pulled on.
You can probably use hot glue for this but I recommend a product called NP1. It is a heavy duty bonding glue that comes in an orange caulk tube and is very sticky. Try not to get this on your clothes or hands because it won’t come off clothes at all and will take days to remove from skin. It dries to a thick solid rubbery texture. You can probably find this at Home Depot or Ace. Allow the NP1 to dry for one day before trying it on! You should be able to adjust the overall straps for comfort.
Hope this helps you to make an awesome children costume!
Total Spent: $12
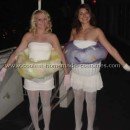
Fun Ben & Jerry’s Children Costume Idea
Children costume by Sharon H., Brielle, NJ
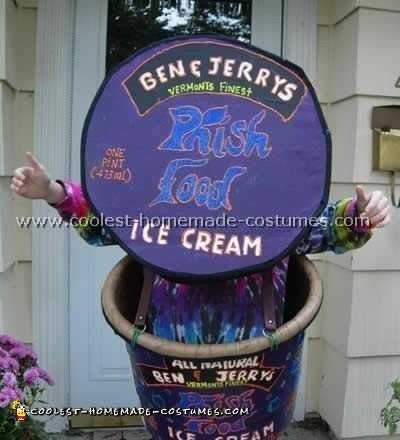
To start off with this homemade children costume, I had a plastic bucket that I zig sawed out the bottom. Spray painted the whole outside. Then my son and I painted the outside the best that we could., My son painted the cows on the back. The top is made out of cardboard and tape.
Bend the cardboard into the round shape and use tape to secure. Glue stripes of newspaper to smooth the top. Paint and finish with some gimp. Wear your groovy tie die shirt. It was a lot of fun making a children costume for my son and he won first prize at school.
Total Spent: $10.
Easy Ice Cream Cone Children Costume Idea
Children costume by Janine B., Boston, MA
The idea for this homemade children costume came from my daughter – she decided what she wanted to be and I made her costume. In order to keep the weight to a minimum I made the ‘scoop’ out of paper mace and covered it with fabric that had a watercolor-like pattern that I thought looked like strawberry ice cream.
This was my first time working with paper Mache and in hindsight I should have just painted it. The sprinkles are glued on pieces of felt. The cherry is made from wadded-up pieces of felt wrapped in a larger square of felt then rubber-banded at the bottom and put through a hole in the ‘scoop.’ The stem is a piece of red twine.
The cone is felt with a pattern drawn with a fabric marker. I glued the scoop the drips and the cone to a piece of foam core for stability and also glued Velcro straps to it to hold it on her body. This homemade Halloween costume was easy for her to wear and she was able to navigate stairs and curbs and most importantly eat candy along the way.
Have fun with your own children costume ideas.
Total Spent: $20
Related costumes:
 100+ Cool DIY Cake and Cupcake Homemade Halloween Costume Ideas
  Vintage Good Humor Couple Costume: Ice Cream Man Ice Cream Cone
 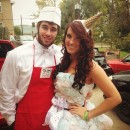 Coolest Ice Cream Cone and Ice Cream Man Couple Halloween Costume Top 11 DIY Mouth-Watering Cake Costume Ideas You Can Make on a Diet
 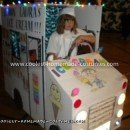 Coolest Lemon Laura’s Ice Cream Truck with Whiteboard
 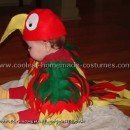 12 Coolest Homemade Parrot Costume Ideas
  Homemade King Candy and Princess Lolly Costumes for our Pet Dogs
  Handmade Super Creepy Ice Cream Man and Candy Clown Couple Costume
Your comment has been sent successfully.