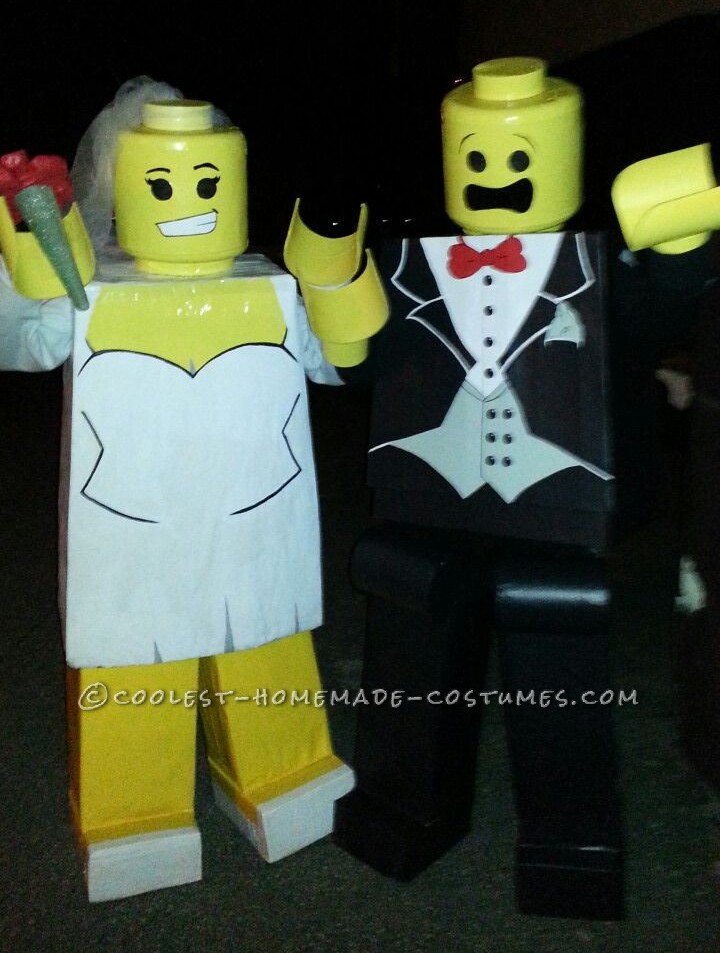
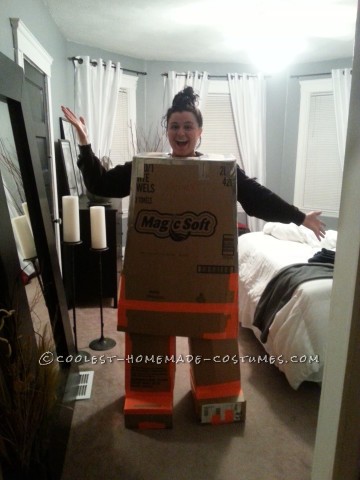
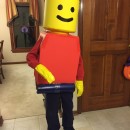
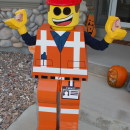
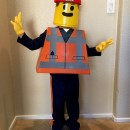
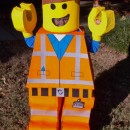
So we wanted a really cool, over the top, prize winning costume. We made lego people!
Here’s the complete DIY instruction list:
Cardboard Collection time
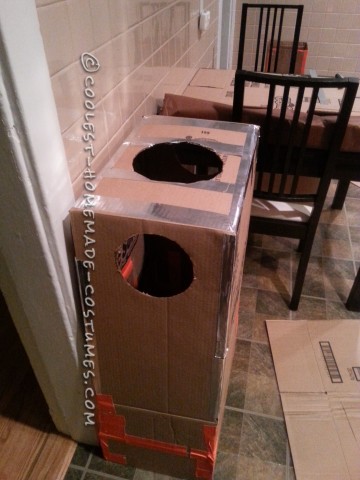
We collected a lot of cardboard, we practically hoarded it. We weren’t sure how much we would need so we grabbed a ton. We ended up using two large boxes for the bodies, the same sized boxes for the four legs and four smaller boxes for the feet. We used box cutter to cut our first two large boxes for our bodies.We needed to make the top of the bodies more narrow and that took a few cuts of the box to get it just right! Once we had the shape of it just right, we took the box and duct taped it back together. We taped on the inside and also reinforced it on the outside as well to ensure that it would be super durable.
Legs for Days
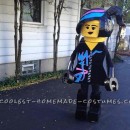
Next we made the legs. I was the Lego bride, so my legs were far more easy to construct. We made a pretty straight forward leg for mine. We measured out the cuts, which for my leg ended up being 9″ then 10″ then 9″ wide (for each side of the leg) then 27″ long, we then cut the box. We had three sides to the leg at that point we cut another 10″ wide 27″ long piece of cardboard and then duck taped them together on the inside and outside of the leg. We repeated that step for the other three legs as well.
The grooms legs, once they were constructed, we needed to add that curve to the top to keep it “Lego authentic!” We actually kept a Lego guy out at all times as a point of reference.
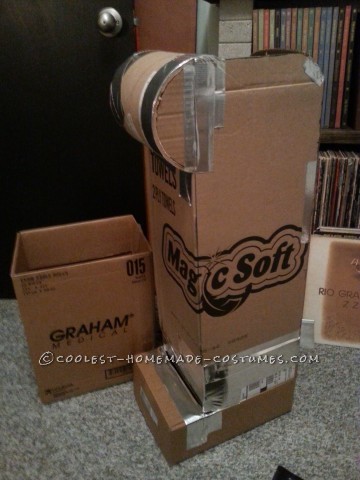
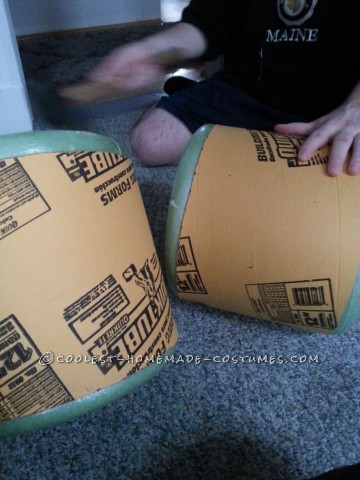
My boyfriend had a large cardboard tube which he got from buying a painting from a cruise ship. He took that and cut it using a hand held saw. He measured the width of the leg and cut accordingly. He then duct taped the curve to the leg. To add an extra something to make it more Lego guy approved, he cut out the two holes on the back of the legs which we later just laid black felt over. See attached picture.
Lego Headgame
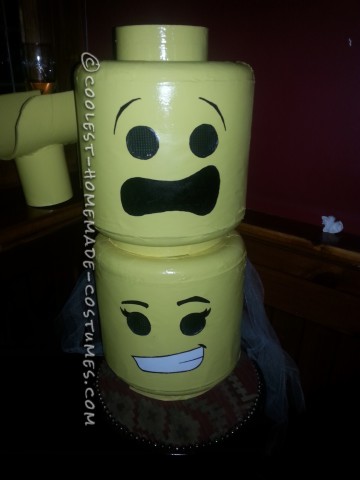
Next we made the heads. This part I thought would give us more of an issue but it ended up being one of the easier steps! We went to Home Dept. and picked up a large 12″ tube. We measured our heads and cut the tube to ensure that our whole heads were covered. We then went to Michaels and got a lot of Styrofoam.
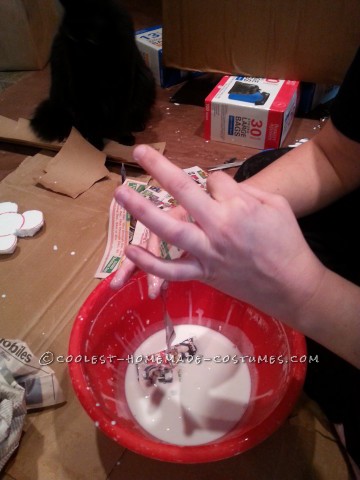
We purchased four Styrofoam wreaths 12″ each. We cut a small bit out of each of the wreaths then pushed them back together and hammered them into the top and bottom of the cardboard tube from Home Dept. We then duct taped them on the inside on the tube.This created a more curved effect. I paper mached the top and the bottom of the curve to give it an even more smoothed over look.
Once the paper mache dried I sanded it to get rid of the wrinkles and creases in the paper. We then covered the middle of the head with a brown thick paper to smooth it out. We bought four small Styrofoam discs from Micheals and doubled them up on each head for the top bump part on the lego head. we attached these with a few finishing nails.
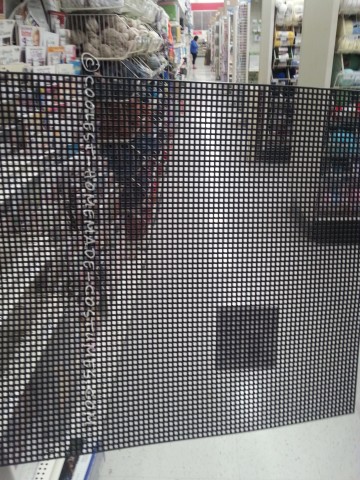
We put on the heads and tried to figure out where we would be able to see out of, marking it with a small black dot with a sharpie. we then used box cutters to cut out small eyes.We picked out some plastic mesh (seen in picture) at Micheals and we could see perfectly out of it and you couldn’t see in so it worked great. It was only 59 cents too!
We spray painted the heads using a “sun yellow” spray paint found at home dept. Relatively inexpensive.It took about three coats to really get it to look great. We researched which expressions we wanted and pulled them from different sources, We thought it was hysterical to have the groom be worried and the bride to have a smerk.
My boyfriend drew the faces on a piece of printer paper first and then used that as a template to transfer the faces.
A Little Paint Never Hurt Nobody
We needed to paint the bodies and legs. We covered the bodies and legs with the same brown paper that we used for the middle of the head. we bought it at home dept. I believe it’s used for painting. My bride legs were simple as we just threw a few coats of the sun yellow spray paint over it. we used two coats and it came out great.
We ran into a speed bump when we realized that when we tried to paint over the paper it began to wrinkle. We then briefly entertained the idea of using something like a fiberglass mix or a bondo used for cars (yeah we were nuts!) We quickly realized that albeit a pretty good idea that would make the costume as durable as a bumper; that would be pretty costly and time consuming.
We decided to go the paper mache route with the grooms body. It seemed to work pretty well. We tried to do my bride body that way as well but where the “dress body” was longer the weight of the paper mache was making the box wrinkle and cave in. We decided to just cover my Lego dress body in the thick brown paper and hoped that with all the details we were going to paint that it wouldn’t be as much of an eye soar.Turns out we were totally right. It also dried a little less wrinkled than it initially looked, which was nice.
We painted the grooms legs black, the grooms body black and my dress body white. We used regular house paint that we had lying around.
Lego Hands
We used the same large tube for the hands that we did for the rounded part on the grooms legs. We cut it out and then glued a small tube to make a Lego wrist. we then Spray painted the hands the same sun yellow.
Finishing Details
Once the paint dried from the bodies we painted on the dress and suit details and we were ready to rock… Lego style!
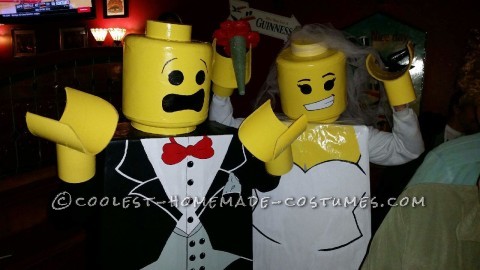
It was a lot of work and took us almost three weeks to finish the construction on them. We had a few bumps in the road particularly with the paint but it came out so amazing and we were so proud. We had people coming up to us all night long wanting to take pictures and dance with us. We also won our local pub’s Halloween Costume contest. We were thrilled! Looking through the little Lego eyes, from what little I could see anyway, the faces on the crowd were the best. People really enjoyed these costumes and it made it so worth it.
Hope you enjoy!


Your comment has been sent successfully.