
Why do I always ask my son (He’s 8 now) “What do you want to be for Halloween?” You would think that I would have learned that he wants to be something challenging. Well in his defence this year he did say something generic when I first asked him. I don’t even remember what. Ninja? Batman? Spiderman? Something that you would see a dozen of.
I just can’t do that after years of unique homemade costumes. I enjoy making his costumes. Plus, it’s a tradition at this point so I vetoed it. Insisting that he had to pick something unique that we could make together. I think he wanted to make me pay for that one…
“OK I’ll be a haunted house.” I rolled my eyes and thought “are you kidding me?” Then I rolled the idea around in my head thinking that I was crazy to even consider it. Only an idea was already forming…
Could I do it? Well I’d made him a “Tree House” one year, so maybe? (Yes that one is on here.) Or maybe I’m getting delusions of grandeur. But, I love a challenge… If it didn’t work out we could always do something else. You know something that I’d already vetoed.
My idea started with a Refrigerator Box and some other recycled items. Yeah I was going big! – My son loves recycling and he suggested that we try to use some soda bottles. I had an idea for how to work them in. – Best of all I had plenty of craft paint and many other supplies I needed to get started. I just had to get a box donated.
That part turned out to be harder than I thought it would be. But a few days later I had one and was ready to start. I’d spent the few days it took to find the large box researching ideas for how to pull his costume together. After some discussion with my son showing him pictures of ideas we decided to turn the “Haunted House” into a Haunted Castle.
A Spookie Start
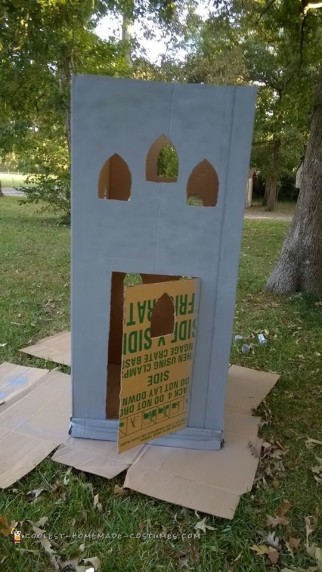
The first thing I did was cut the bottom so that we could figure out how to attach the entire thing to my son’s wagon. My husband suggested and then cut 4 pieces of wood to hold it. He attached them to the cross bars on our folding wagon. The smaller 2 across and the larger one front to back. I had cut the hole in the bottom so that the house would slide down over the sides and rest on the braces. It was sturdy enough that we didn’t even have to tie it down. Well there was that one bump in the sidewalk where the house almost came tumbling down. (We really did tie it down except for when we went to his scouting event and discovered that the room was too small to move it around.
Next my son and I marked out windows and I cut them. (I let him help a little but it was hard for him.) Then my son and I started painting the outside with spray paint. I thought I had enough from left over paint but it took a lot more than I’d planned. The cans were only $2.99 but it took 5 more can’s to finish up the large box and another one for the ramparts.
In retrospect I should have used a large jug of paint from the craft store and a foam brush like we did for the black inside. (I already had that too since we do LOT’s of crafts around here.) But the spray paint likely looked a little nicer in the end.
After the walls on the outside of the castle were painted gray I added some blotchy sprays of black to start the texture of the stone.
Once it dried we brought it inside and my son started on the black inside. Which he later splattered with red paint after he decided that it would be cool to make it look like it had blood all over it. He also did some “spooky” red hand prints and drips. I let him have cart blanche to do whatever he thought looked best on that part and he had a blast throwing the paint around. (Tips if you have a child do this have them wear old clothes and put a drop cloth down under it not just around the edges. It’s going to get messy. The water based paint is easy to clean up, but who wants to?)
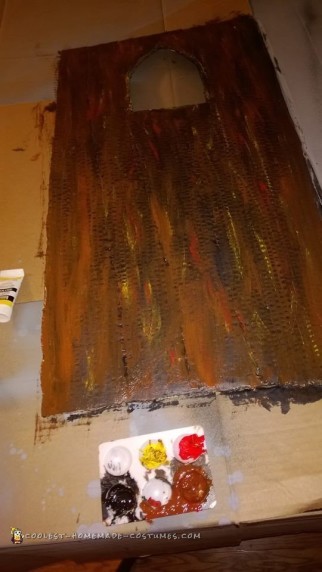
Next I painted the door. I cut it straight across because my son wanted to use the foam from the box as a stone over hang above the door. But when we got to that point we didn’t really like that it would put his face in shadow when he peeked out and that it might be too easy to break off. If I ever do another one I would do an arched door to match the windows.
I got out our stock of paints and attempted to paint the door to look like wood. I decided to add some red, yellow and blue high and low lights to give it more dimension. I just kept adding and blending until I was happy with how it looked. After it dried I added some black lines to simulate boards and I dry brushed some black all the way around, from about a 1/2 inch in out to the edges to try and make it look older and worn.
Don’t Step on the Cracks
I was a quite nervous about the next steps. Adding the large stones and the smaller ones around the windows to my mostly grey structure. I had searched quite a bit trying to find a technique that I felt comfortable trying with my limited artistic ability. If you knew me then you would know that I can’t draw at all and my penmanship is pretty sad to spite years of practice.
First I decided how large I wanted the stones around the windows and debated how to draw them. I didn’t feel confident free handing them so I decided to make a template. (Which I had also done for the windows that I cut out.) I used a wide point sharpie to draw the window stones adjusting the template a bit as needed. I ended up having to modify the template quite a bit for the front windows because they were closer together than the others.
Part of the trick to doing homemade costumes that no one has ever done before is learning to adapt when things don’t go quite the way you planned. I have become very good at adapting over the years. On this costume I had to repeatedly when things didn’t go as I planned.
Next I figured out how large I wanted to make the stones and then measured them out. The instructions said not to make the lines too straight so that took a lot of the pressure off. I am an expert at making un straight lines. If you need lessons I’m your gal. Using a yard stick as a guide in order to keep from getting too far off where I needed them to be I started drawing the horizontal and then the vertical lines; slowly working my way around. As I added those I added curves (per the painting instructions I had found) in each corner to round my “stones” a bit. Next I randomly added some little dots, lines, cracks and other marks inside each “square” to simulate some of the defects in old stone. (OK and to hide all the places that my lines didn’t go quite right.)
You know “Oops! I mean, Yes that’s a great place for some ambiance.”
Window To Our World
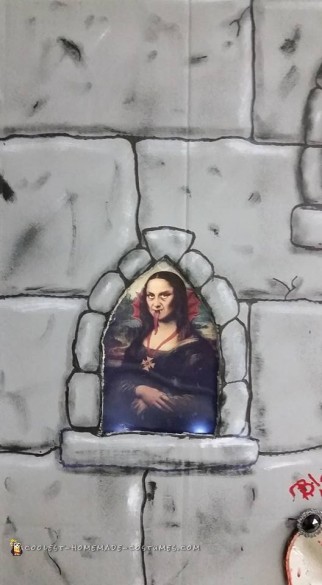
Next I wanted to add the windows. My thought was some sort of translucent paper so that the lights we had rounded up to put inside would shine through, but people couldn’t see in. Only when I went looking everything was too opaque or too clear. We were on a really tight budget and I couldn’t afford the other options I found. When I had almost given up, I finally found some plastic boxes that are used to carry a book report or presentation. They were on clearance for a few dollars and I could cut them and get 2 windows from each one. I was hoping that they would not only look like glass but they would be sturdier than paper. I added 2 bottles of “stained glass paint” to my basket hoping to paint them and make them look old and spooky. It think the blend of paints worked really well with the lights inside.
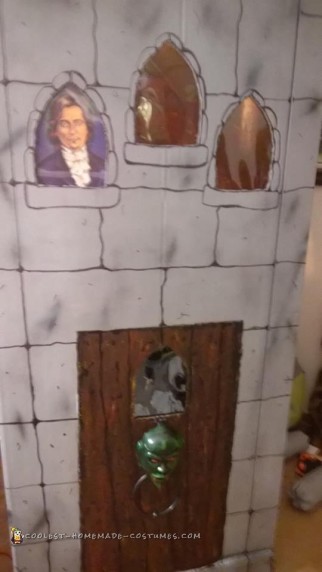
I left the one on the door clear so that my son could look out. I also left a clear spot in the middle of one of the top windows for a hanging skeleton. I think they must have looked pretty real because kids kept poking at them to see what they were made of. I actually had to re-glue one of the plain ones that got poked the most and after it came out the 2nd time I switched it out for a Dracula window decoration.
Once they were dry I glued them into all but 3 of the windows. I had special plans for those and I had worked on that while I was waiting. 3 dollar store finds worked perfectly. The first was a werewolf window cling. I left the paper on the back with the exception of cutting 2 holes where the eyes were. My hope was some light behind it would make them glow. It took some experimenting but I finally found a dollar store book light and got it glued and positioned just right. The eyes lit up with an eerie green glow.
I used 2 more of those lights to light my other 2 special windows from behind. Those were 2 spooky paintings. The type that look like an innocent painting when you are standing at one angle but when you move they become something more sinister. One was the Mona Lisa who looked decidedly snake like at a 2nd glance. And the other half the face seemed to melt off exposing a skull underneath. I discovered that I could carefully peel the “paintings” out of the frame and they were the exact size to glue behind my windows.
At that point I also glued on the door knocker so that we could see how it looked.
Getting Stoned
The castle was looking much better, but still quite flat.
Now I had to decide if I should stop there or to keep going and attempt to add the light and shadows that would hopefully make my stones look more like, well stones…
“What if I messed it up and it looked awful?” “What if it took longer than I expected and only finished half?” It was already looking pretty good… And I’d spent many hours just getting it to where it was…
I kept looking at the online photo of the “castle playhouse” that I was using for inspiration thinking how much better it looked than what we had so far.
After some rest I decided to go for broke.
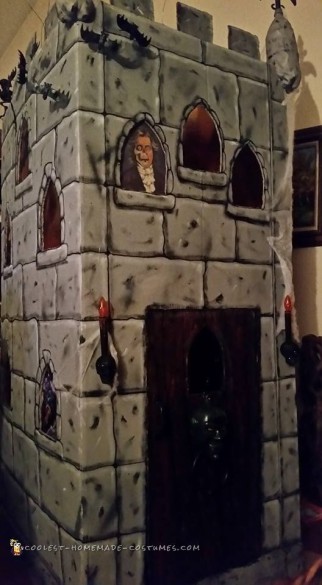
The next step was to carefully dry brush (black) shadows along the bottom and the left side of each stone. I go a piece of cardboard to us as a pallet and to practice on. Experimenting until I could find the right amount of paint to lightly make the strokes with the mostly dry brush. Then I brushed across the bottom and then feathered along the side. Adding a shadow pulled in a little from the corner where they met to give it even more dimension. I slowly worked around the entire castle until I was done. I also added more black randomly to the stones to give them texture. I think I held my breath a little as I stepped back to see how it looked. Yes better! When I was satisfied with how all the shadows looked I moved on to the next step. Highlights.
Now it was time to dry brush white where the light would hit the stones. When dry brushing a little paint goes a long way. If you haven’t done it you put some paint on the brush and then try to get most of it back off before you paint. In my case I used one of the cutouts from the windows to paint most of the paint off the brush before moving to the castle walls. I was so impressed with how easy it was and how effective too. The stones were popping and looking better with every stroke. Even as I painted the flat cardboard I had this eerie feeling that I was looking at some thing with texture. When I was done with that step once again I stepped back to get the full effect.
I looked at our castle in awe. It was so much better than I had dared to hope.
The Haunting
During the time that we were working on the painting we had taken a trip to our local Halloween Shop and to a dollar store hoping to come up with ideas to “haunt” the castle. We had several bags of items and a small pile of halloween treasures collected from the house.
I still needed to add the classic castle ramparts around the top. My idea was to use the bottles to do this. But after cutting 4 large ones to fit the corners I decided that it was just more work than I really had the time to do. Maybe a better tool to cut through the hard center on the bottom of the bottle would have helped?
I needed to come up with another option. While I was painting the bottles for the corners to match the rest of the castle I was sorting through ideas. When I picked up the window cut out to add some dry brush strokes I realized that I had a stack of something that would work perfectly along the top of the castle to give it that classic castle top look. I quickly spray painted them to match and after drying I added the details. The next day they were ready to hot glue in place.
We loved the towering look of it, but if you don’t want to be taking it apart to move it in and out of doors then I would suggest cutting the top down enough you wouldn’t have to.
I had planned on some halloween flags flying from the corners of the castle but at the dollar store my son had spotted some stakes that had some gargoyle looking things on them. (I let him go pretty wild at the store because all the halloween items that were usually $1 each were buy one get one free.) He wanted those on the corners. Since they were meant to be stuck into the ground they needed some adapting. We had to cut off the sides that were meant to stick into the ground, so that they would slide down into the bottle. Next I sprayed them with some textured black paint that was left over from painting our old trailer. It tamed down the “plastic” look a bit so that they looked more like old iron. They fit perfectly in the bottles and just a little bit of hot glue held them in place. At least it did until my husband decided that they were in danger of flying out during transport and he pulled them out. (I did say I just used a little hot glue. And yes if you are wondering I he was still “undead” when I found out.)
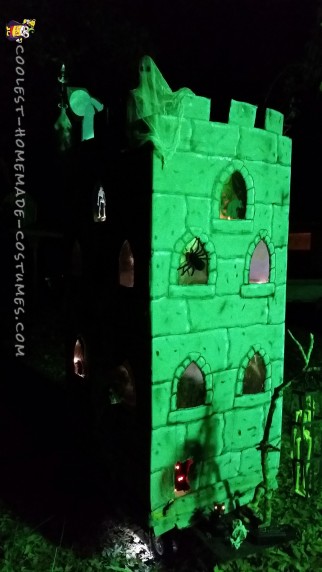
Now it was time to start “decorating” our castle. A halloween door knocker warned of the horrors to be found inside. 2 skull electric candles framed the door. A bevy of bats hot glued on to wire and stuck into the top so they would look like they were bursting free of the castle and swooping downward toward anyone foolish enough to come too close. And of course you can’t have anything haunted without a spider web and a huge spider. Or so my son informed me when he added those to our basket.
It was looking pretty good but it still seemed a like it needed a little something in a few more windows. I hot glued a shadow – cut outs – one of a bat and the other of a rat in 2 of the windows. My son had a coffin candy container and I added that on a black piece of cardboard that he had carefully painted and I’d attached to stick out in back. He also had a skeleton in a cage that he wanted to hang, a snake, and some bones that we needed to find places for.
After thinking about it for awhile I decided the best way to hang the skeleton cage was to find a branch that could look like a spooky tree and screw it to the board sticking out in the back. That was the easiest thing to get since we live next to some woods and we’d recently had some high winds. I just searched the pile I’d gathered from the yard and quickly had one that was the perfect size and shape. It worked out very well.
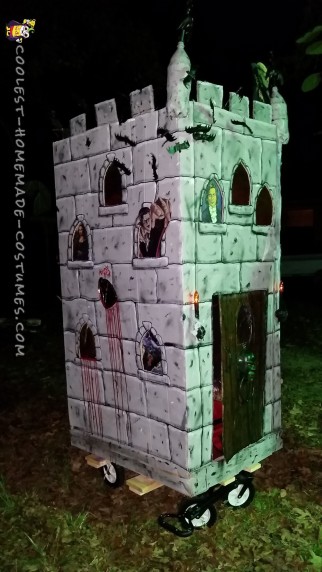
We also decided that “Bloody Mary” was very scary so we cut the handle off a mirror to glue on one wall. When the mirror cracked we glued it as best we could and then hoped that it would add some extra spook. My son wanted blood flowing from one window so we searched for a recipe online in order to make enough for that and to put around the mirror. I wrote ‘Bloody Mary’ in red near he mirror to make sure that the reference wasn’t missed.
We had to go back to the store when one of our side lights broke and while we were getting that he found some more decorations that he begged me for. A heart that we put on a skeleton hand so he could reach out with it. Some extra bats. A werewolf and dracula that ended up in the window that had fallen out for a 2nd time and peeking over the top of the castle and one of my favorite things a bird skeleton for the top. He also got one of those lights for inside the pumpkin which we decided to use glued on facing up to light up the ghost we added later. We put some tea lights that I had glued under some windows (the one with the skeleton) and and under the perched bird.
I really wasn’t sure what I was going to do with the ghost when we made it. I wasn’t even sure that it would come out right. But I saw the idea when I was searching for homemade halloween decorations. All we needed was some cheese cloth and starch. (Not the spray kind) Just soak the cheesecloth lay it over something that will allow it to have a ghostly shape, let dry, add eyes and ‘Warla!’ as my son would say. It actually was that easy. But don’t expect to be able to manhandle it. Or maybe I should say kid handle. When we went to the scouting event I took the ghost off the top to put it in the car and one of boys smacked the starch right out of it. I ended up having to make a 2nd ghost for the rest of our fun. Next year I want to buy some cheesecloth and make a bunch for our yard. I might even try to make them glow in the dark.
Best Halloween Ever!
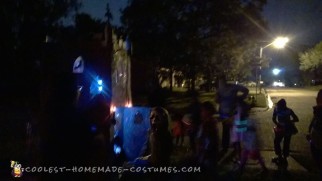
The costume evolved throughout the week that we used it. We missed the big halloween event because it decided to storm and we changed our plans rather than risk getting caught in flooding. That was a bit of a let down since it was supposed to be a really huge event and we really wanted to show off all our hard work. But I promised my son that I would find the time to write up our story about making it and share it online.
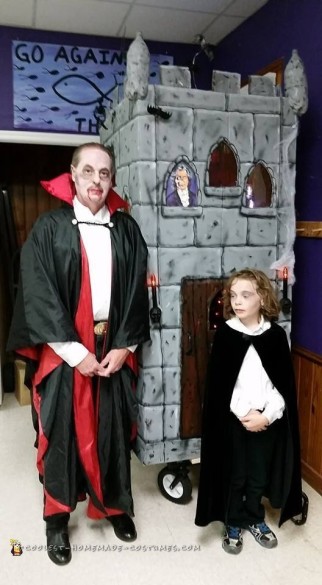
My son made a super cute vampire in his clothing that was also made from mostly found items. We used a shirt and black pants that were his and I made the cape from a skirt I found at a thrift store. We bought some makeup that came with blood, a medallion, and teeth. but we discovered that our homemade blood worked much better on his face than any of the store bought ones that we tried. Sadly I didn’t get a good photo of him on the last night. I was so exhausted that I totally forgot. Part of the exhaustion was pulling the wagon with this huge castle and his 54 lb’s for over a mile. (I did make him get out and walk some in a few uneven places.) Don’t get me wrong I loved it, but I am a wee bit older than your average mom.
His Haunted Castle was a hit. Adults and kids both loved it. People were stopping us to comment and to take pictures. Telling me that I deserve the mother of the year award as I pulled it along. That was great but I know many mom’s who are much better at it than I am.
That was before my son started asking kids if they wanted to “trick or treat” him in his costume. That was the most fun. There were times that we had 5 to 10 kids lined up the get a treat from him. Since the neighborhood that we went to was swamped many of the homes had run out of candy early. Many of the parents told us how thankful they were that we had brought candy to give out. That was 100% my son’s idea, I would never have thought of it. But it added a super fun dimension to our night. Although it did mean that while he gave out well over 200 piece of candy he only managed to collect 32 pieces, since many of the homes had already run out. Even with the haul he had such a blast that we didn’t care at all. And that makes it all worthwhile. As he said “Best Halloween ever!”

Related costumes:
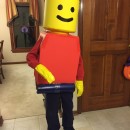 Cool Lego Minifig Costume
 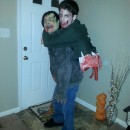 750+ Horrifyingly DIY Spooky, Gory, Dark and Scary Halloween Costumes
  140+ Mesmerizing Headless Scary Halloween Costume Ideas
 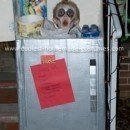 Coolest Homemade Head in Freezer Costume
  Coolest Medieval Gargoyles on Stone Pedestals Couple Costume
 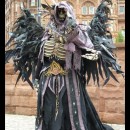 Scary Undead Necromancer Costume
 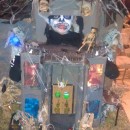 Contest-Winning DIY Haunted House Costume
 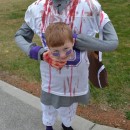 Scary DIY Headless Football Player Halloween Costume