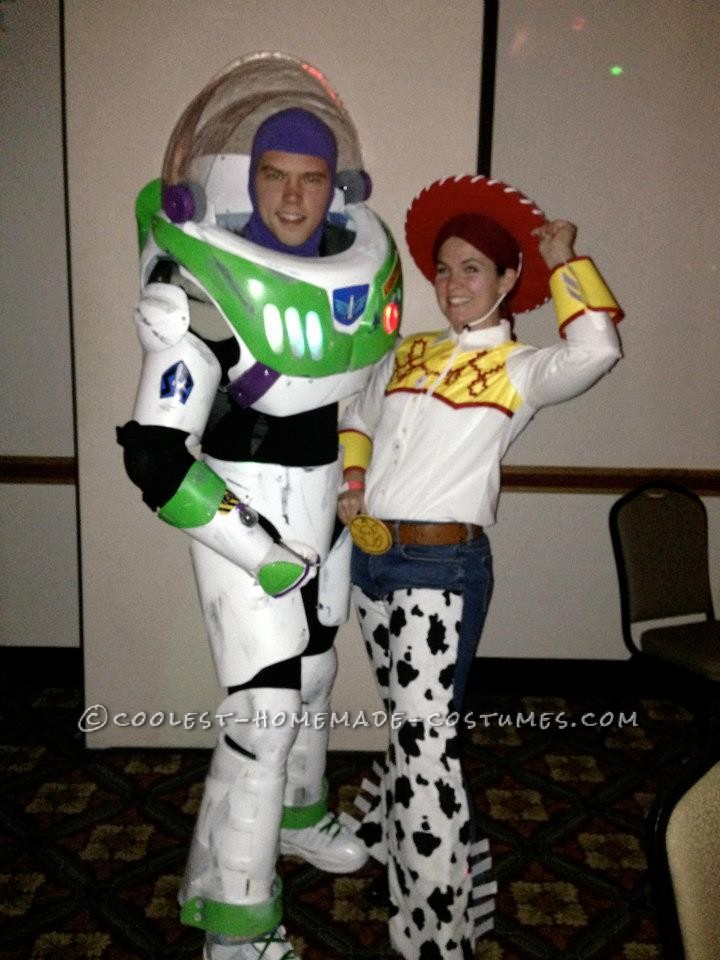
This year we decided to make Buzz Lightyear and Jessie the Cowgirl costumes. We started early in September. We had a ton of fun in these costumes. People were asking to get their pictures taken with us (or trying to sneak them and getting caught so I would pose). My favorite part of the night was when I felt a small tap on my leg and a tiny voice that said “Hi Buzz Lightyear.” It was a child about 3 years old and he wanted his picture with me. Then said “Thanks Buzz” and got scared and ran back to his mom. Just a side note: If you have things that look like button on your chest, people will try to push them. Luckily it was made out of thick plastic and could take the damage.
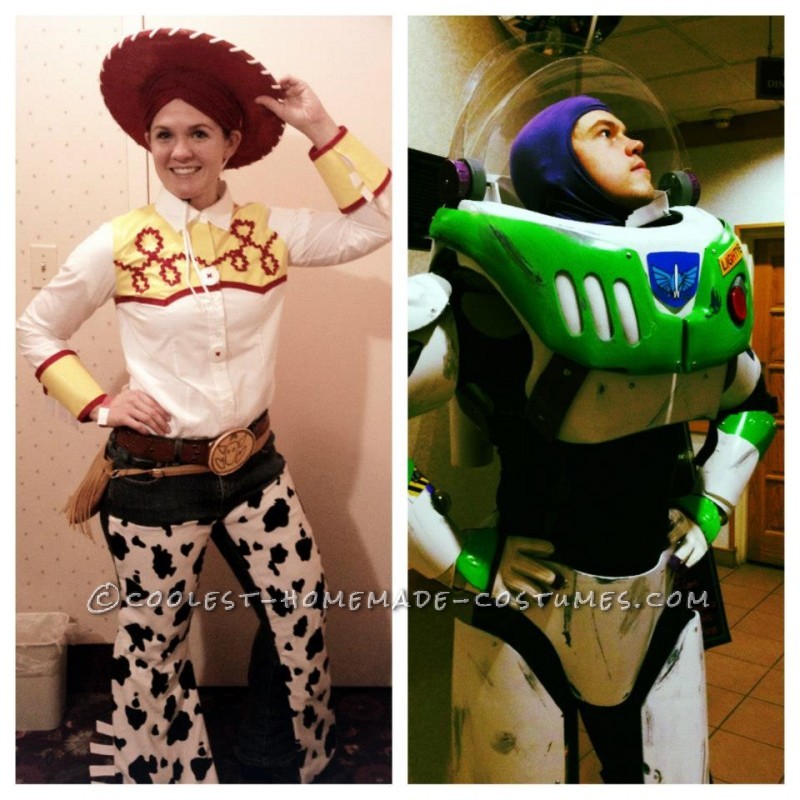
Jessie: Her costume was home made chaps cut from a ruined pair of pants and fabric glued. The shirt was a button down. We painted the yellow detail with screen printing ink (fortunately we had some from shirts we made). The red detail is rickrack shaped into patterns and glued on (and later safety pinned). She bought the hat black and covered it in wood glue to make it paintable.
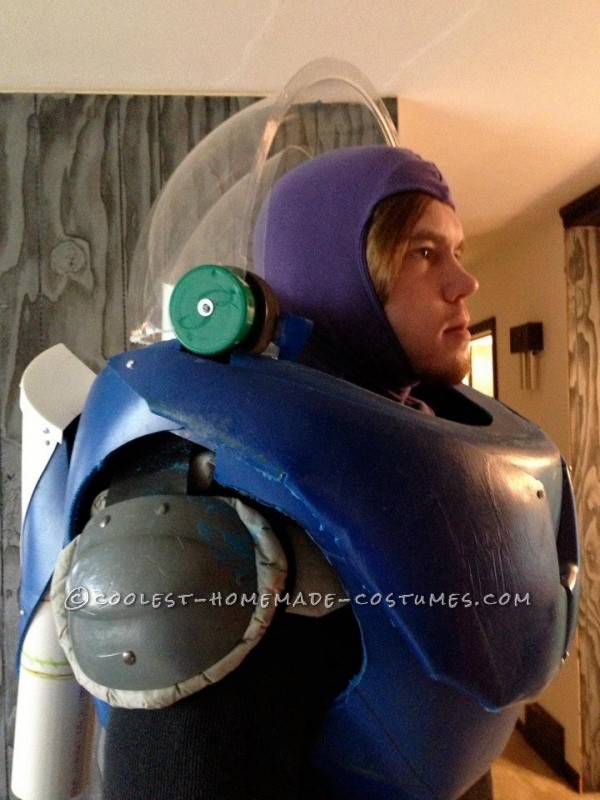
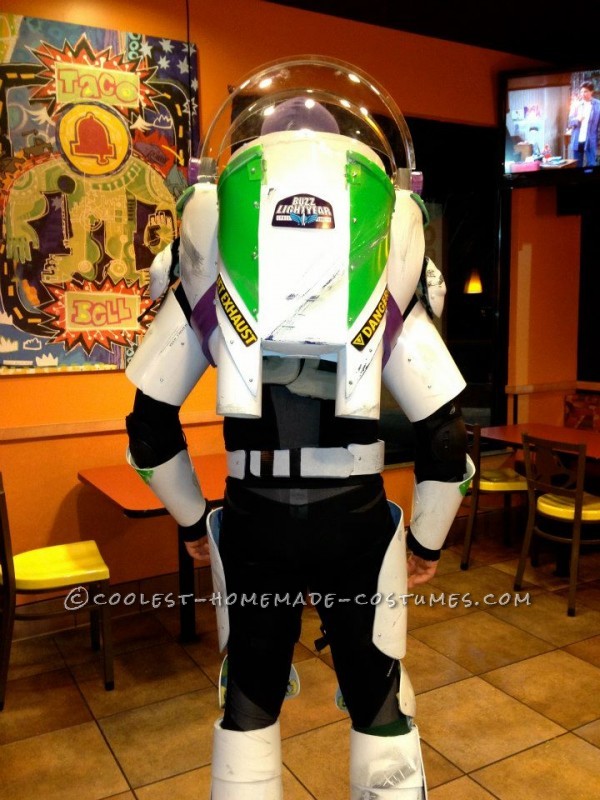
Buzz: I made my Buzz Lightyear costume. This was more time consuming. The chest piece and upper leg armor was made out of 55 gallon drums. The shins are hockey shin pads. The arms were made out of 3 gallon ice-cream buckets from the local ice cream shop (thanks haunted depot). And of course the dome. I ordered the dome online. It is a 16” plastic globe meant to be in storefront displays filled with gifts. The dome was attached with hockey pucks and simply orange container tops.
Separate Classic stances.
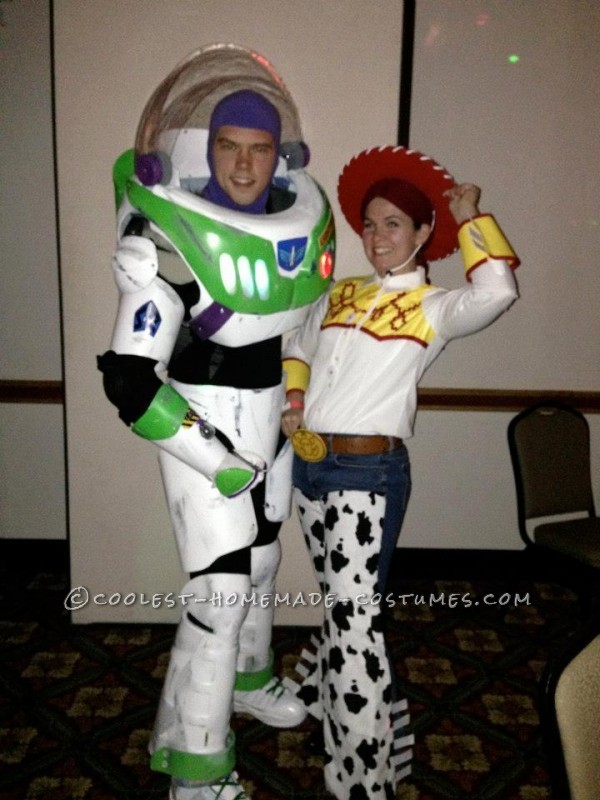
First shot of us together. Button lit up.
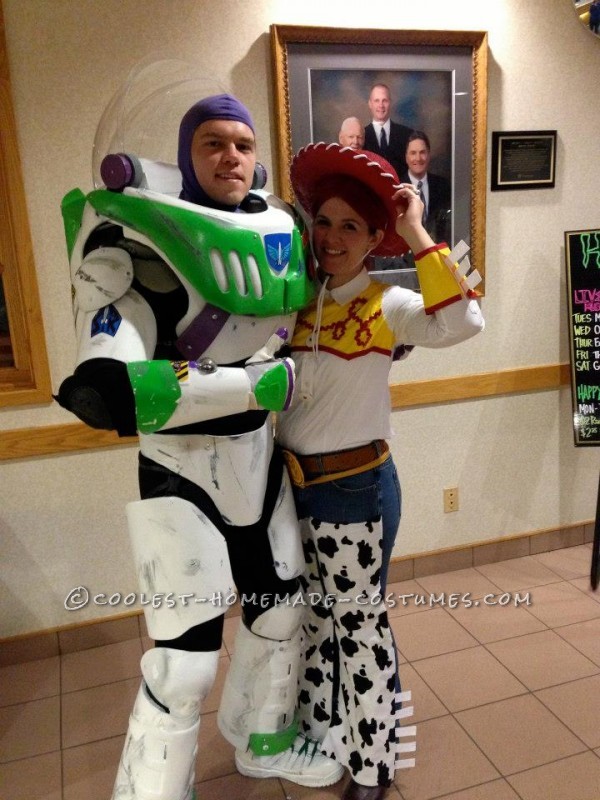
The couple together
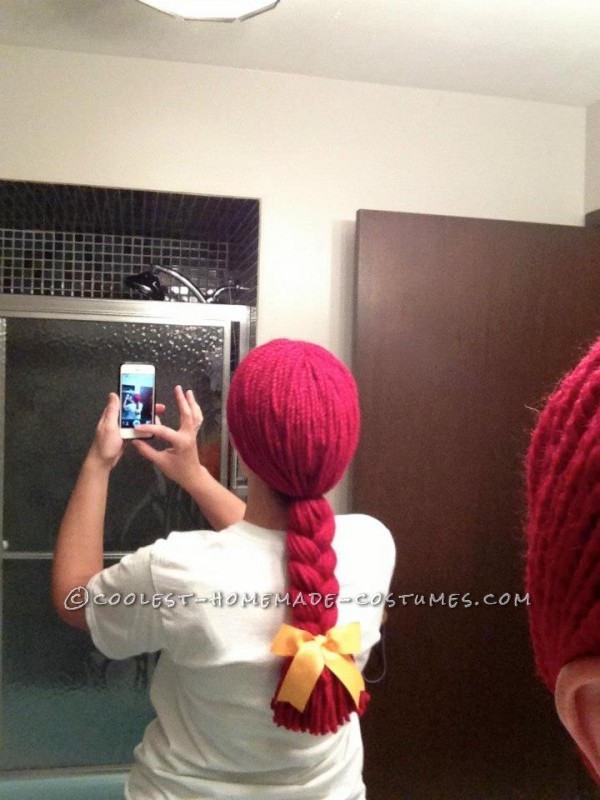
Jessie’s wig:
Jessie’s wig was made out of yarn. We had my mother in-law help us with the fitting and sewing. They sewed the part and braided it so it could be taken on and off if need be. Make sure to make it extra long because the thick braid makes it a lot shorter. It can always be cut later.
Details of the wig
Jessies Chaps:
My wife took a pair of old jeans and we traced the chaps shape on them and cut it our. She then glued the material to the pattern. Once it was dry she glued the chaps to the front of a pair of high wasted jeans. The belt buckle was made out of yellow fabric on a foam board.

Chaps assembly
Jessie’s shirt and hat:
The shirt was a button down. We used screen printing ink for the yellow. The red details is glued and pinned rickrack. She bought the hat black and covered it in wood glue to make it paintable. It took three cans of paint but it gave it a slick plastic look. Then it was just a matter of drilling holes and looping the strings.
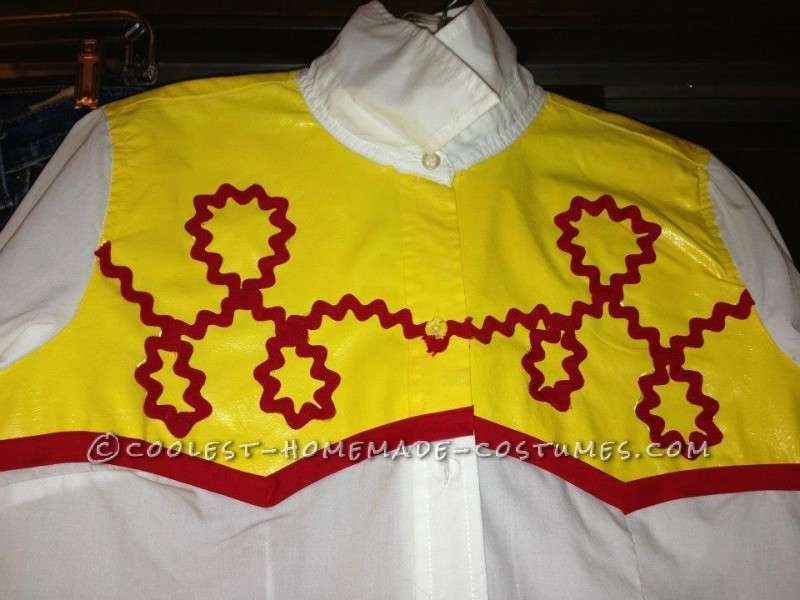
Jessie’s shirt detail
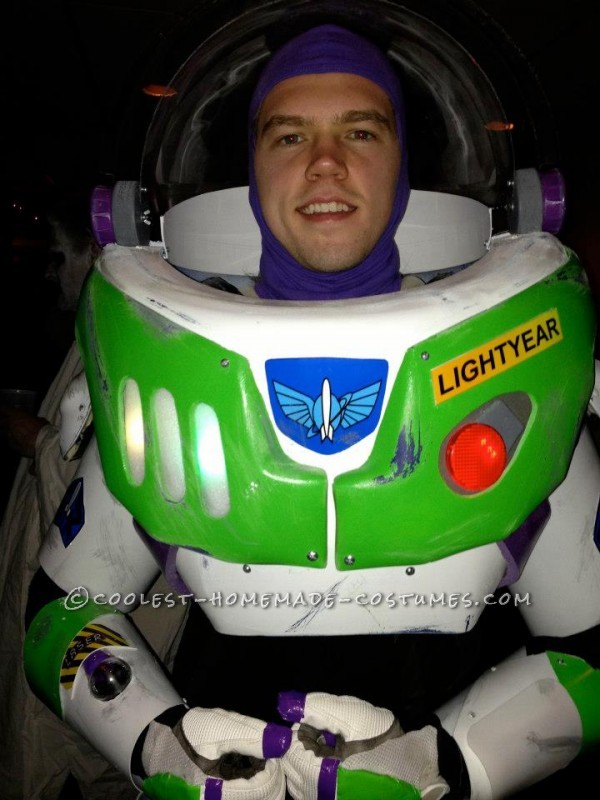
Buzz’s chest:
This was more time consuming. The chest piece and upper leg armor was made out of 55 gallon drums. I used the natural shape of the drum to my advantage and then used a heat gun to mold it to shape. The paint is Krylon bonds to plastic paint. The paint job was not perfect so I decided to “battle scar” it and make it look like he was worn or in a battle (perhaps with the evil emperor Zurg or from getting bounced around in the back of a pizza delivery truck).
I decided to go with a jet pack instead of wings. I knew if I made wings that worked they would get broken. I ordered the dome online. It is a 16” plastic globe meant to be in storefront displays filled with gifts. The dome was attached with hockey pucks and simply orange container tops.
First assembly rough up.
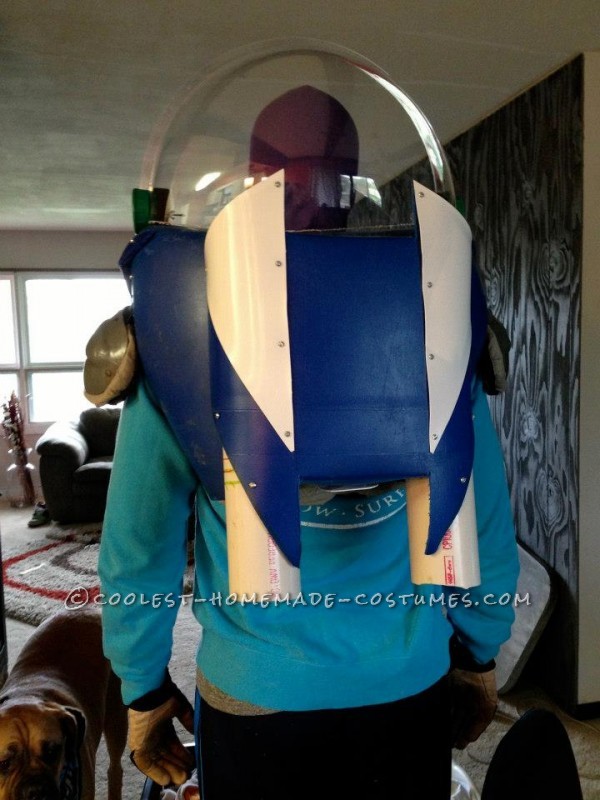
Jet Pack
Buzz legs and shins:
The shins are hockey shin pads cut up and flipped over (it was to give it the flared legs buzz has). The boots are spray-painted snowboard boots I had laying around. I also battle scared these. The boots took a lot of paint in order to look plastic. I made the cod piece and the leg armor our of the 55 gallon buckets. It was one of the easier parts because I just heated it up and molded it right on my thigh (make sure you have thick pants on….Ouch that’s hot).
Buzz Details:
I found decals of Buzz online and modified them to fit my suit. I printed them and mounted them to plastic and mounted that to the suit. Be careful when gluing things to painted plastic. It will rip the paint off and fall off easy. I had to scrap away the paint in order to make it stick.
The laser was made from a kid’s toy that lit up in the Walmart checkout line. They are everywhere right now. I also made a star command communicator by mounting my phone on my arm and attaching a speaker to my chest. I had a playlist of all buzz’s quotes and “you’ve got a friend in me”
The chest has LED lights that I found in the Walmart check out that light up red, green, blue. I mounted them under foam to give it a glowing “power” light. They had a few different setting that I can change in order to flash or just stay lit.
Details on finished jet pack
Buzz’s chest detail
http://youtu.be/kxXCz2v2mE8

Related costumes:
 Coolest Girl Couple Buzz Lightyear and Woody Costumes
 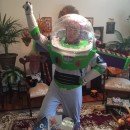 Coolest DIY Buzz Lightyear Costume
 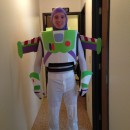 Best Buzz Lightyear Costume Ever!
 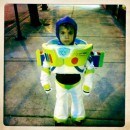 Cool Toddler DIY Halloween Costume: Buzz Lightyear Costume Like No Other Buzz!
 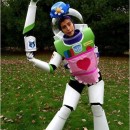 Coolest Homemade Mrs. Nesbitt/Buzz Lightyear Costume
  To Infinity and Beyond Family Costumes
  Sexy Ballerina Buzz Lightyear Costume
 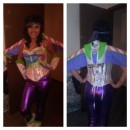 Cool Homemade Buzz Lightyear Costume for a Woman
Hi,
i’m really excited about the Buzz lightyear costume, it’s an amazing
creation…i would like to have, if possible, the exact procedure of
making it and informations about where can i find the 16″ plastic
globe…
Wow. I love your idea and thank you so much for sharing, my husband have been searching the net for buzz costume ideas and your site has given us a great idea for the work that we are going to prepare to put into it. :D thank you again and great work on Jessie and Buzz.
Both your costumes are pretty awesome. Made a Woody and Jessie costume for my husband and myself (due attending Mickey’s Not So Scary Halloween Party). The Grandchildren insisted we had to get dressed up.
For Jessie blouse — Used a young man’s white dress shirt that I got at Walrmart for $8.00. With a sponge brush I just painted a faux yoke on using Tulip Soft Fabric Paint and the cuffs were made with yellow craft foam that matched perfectly in colour. For the embroidery design (on both) as I couldn’t find suitable trim; I just dyed some Roman Shade cording and used fabric glue as an adhesive which worked out well. For the large buttons, I purchased ‘button frames’ by Dritz home and just popped at 6 mm thick piece of craft foam in their centre and positioned l/8″ thick elastic to their back so they could slide on ‘n off over the existing garment buttons.
Used a similar method of creating her chaps as you did, but I just hand-basted mine on.
For her hat it was a plain foam $-Store one (in red) and by using a small hole punch I was able to add the white cord around the brim. For a band I just glued on white 2 mm thick foam. For her single braid I used ‘chunky’ yarn and attached it to the inside of her hat with Velcro as I made a masquerade type mask by photo editing an image of her face and mounted it on 6 mm craft foam ensuring its hairline met the hat.
Her belt buckle was also made out of craft foam and scaled in size to fit/slide over the real buckle. A piece of 1″ elastic glued to its back. For the base I used a 6mm thickness and glued on/stacked its design that was made out of 2 mm craft foam. It was finished off in silver with a product called Rub ‘n Buff.
Apologize for rambling on, but perhaps between both of us we will be helping out someone who wishes to duplicate Jessie’s costume. Thanks for giving me the opportunity to do so.