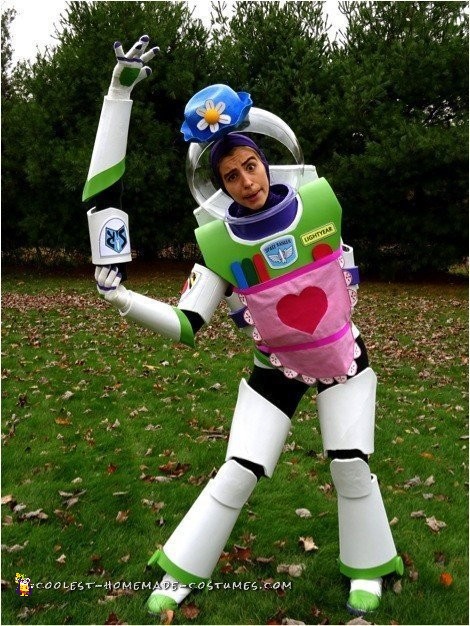
Every Halloween, I try to choose a costume that nobody else will be wearing out, and since Buzz Lightyear is popular year after year (and even though I love it every time), I decided to go with his slightly less known version: Mrs. Nesbitt.
Construction of this Nesbitt/Buzz Lightyear costume took 2 months, starting in early September and finishing on October 31st around 4PM. It seems that no matter how early I start, I’m always adding the finishing touches on Halloween. I guess I do my best work during crunch time! After two months of hard work and once again making an absolute mess of my parent’s basement (which I referred to as my workshop), my costume turned out even better than I had hoped!
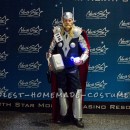
We started off Halloween night at a house party. All of my friends knew that I was making a Mrs. Nesbitt costume, but they were absolutely amazed when they saw the finished product! They couldn’t believe how accurate it was. After a few hours, we headed to a bar in downtown Pittsburgh that always hosts a great Halloween party. When we walked in the door, my costume was an immediate hit! All night, people were tapping me on the shoulder to tell me they loved my costume, high-fiving my fake arm, shouting “Mrs. Nesbitt!!”, and asking to take a picture with me!
At one point in the night, the DJ announced that there would be a ‘Best Homemade” costume contest, and invited anyone who thought they had the best homemade costume to jump up on the bar and dance. My friends encouraged me to enter the contest and they lifted me onto the bar. I danced like crazy in my Mrs. Nesbitt costume, but unfortunately didn’t win. I learned later that the contest was actually “Best Hoe-made” costume, not “Best Homemade” costume, which would explain why I looked so out of place against my competition! Woops, at least it made for a funny story!
Overall, it was a wonderful night as Mrs. Nesbitt, and even though I didn’t win any contests, just seeing everybody’s excitement over my costume made the hard work all worthwhile!
1) Making Armor Templates from Cardboard and Replicating the Process with Foam
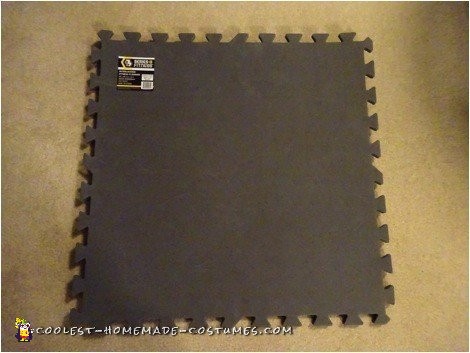
I researched several materials to use for building armor, and found that foam was my best option. I had never worked with foam before and welcomed the new challenge! I bought 10 2ft. x 2ft. foam squares (interlocking foam fitness mats) from Five Below, totaling $30. For all of the individual armor pieces (Thigh, shin, knee, forearm, bicep, chest, and the ‘underwear’ piece for lack of a better term), I first made a template in cardboard and made sure each piece fit my body correctly.
I had been saving cereal boxes, cracker boxes, etc. for months to have enough cardboard for the templates. Once all of the cardboard templates were complete, I traced the templates onto the foam. I used metal-cutting shears to cut out the foam shapes, and used sand paper on all of the foam edges to make them smooth.
*Special Note: For the chest piece, I made sure it was large enough so I could tuck my left arm inside of it (since Mrs. Nesbitt is missing an arm).
2) Shaping the Foam Pieces with Heat and Gluing them with Contact Cement
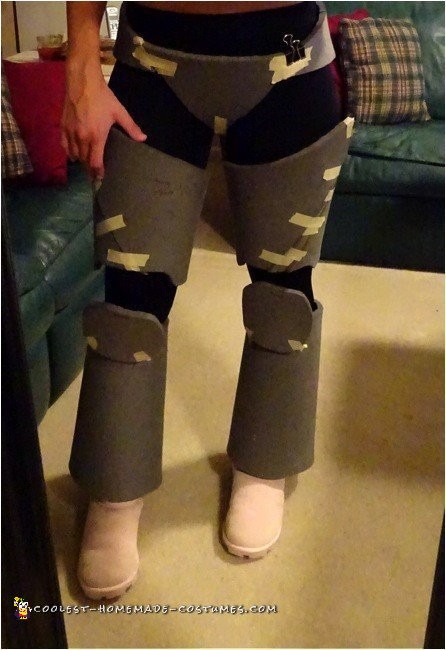
Shaping the Foam Pieces with Heat – When all of my foam pieces were cut out, I had to shape the foam to my body. From my research, I read that using a heat gun would be the easiest to shape the foam, but I didn’t want to spend the money, so instead I used an old iron. I ironed each of the foam pieces and shaped them while they were still hot. For some of the armor pieces, I had to repeat the process several times for it to hold the shape I wanted. This shaping process didn’t work perfectly, but it made the gluing process much easier than if I would have just glued the flat foam pieces together as is.
Gluing the Foam Pieces with Contact Cement – To glue the foam armor pieces together, I used Weldwood Original Contact Cement (I bought it at Home Depot, although I saw it later at Walmart for half the price!) When using the contact cement, I applied it to both of the foam pieces that would be glued together, let it dry for about 10-15 minutes, and THEN attached the foam pieces together (it’s important to let the cement dry and get tacky before attaching the foam pieces).
*Special Note: For the ‘underwear armor’ piece, I only glued it together at one hip. I kept the right hip and bottom of the underwear piece unglued, or else I wouldn’t be able take it off to go to the bathroom. I used Velcro on the right side and on the bottom of the underwear piece for easy removal.
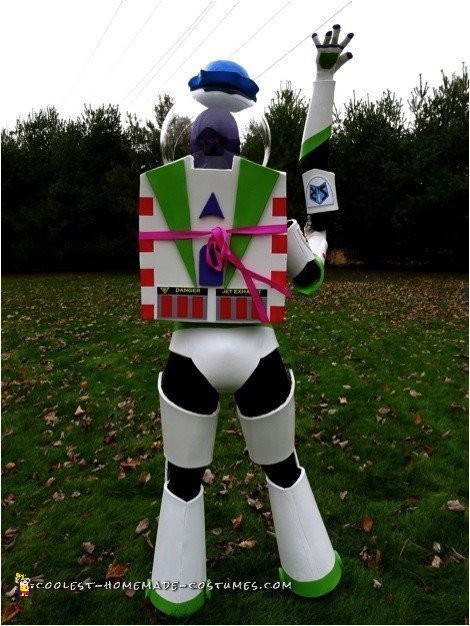
3) Painting the Space Suit and Adding Decals
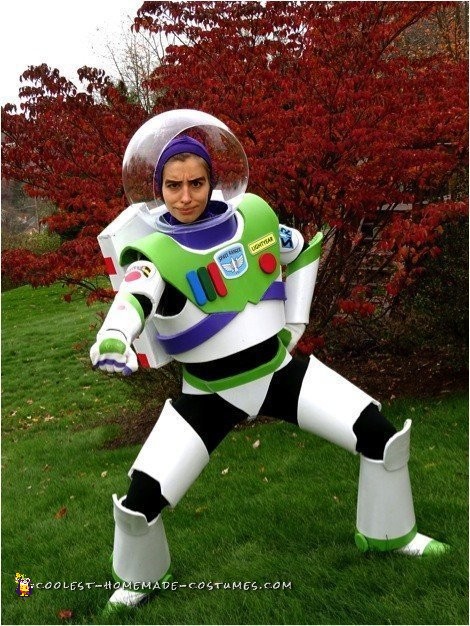
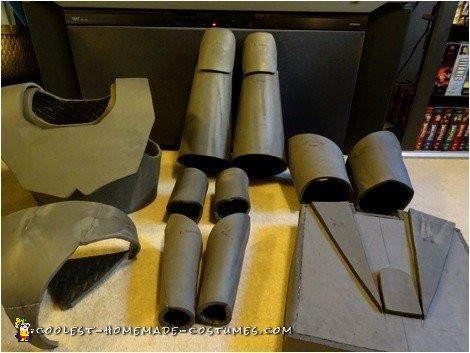
Painting the Space Suit – I bought white, green, and purple spray paint for the space suit, but before I spray painted anything, I hand painted 1 coat of white paint on all of the armor pieces. This saved me from having to use coat after coat of spray paint to cover up the gray foam. Once all of the foam pieces were hand painted in white, I applied 2 layers of spray paint in the respective color (white, green, or purple).
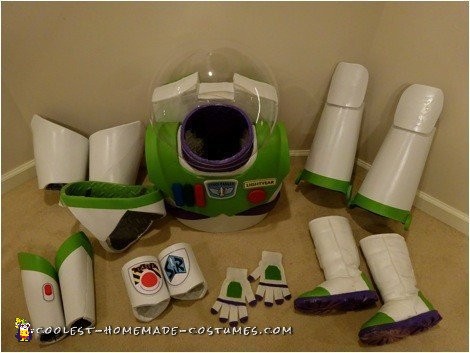
For the space boots, I spray painted an old pair of Ugg-boots that were in the back of my closet for years. For the gloves, I spray-painted a cheap pair of white gloves from Walmart. To get the green details on the shin, forearm, and ‘underwear’ armor pieces, I let the white spray paint dry for a day or so, then used painter’s tape to outline where I wanted my green detail to go. I covered up all of the exposed white with newspaper before spray-painting the green details to prevent any overspray.
Making/Adding Decals – I cut out the chest piece buttons from the gray foam and hand painted them. I created the decal stickers for the chest piece and upper arm pieces in Microsoft Word and printed them out on normal computer paper. I used Mod Podge to attach them to a thin white Foam sheet (purchased at Michaels for less than $1), and covered the decals in several layers of Mod Podge to protect them from water marks. I glued the finished decals to the Space Suit using contact cement.
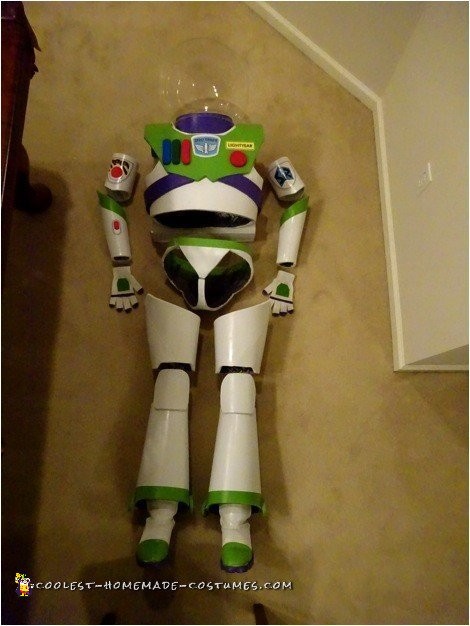
4) Creating the Space Helmet and Attaching it to the Suit
Finding the perfect space helmet was tricky. I purchased this 14 in. Clear Acrylic Globe – with 5.25 in. Neckless Opening on Amazon which came out to $40 with shipping. The globe is meant to be a lighting fixture, but it works perfectly for a space helmet! I used a Dremel tool to enlarge the head opening of the globe (the 5.25 inch opening is too small for even a child’s head), and I also cut out the front of the globe so I could breath while wearing it.
One of the biggest challenges in this process was figuring out how to attach the space helmet to the space suit. If it wasn’t attached, the helmet would bobble around on my head all night, and I didn’t want that. I ended up creating a foam cylinder that fit perfectly inside the neck opening of my globe, and also fit perfectly into the top of my chest piece. I spray painted the neck piece purple to blend into the purple head sock that Buzz wears, and then I hot glued the inside of the helmet to the foam neck cylinder. I attached the neck cylinder/helmet combo to the inside of the chest piece with contact cement. Therefore, the helmet, neck piece, and chest piece were all one combined part.
5) Creating the Purple Head Sock and Mrs. Nesbitt’s Hat, Apron, and Detached Arm
Purple Head Sock – To create the purple head sock, I bought a purple shirt from Goodwill. The sleeve of the shirt fit nicely over my head, and I cut, tucked, and hand-sewed the rest to fit perfectly.
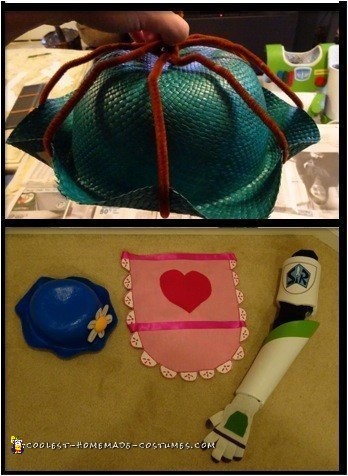
Mrs. Nesbitt’s Hat – To create Mrs. Nesbitt’s hat, I bought a floppy sunhat from Goodwill, cut off several inches from around the brim, curved the brim up using pipe cleaners, and used paper mache to solidify the form. I painted the hat, and created the flower using thin foam sheets for the petals and a Styrofoam ball for the center of the flower. I attached Mrs. Nesbitt’s hat to the space helmet using glue dots along the underside of the entire hat.
Mrs. Nesbitt’s Apron – To create Mrs. Nesbitt’s apron, I bought two pink shirts from Goodwill (one for the main part of the apron and another for the heart). I cut the apron to size including the frill details. I painted the frills white and used pink puffy paint for the details. I used stitch witchery to iron on the pink ribbon and the heart, and I hand-stitched around the heart for reinforcement. I secured Mrs. Nesbitt’s apron to the foam chest piece and jet pack using straight pins (the foam was thick enough so the pins wouldn’t poke through to my body).
Mrs. Nesbitt’s Detached Arm – To create Mrs. Nesbitt’s detached arm, I stuffed a pair of black panty hose with newspaper (I wrapped the newspaper around a long strip of the gray foam to help keep the arm stiff). I secured the arm armor pieces to the panty hose arm with Velcro, and hand sewed the glove onto the arm to keep it from falling off. Before heading to the Halloween party, I tied Mrs. Nesbitt’s detached arm to my right arm with a thin rope/cord so it would be easier to hold on to throughout the night.
6) Securing the Space Suit Armor to my Clothing and Acting the Part of Mrs. Nesbitt!
Securing the Space Suit Armor to My Clothing – Underneath Buzz’s spacesuit, I stuck to a simple black long sleeve shirt and a black pair of leggings. Some of the armor pieces stayed in place well (the chest piece and forearm pieces), but the upper arm pieces, thigh pieces, and shin pieces would move around/fall down without being secured, so I attached them to my black shirt and leggings with strips of Velcro. This kept them perfectly in place and prevented anything from shifting throughout the night!
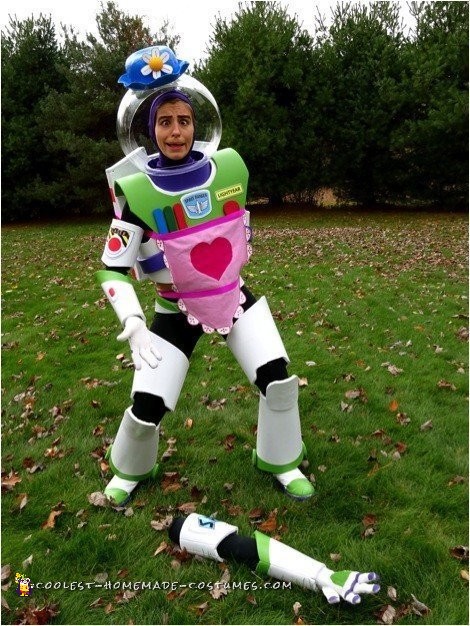
Acting the Party of Mrs. Nesbitt – In Toy Story, Mrs. Nesbitt is a rather loopy character who is filled with despair and makes a lot of crazy faces, so it makes for a fun night of pictures in this costume! I also took a few pictures as regular Buzz Lightyear just to show the overall finished space suit without being covered up by the apron!

Related costumes:
 Homemade Thor Costume: He Who Wields This Hammer Commands the Lightning and the Storm
  Creative Tim Burton’s 9 the Movie Costume
 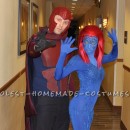 Supervillainous Magneto and Mystique Costumes
  65+ Coolest Homemade Pokemon Costume Ideas
  Despicable Star Wars: Return of the Minions Group Costume
  Coolest Mr. and Mrs. Potato Head Couple Halloween Costume
  65+ Coolest Homemade SpongeBob Costume Ideas
 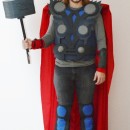 How to Make a Cool Halloween Costume: Thor the God of Thunder