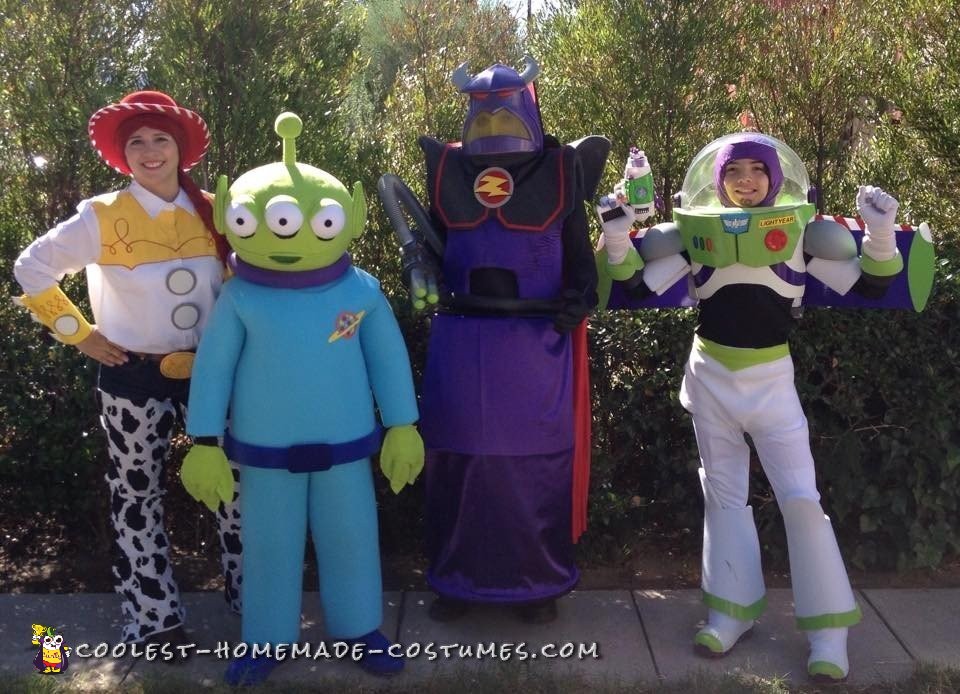
We had the opportunity to outdo ourselves once again. My wife and kids decided to be the Toy Story characters that fit our own personalities. The hardest part was trying to decide if we would be able to pull it off on or before October 30, 2015. Yes we all vote and decide as a family and we don’t even begin to discuss and decide until the first week of October what we will be. Our Halloween costume planning routine is the same every year. No we do not work for the film industry, studios or costume industry, never have. We are simply “Craftsman Artists.” Our costumes are kept a secret and revealed to our friends and family until October 31st.
Jesse’s character (wife “Mom”):
A red “Scala” wool hat was used for the hat. A white lace ribbon material was used to wrap the brim. A wig was made out of red yarn and then braided. A white dress shirt was painted with fabric paint using the correct colors and style as the movie toy. The cuffs were made out of foam sheets found at your local craft store. The buckle was shaped out of yoga mat foam material and wrapped with glitter foam sheet. The bull head insignia was later enhanced with a brown “Sharpie” marker. A cow pattern sheet was cut into chaps then glued to the front of blue jeans.
Pizza Planet Alien (9yr old son):
The head was made from a “Jack-O-Lantern” plastic container used for “Trick-Or-Treating,” bicycle helmet, sprinkler extension and a tennis ball. The “Jack-O-Lantern” face, base and pumpkin lines were erased using expansion foam to fill in and then shaped with a carving knife. Once I was satisfied with the rounded shape I was able to test fit the head piece using a child’s skateboard helmet by attaching it through the inside using industrial strength Velcro. With some minor re-positioning of the helmet I successfully cut the 3 eye openings and mouth for my youngest to be able to have a clear view. The character eyes were 3″ Styrofoam balls and were wrapped in fleece material as well as the entire head piece and antenna.
An adult Small sized sweat shirt and sweat pants were used as the pattern to cut 1″ thick dense foam and glued to the inside for comfort and cooling layer. The arms were made with 1/2″ thick foam. The outer layer was wrapped in fleece material then the seams were glued together using 3M #74 spray adhesive. The back was then cut and Velcro was glued to the seam to fasten the torso after putting it on. The two piece suit gave the appearance that it was filled. The gloves were .99 cent Jersey brown gloves and wrapped in fleece as well. The shoes were knock off UGG’s about two sizes bigger to look proportionate with the rest of the outfit and were also wrapped in fleece. The “Pizza Planet” logo was cut out of felt and carefully glued with hot melt glue.
Emperor Zurg (myself “Dad”):
An Adult XL sweat shirt was used to make a pattern of the torso using the same technique as the “Pizza Planet Alien” The exaggerated red collar was made out of stiff red felt and glued to the cape. A shinny purple sheet material was used for the abdomen area. The lower portion was made out of a plastic tub like the ones used at parties filled with ice cubes and drinks. The bottom section was cut off to contour my waist shape and size. The same shinny purple sheet was used to wrap it. Foam tube insulation was used to cover the waist opening and layered to reach the abdomen area of the torso piece matching the Zurg toy. Logo and red chest lining was cut out of felt material then hot glued. Unfortunately we ran out of time and had to use a store bought kid’s “Zurg” mask that I modified to fit me with the Emperor Zurg costume.
Buzz Lightyear (13 yr old son):
This was the hardest one. It started with a simple plastic planter I envisioned as the chest/torso piece at Lowe’s. We cut the bottom section and then drew the pattern matching the cuts on Buzz’ toy. A few test fits successfully matched my oldest son’s arms and looked proportionate with his body. A plastic bonding spray paint by “Rust-Oleum American Accents” white primer was used to paint the torso piece. The chest piece was made out of yoga mat foam material. A green vinyl wrapped manila folder was glued to the face of the chest pieces to give it the plastic appearance like the toy. The left chest red button was made out of the bottom of a red “SOLO” plastic cup. The right chest buttons were salvaged from a broken infant size actual “Buzz Lightyear” costume chest piece.
The jet pack was cut out of cardboard and glued to contour the shape of the torso piece then painted with the same white primer to match. The wings were cut out of “Coraplast” and wrapped with vinyl. They were later attached to the cardboard jet pack using the office type brass fasteners to make the wings function-able. When the wings were not used in flight they were kept from accidental ejecting by using “Velcro.”
The dome was made out of clear styrene (approximately .30mm thick) material molded into a half dome. I then carefully cut the dome in half with regular scissors and fastened them to the top rim of the torso piece with the office type brass fasteners to make it function-able. The mounting points were then covered using the disposable coffee cup lids from my local “7-Eleven” store after I spray painted them purple. A piece of green fleece material was cut with a hole in the center and wrapped around a pipe foam insulation tube and glued to the top rim of the torso piece. The shoulders were made out of a plastic ball I cut in half and painted grey from a basic “Ball and Chain” prop sold at my local 99 cent store. The bicep pieces were made out of yoga mat foam material and wrapped in white fleece.
Regular white baseball pants were used for the costume. The lower leg bottoms were cut and shaped out of yoga mat foam material then wrapped with white fleece. The green accents around the lower legs were made the same way as the chest pieces. Some snow boots were masked off and painted matching the “Buzz” toy and wrapped the upper part with white fleece. All of the decals were hand drawn and vectored using our CAD program then re-sized/cut to scale to fit on the chest , bicep and jet pack pieces. And yes “I am your father.”
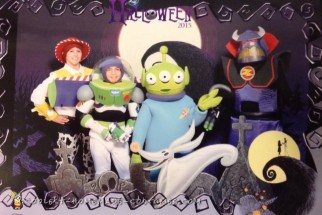
It took several hours each day (during a week and a half period) in between work and school during odd hours of the day and night to complete all four costumes. You may have seen my entry back in 2011 here on this site titled “Coolest C3PO and R2D2 Couple Costume 16.” The kids and parents at our son’s school are waiting in suspense every year almost like waiting for a blockbuster movie to be released. At the Disney Studios in Burbank we are invited every year to make an appearance with our costumes even though we are not “Castmembers” or employees of the “Walt Disney Studios.” The “Castmembers” themselves as well as their guests ask to take photos with us and are shocked that we don’t work for Disney. Unfortunately we are not eligible to enter their Halloween costume contest since we are not “Castmembers.”
Special thanks to my wife and kids as well as Coolest-Homemade-Costumes.com for the motivation and inspiration to make our own costumes once again. Thanks for taking the time to read my write up. Hope we inspire you to make your own costumes for years to come.

Related costumes:
 65+ Coolest Homemade Pokemon Costume Ideas
 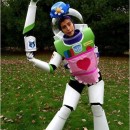 Coolest Homemade Mrs. Nesbitt/Buzz Lightyear Costume
  65+ Coolest Homemade SpongeBob Costume Ideas
  Despicable Star Wars: Return of the Minions Group Costume
  Awesome DIY Despicable Me 2 Costumes: Bee-Do Minion and Half Good Half Evil Minion
  Creative Tim Burton’s 9 the Movie Costume
  Awesome Family Guy Group Costume
 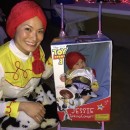 Cool Mom and Baby Costume: Toy Story Jessie Doll in Box Costume