Take a look at these cool homemade Transformers costumes shared with us by costume enthusiasts from around the world. Along with the costumes here, you’ll also find loads of homemade costume ideas and DIY Halloween costume inspiration for your next costume project. Enjoy!
Latest Transformers Costumes
- Epic Transformers Unicron The Chaos Bringer Costume
 The costume design was inspired from the Transformers character Unicron, his Prime Cartoon incarnation in particular. With the extensive details, … Read more
 - Coolest Homemade Transformer Costume – AKA Wrangler!
 This Transformer costume idea was rolling around in my head since ever since my sister bought a used power wheels … Read more
 - Cool Homemade Transformers Costume Made of Recycled Materials
 This Transformer costume is made up of a cut up power wheels jeep,various plastic shapes,about 5 cans of spray paint, … Read more
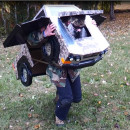
 - Coolest Ice Cream Truck Transformer Costume
 I’m an artist living in Austin, TX who spends every September and October working on my kids Halloween costumes. Transformers … Read more
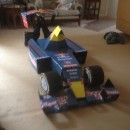
 - Coolest Formula One Transfomer Costume
 I’m an artist living in Austin, TX who spends every September and October making my kids Halloween costumes. My son … Read more
 - Coolest Homemade Transformer Costume
 I made this homemade Transformer costume for my best mates 21st birthday that is considerably close to Christmas. He didn’t … Read more
 - Homemade Dinobot Grimlock Costume – Transformers: Age of Extinction
 After working at Disney World for half a year, I was always inspired by the costumes around the parks and … Read more
 - Original TF Prime Soundwave Costume
 My costume was inspired by my favorite cartoon, Transformer Prime. I had no idea how I was going to pull … Read more
 - Made Up Transforming Transformer Costume: Autobot FURY
 So I’ve always been a big transformers fan, and I’ve always made my own costumes, so I thought it would … Read more
 - Crazy Autobot Silverbolt Costume
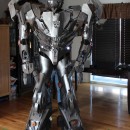 This Autobot costume took 2 years to build. It was with a lot of sleepless nights that I was able … Read more
 - Transforming Red Bull RB8 Formula One Car Costume (And an Entire Pit Crew Too!)
 Every year, at the end of September, our medical school do an annual pub-crawl where every fresher has to attend … Read more
 - Awesome Duck Dynasty Transforming Truck Costume
 I have always loved Transformers, and now I love watching Duck Dynasty….so we decided to make a Duck Dynasty themed … Read more
Featured Halloween Costume Ideas
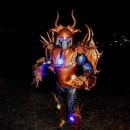
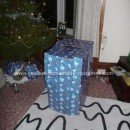
Costume by Amber K., Denton, TX
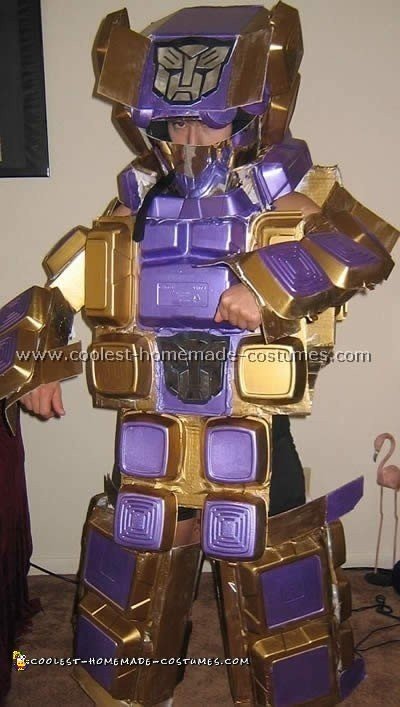
I originally wanted to be a Transformer and got the idea from this website for a Halloween costume. I saw one made entirely out of foam and wanted to do something like that. While on my quest for materials I decided to use the boxy body structure of a transformer out of Styrofoam to-go boxes and it just so happens I work at a restaurant!
I used approx 20 boxes, bigger ones for the body piece-chest/back/big leg parts (thigh) shell and smaller ones for detail on chest piece, outer legs and arms/shoulders. I began with gathering cardboard boxes; medium sized also from my place of work and constructed the legs, torso and arms. Initially I spray painted everything white as the Styrofoam was white, I was simply not going to use color. I held the pieces together with masking tape, white duct tape and spray adhesive.
While I was spray painting the pieces with the Styrofoam attached I heard and found a chemical reaction in the spray-paint disintegrating the Styrofoam! So after reapplying some pieces this lead to me to the idea of painting my costume and this of course was only possible by hand. It took me about one week, two to three hours a day to create and four days to paint fully (Metallic Gold/ Metallic Amythyst fabric paint, about five 2 oz @ .88 cents each at Wal-Mart bottles with two coats for a smooth finish). Secondary materials included a metallic poster board for the face mask and a transformer logo which I found on the internet under Google images.

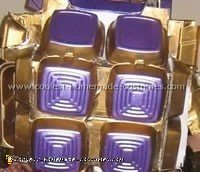
I traced two logos on the metallic poster board and cut the pieces and glued with spray adhesive to a converted motorcycle helmet and torso portion. The helmet also has about four bottom pieces of to-go cups for a different shape. The body is not identical to a transformer yet made do with my own ideas and contours and came out well with the logo and similar metallic facemask. I couldn’t move easily but the compliments for my Halloween costume were well worth it and I had fun getting into creating it.
Total Spent: $24
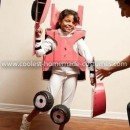
Costume by Will U., Hopkinsville
,
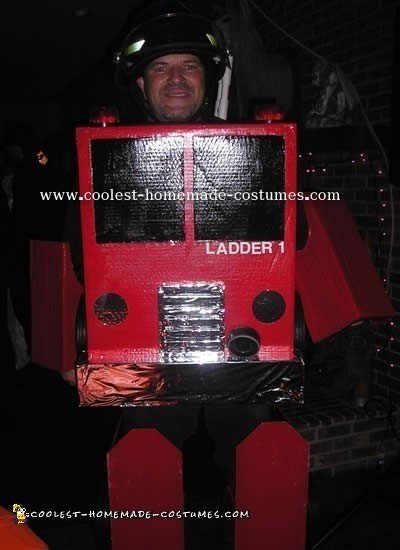
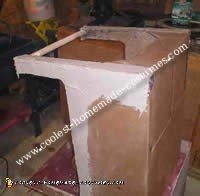
I decided to build this fire truck costume as an aid for the local fire departments when the fire safety classes were being held and a lot of children were being brought together to learn about fire safety. I finished this Halloween costume in time for a Halloween party that was organized to benefit abused children.
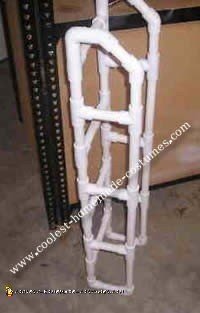
This Halloween costume actually does transform into a fire truck and has working lights on top and a working siren in front above the bumper. I received first place for homemade costumes at the party. I put in around 20 hours of work.
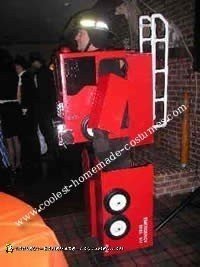
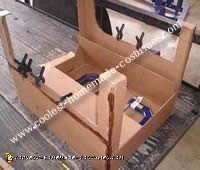
It is made up of the following: The backpack that holds the PVC ladder is made of wood and houses the battery for the lights and siren and also is the attachment point for the support straps to hold it on my back. The ladder is made from pieces of 1/2 inch water pipe found at Lowes. The backpack is 1/4 inch interior plywood (will use cardboard for weight savings on next one). 1&1/2×1&1/2 wood was used for bracing inside. Then it was painted with Apple Orchard red from Lowes. I attached the ladder to back with sheetrock and metal screws.
Cab was original 1/4 inch plywood but found it was way too heavy. Went to Ups store, got a 24x18x18 box x2. Cut windows out of one box, cut panel out of second box to glue in behind windows to give depth and strength. Used 3m headliner spray glue. I used 7/8″ dowel rod for rear support of cab and place for straps to wrap around from backpack. Used Styrofoam sheet to cut 4″strips (three of them) and glued to front of cab for bumper also added 4×4 bumper sides. I used sheetrock anchors from backside along with Elmer’s glue to attach bumper I covered with chrome tape bought at parts store.
Made grill from Styrofoam, cut out louvers, added chrome tape, painted cab black behind grill before mounting grill with 3m weather-strip adhesive and sheet metal screws. Siren is auto alarm siren with seven tones and very loud. I used toggle for power to both and wired in a momentary on button to siren. Toggle is run in plastic conduit inside one sleeve siren button to other sleeve all the way through arm pieces into palm of glove. Arm pieces are made of one 6x6x 36″ box from Ups store. Great Stuff foam was sprayed inside then after hardening I hogged it out to fit my arms and painted red outside black inside. Very light weight! Wheels were attached to cab with 1/2″ bolts and nuts. Legs were built starting with 2×8 lumber about 18″s long. All sides made of 1/4″plywood with 1&1/2×1&1/2 wood reinforcing. I painted red outside and black inside.
Boots were screwed down to base. Chair antis lip pads were added to bottom to avoid scratching. a floor strap was added to inside to keep leg upright due to higher amount of outside weight. Two wheels on each side, 1″ lettering on sides. Gloves were some black ones I had lying around.
Hope this info helps you make this Halloween costume yourself. Don’t be afraid to try!
Total Spent: $200

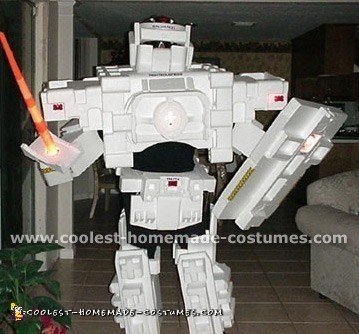
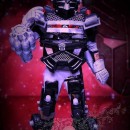
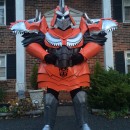
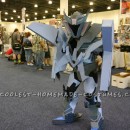
(Editor’s note: We decided to put this costume in the Transformer’s category although it was called “Armor of God” by its creator).
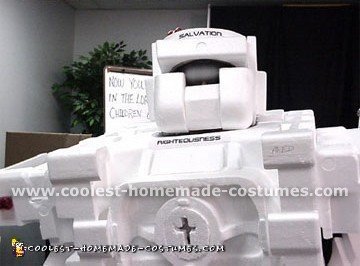
I made this Halloween costume entirely out of ‘WASTE FOAM” from appliance boxes. It was a project for our Church and I wanted to be a bit more creative than an “Angel” or “Moses” so I decided to challenge myself with the “Armor of God” as a Halloween costume.
At first I readily found foam around the house in boxes of old TV and computer equipment but I kept running out of plain flat sheets. So I decided to go on an adventure with my daughter to look for foam. What better place than appliance stores right? WRONG! Most of the time they had thrown away or crushed their trash before I could get to them.
Then I hit the jackpot with a freshly dumped “goldmine” of foam. I asked the manager if I could have it and with a dazed and confused look, he allowed me to rummage through his dumpster.
You should have seen the embarrassed look on my daughter’s face as “crazyman” dad looking for foam. At one point, all you could see of me were my feet sticking out of the dumpster, but I was determined to get my hands on the “white gold” before me.
Putting the Halloween costume together was another mountain to climb. I started cutting in the living room and filled the whole area with ‘snow’. My wife kicked me out (to the garage, that is) and I toiled every night till 3 am with Tacky Glue (the best glue on earth!) and wooden skewers to hold the pieces together.
I then purchased a cheap light-saber-type sword and doggie-collar lights to enhance the look. The helmet was an old bike helmet with chunks of foam attached with glue. If you notice carefully, the chest piece of the Halloween costume is mainly taken from a monitor box. The chest light is a .99¢ battery night-light with a little foam shape over it.
This costume was hard to move in, but it never fell apart and I’m going to use it again this year. Total spent $5.00.
Related costumes:
 1000+ Inspiring Homemade Book and Movie Character Costumes
 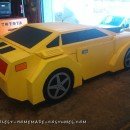 150+ Coolest Homemade Transformers Costumes
  2000+ Awesome DIY Animated Character Costumes
  Top 10 Lists – Coolest DIY Halloween Costume Collections
 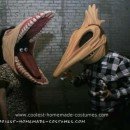 Halloween Home Made Costume Contest Winners – Hall of Fame
 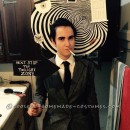 500+ Coolest DIY Web Series and Television Character Costumes
  800+ Game and Toy DIY Halloween Costumes
 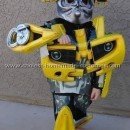 Coolest DIY Bumblebee Costume Ideas
Your comment has been sent successfully.