When watching a commercial for Energizer, I made the decision to be the Energizer Bunny for Halloween. The costume was not very expensive to make but did take a bit of time since I made everything myself. I had a lot of fun being the bunny and received a lot of compliments. Making it was fun but it made my guest room (where I made everything) look like a kid’s pink princess palace or a pink cotton candy factory exploded because of all of the experiments of dyed pink clothing and felt and glitter everywhere! It took me forever to clean up the glitter, and even after that I was still finding pink glitter on items for months!
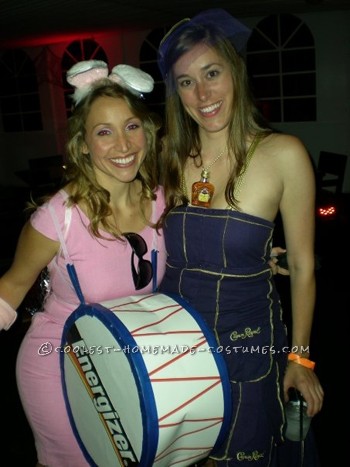
I wore this costume to a costume party that was at a hotel. I had to drive to the party and didn’t want anyone seeing me getting into the costume so after arriving to the valet only hotel, I had to ask them to wait while I unpacked all of my gear then lugged everything into the main bathroom of the lobby to put everything on. I’ll tell you something… having my husband to help me get into the elastic straps of the drum and battery pack had made things a lot easier. Luckily a lady in the restroom saw me struggling and offered to help!! Moving through the crowd with the drum and getting close enough to the bar to order a drink proved to be obstacles but the compliments from my friends made it worth it! I digress… I’ll tell you how I made everything!
COSTUME:
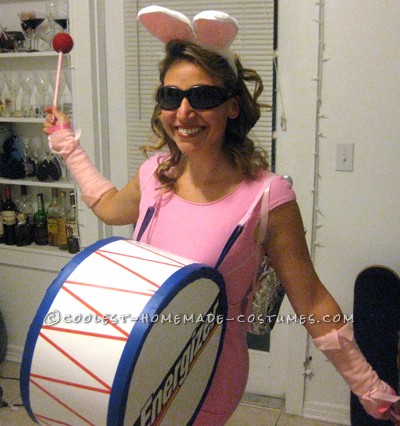
Dress – purchased from the thrift store. Originally white but dyed pink. You could use any pink dress or outfit!
Ears – purchased white bunny ears (already connected to the headband) then used pink felt and pink glitter (adhered with glue) on the front of the ears.
Sunglasses – already had these at home!
Drum – made from white poster board (2 long strips for the outside, then 2 round pieces for the sides), blue painters tape to hold the poster board together and to connect the arm bands, print outs from the computer using Photoshop for the Energizer logo, red tape cut into strips then put on at diagonals on the outside of the drum, white elastic pieces dyed pink to strap it around my arms/shoulders connected with blue painters tape.
Drum stick thingys – wood sticks purchased from the craft store wrapped in pink ribbon, round Styrofoam ball painted red. Then I just made a hole in the ball and put some glue in it then put the stick into it so it would not come off when swinging it around!
Arm bands – pink felt decorated with 3 big rhinestones (pasted on with glue) and hot pink ribbon at the edges. I sewed the sides together to fit my arm and cut a hole for my thumb.
Tail – cotton ball puff from the craft store
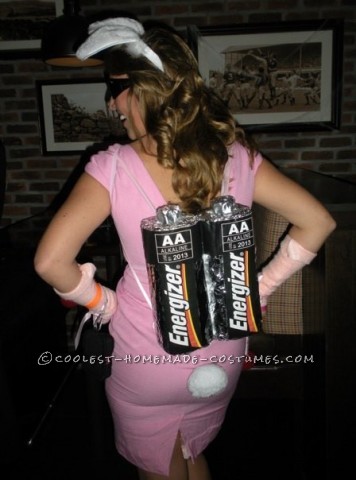
Battery pack – I used paper towel rolls and wrapped them in tin foil then glue them together. I used tin foil for the top of the batteries by shaping the foil in my hands then adhering with glue. I used Photoshop to make the logo and printed it on regular printed paper then glued it to the foil. I used more of the elastic strips dyed pink to adhere the batter pack to myself.
Shoes – I dyed some white knee-high socks pink then scrunched them down a bit around my calved. I had some white heels that I had covered with glue then covered them in pink glitter. I cut a hole in the socks for the heel so they were kind of like legwarmers over the heels.


Related costumes:
 Sexy Energizer Bunny Costume
 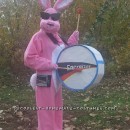 Energizer Bunny Costume by the Energizer Granny
 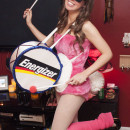 Cutest Energizer Bunny Costume Ever!
 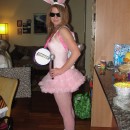 Sexy No-Sew Costume for a Woman: Energizer Bunny Comes to Life!
 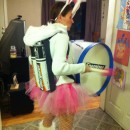 Cool Homemade Energizer Bunny Costume
 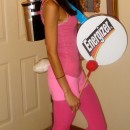 Easy Energizer Bunny Costume!
 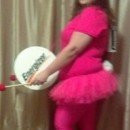 Cool Homemade Energizer Bunny Halloween Costume
  Original Homemade Energizer Bunny Costume
How did you attach the drum to make a ‘backpack’?
I used elastic strips (from a craft store) then dyed them pink and atached them to the drum. The blue tape that was used around the outsides of the drums were extended a couple of extra inches on the top and doubled over so it would hold the elastic strips to the drum securely