My 5 year old son Brayden was dying to be the coolest Iron Man this year. My husband and I brainstormed over it while looking at pictures online to get an idea of what materials we could use (inexpensively) to pull off a very cool costume for our son. Looking at some photos I thought I might be able to reuse various plastic bottles to create the costume. So…we were off on just a whim at that point.
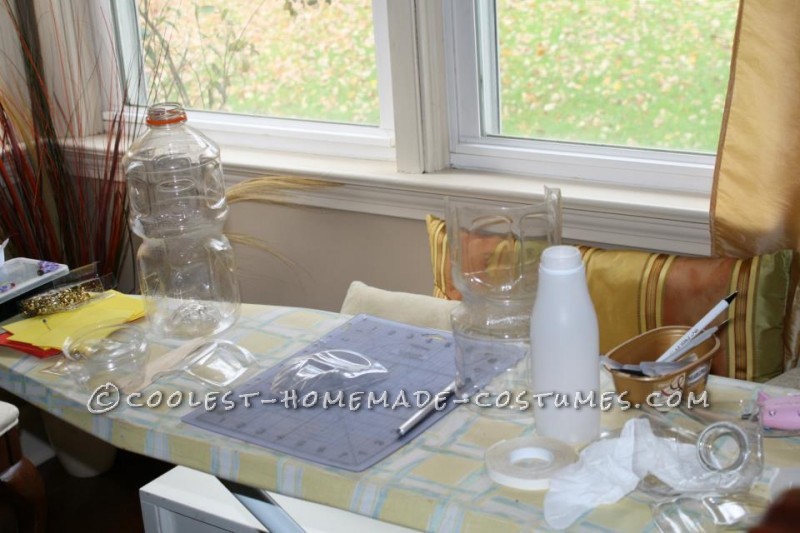
I asked all of our friends to save their Gatorade bottles, milk cartons, laundry detergent bottles, juice bottles etc! Before we knew it several friends were giving us all of the above for free! Then my husband and I cleaned each bottle and removed all labels and glue (tasking but worth it)! We then looked at Iron Man himself and started to find shapes in the bottles that we could use for various parts of the costume. I cut each piece out over a 4 week period and hot glued pieces as well as hooking them together with tack grommets as needed. I used a child’s dress form to pin various pieces onto so we could see how this was progressing over time.
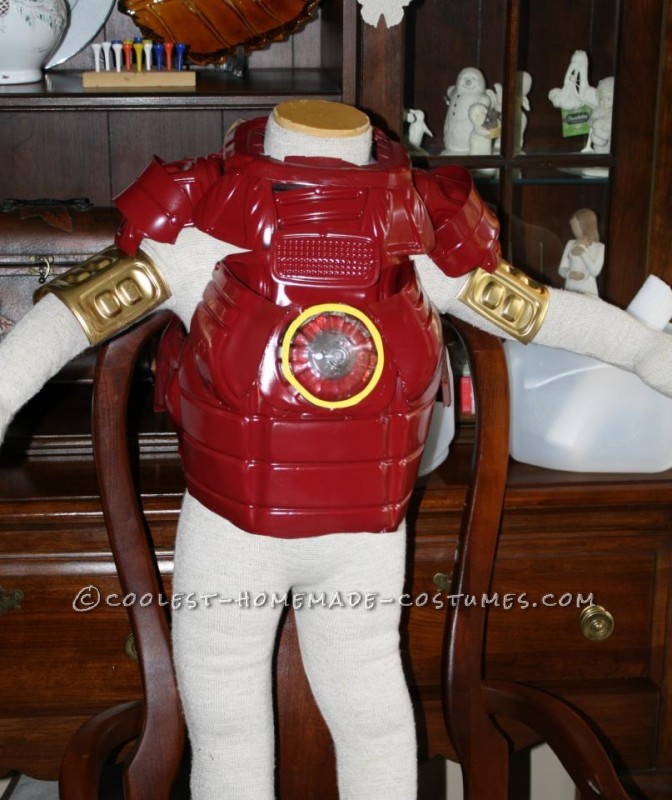
Once we had the chest built, we decided we should spray paint it to make sure this was going to work. We used Krylons Fusion spray paint in burgundy for plastics, and a gold metallic paint. We quickly discovered the color was not true to Iron Man unless we painted the underside of each piece black first and then the tops burgundy. After 2-3 coats on each individual piece, the color was true to form and dried shiny! Some plastics were less resilient and I had to use craft foam (which took the paint very well too) to fuse some pieces together as to not melt and disform the plastics with the hot glue.
The underside of the costume has thin craft foam glued inside so plastic and chemicals, paint were not directly on my sons body and to give added comfort as needed. Some pieces required elastic and Velcro to stay in place, and those were hot glued on. This was not drawn out prior, just building as we went hoping for the best! We used Dollar tree tap lights for the chest area, and used painted hockey gloves for the gloves themselves. We inserted book like wiring in those for palm lights, and a mechanical booklight on the shoulder that moved three times when turned on to come up over the shoulder. Surprising to us, this came out fantastic!!!
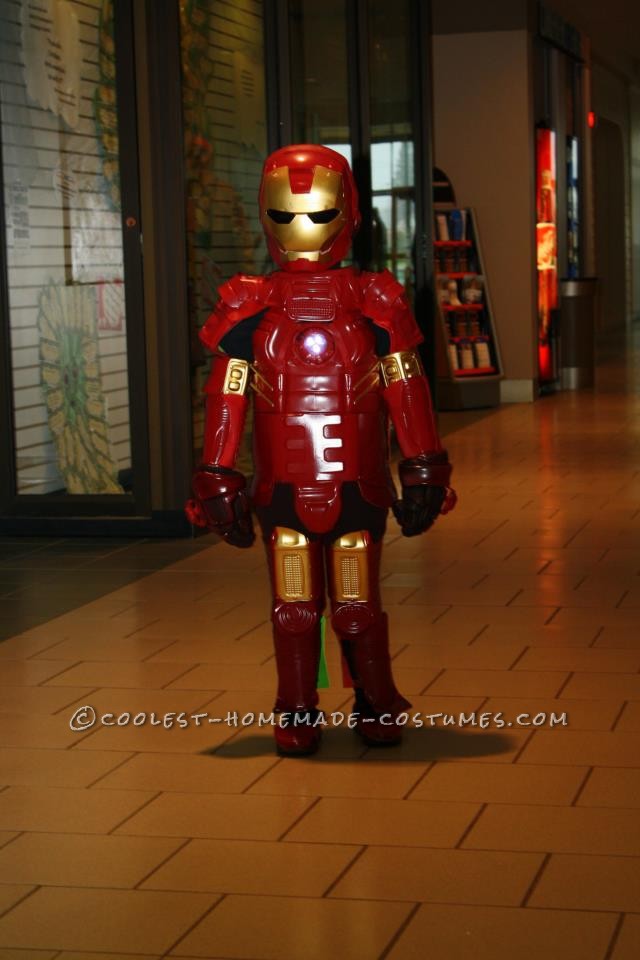
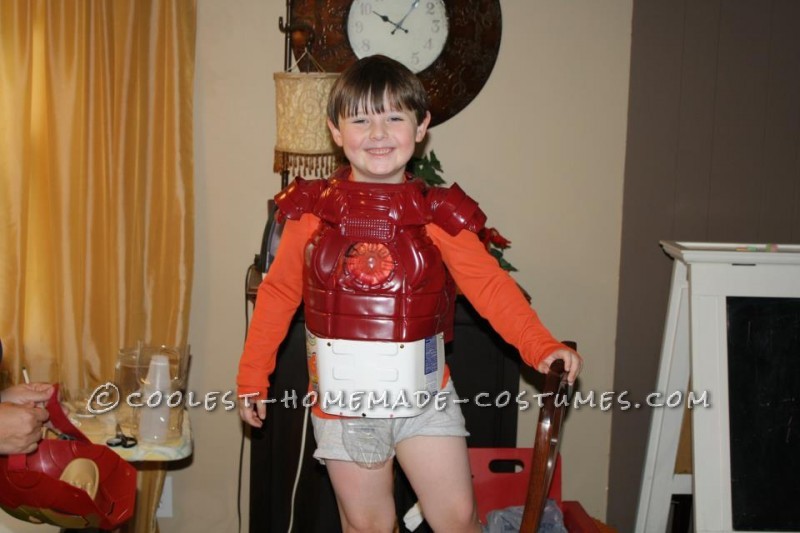
Brayden was followed around the mall by children younger than him, as they were convinced he was the real deal! Adult fans alike were in awe of this costume and the compliments were endless, which really made us feel great as this costume was on of the hardest I have ever made in my life! The mask was store bought, but we did repaint it to match his suit, and added a foam back so his head was not exposed. The costume was front to back covered in Iron Man fashion! I don’t think my son will ever forget this costume, which only cost us about $30 to make from start to finish! Can’t beat that! There were times I just thought it would never get done, but when it was all said and done it was PERFECT!
Cutting of bottles.
After cleaning each bottle and removing all labels and glue with WD40, we started cutting pieces that looked interesting that we thought we could built on. We just played in this step trying to see what shapes we could create that would start with the chest itself, then the shoulders, and working our way out and down as we went.
Where we started cutting different shapes we thought we could use.
Pinning to a toddler dress form.
Once we discovered we were onto something cool, we continued without getting discouraged. As I said before I glued, used tack grommet hooks, and craft foam to fuse pieces together as needed. The more we got done, the easier it was to build onto the base. With every new shaped bottle we got, we really looked at the designs on each piece of plastic and decided what shape and design would work best in keeping with the original Iron Man design.
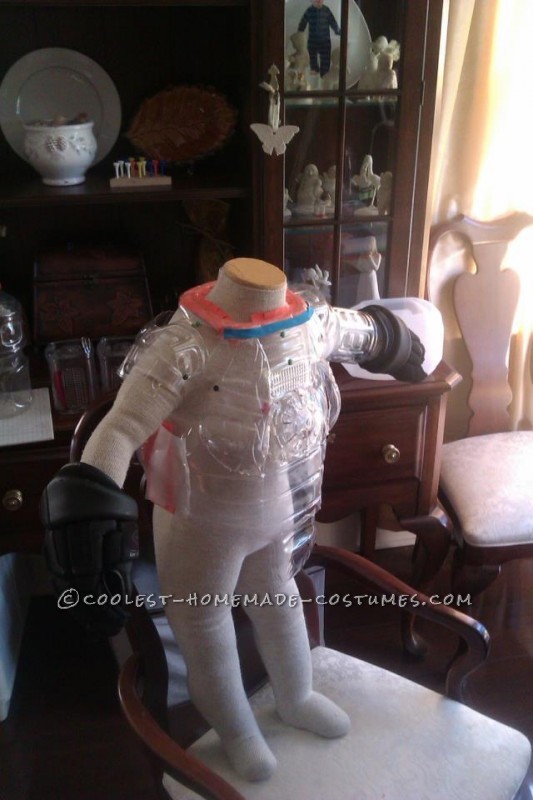
Building the chest and shoulders piece by piece and pinning to Dress form.
Painting…
We decided at this point to paint to make sure this would work. We used Krylons plastic Fusion paint in burgundy and got a metallic gold as the accent paint. We quickly discovered it was not true to the burgundy color of Iron Man and painted each plastic piece a flat black spray paint first, then the burgundy on the top about 2-3 individual coats at a time with drying time in between. The paint performed perfectly on the plastic! It dried fast, and shiny! We were pleased so far.
After we painted and made sure it would work, we continued building down on the costume.
Adding Hips.
We knew we needed some substantial hips, but needed to make them short enough that my son could still sit when needed, and use the potty too without having to take the whole costume off! We used a laundry detergent bottle that we cleaned and sanitized a few times before cutting. It is a thicker plastic and reinforced the top chest very well. It took the paint slightly different, but we had to use about 4-5 coats on that section to make it work. Finally, after using tacks and glue to secure it, we just continued from there the rest of the costume. It was much easier to start from the top and work down as each piece flanked another one in some areas. This helped to create some neat architecture in this piece and made it look cast Iron in some places.
Adding the hip and groin area trying to stay as close as we could do the original Iron Man concept.
FINAL RESULT!
Here it is complete. We are so excited with how this turned out! My son had children following him at various places convinced he was the real thing (toddler size). We inserted a few tap lights and book lights in the chest and gloves and shoulder. We picked those up from the Dollar Tree. Overall the project cost about $30 for paint and supplies. Plastic bottles were all free and donated by our sweet friends.

Final piece.

Related costumes:
 What if Iron Man Needed Sponsors? The Iron Can Costume!
  14 Months to Create the Perfect Iron Man Mark 4 Suit/Costume
  Awesome Homemade Iron Man Costume
 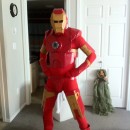 Awesome Homemade Iron Man Halloween Costume
  Coolest Homemade Mrs. Nesbitt/Buzz Lightyear Costume
 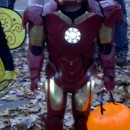 Coolest Homemade Iron Man Toddler Halloween Costume
  65+ Coolest Homemade SpongeBob Costume Ideas
  Coolest DIY Iron Man Costume
Your comment has been sent successfully.