Emmet and Wyldstyle Lego Costumes!
Usually my wife and I go to a local annual Halloween party dressed up as some couple we decide a few weeks before the party, but this year it was cancelled, so we didn’t need to think up a costume this year, so we thought…
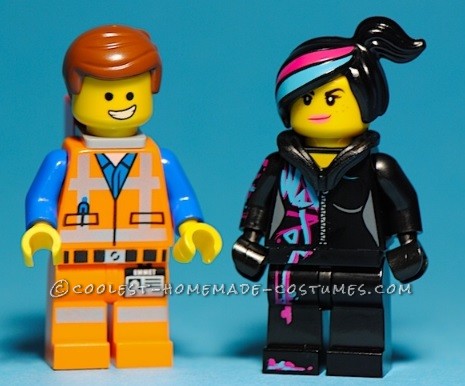
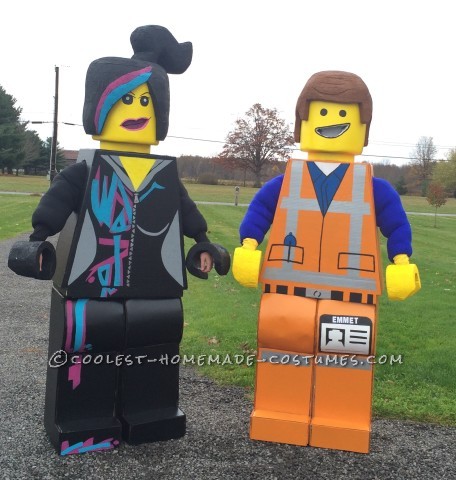
At the beginning of October, a good buddy of mine decided that he was going to have a Halloween party this year on Saturday the 1st of November. So now we had less than a month to come up with an idea for a costume and have it ready for the party. My wife and I came up with a few ideas and we decided on one. A week went by and we didn’t start on it yet and I don’t think either one of us was feeling it, so one day on the way home from work I came up with the idea of the main characters from the Lego Movie, Emmet and Wyldstyle. I figured it just came out early 2014 and hasn’t really been done, so it would be perfect. So that night I presented the idea to my wife and she liked it, so we were ready to start.
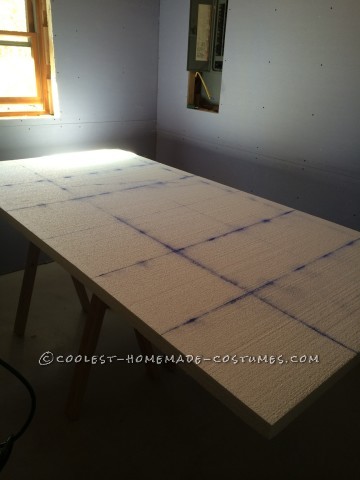
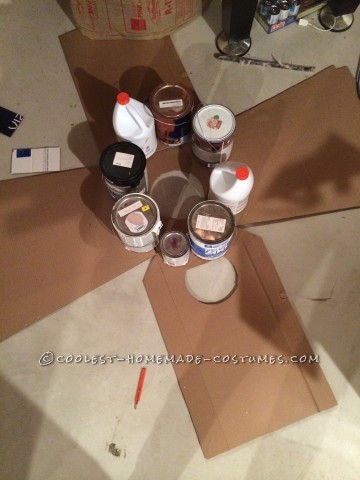
The first thing we needed was Lego men, so we could get a good idea of what we were dealing with and how to scale it to fit our bodies. My wife and I are about the same height, so we could keep the measurements close and not have to come up with two different sizes. We didn’t have any Lego men so we went to Toys R Us and bought the two main characters we were wanting to create. Once we had them, we went to a do-it-yourself center to get the supplies we needed to get started on the project. The main thing we needed was three 8’ x 4’ sheets of 2” white Styrofoam installation, a few colors of water-based paint, rollers, paint brushes, a large bottle of gorilla glue, some 80 grit sandpaper, 400 grit sandpaper and a large blade hot knife. We also needed a small blade hot knife to make precision cuts in the Styrofoam, which we found at a local craft store. Also, for this project we needed lots of heavy duty cardboard, which for my luck, we had just purchased two large screen TVs at work, so I had that covered.
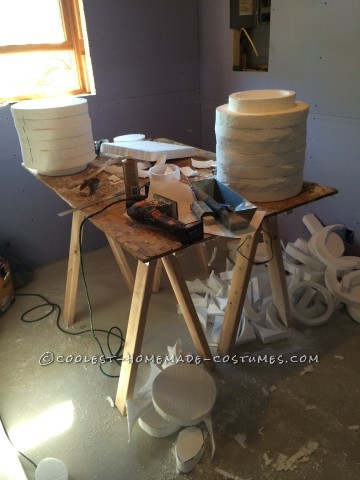
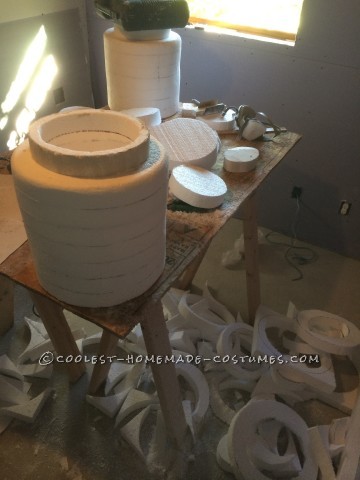
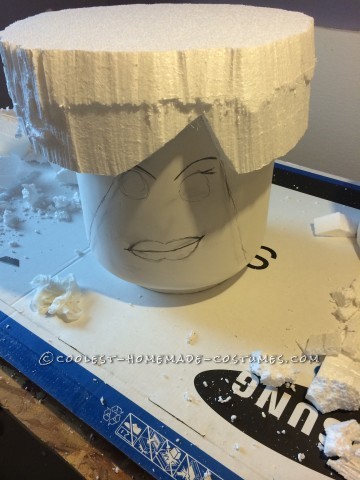
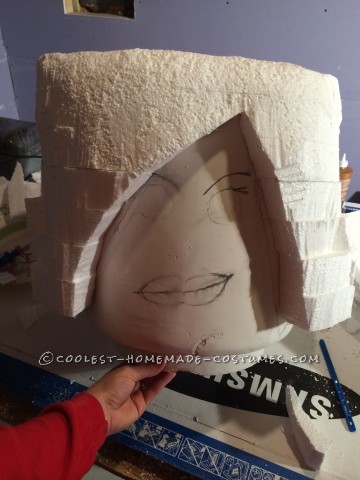
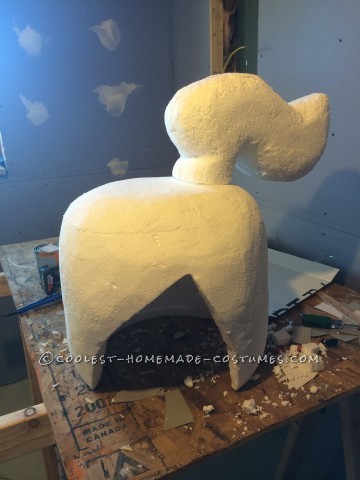
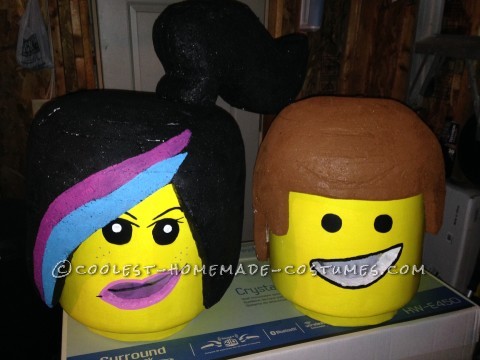
When we got home, we took our Lego men and started to measure each area, scaling them to fit our own bodies. Once that was complete, I knew the size we needed for the head and started cutting pieces of Styrofoam from the sheets and gluing them together. As I glued the pieces, we started cutting an area out with the large blade hot knife so our heads could fit inside. When we were happy with the way it felt on our head and the glue was dry, it was time to round the outside so it was round and resembled the head of a Lego man. This was done with the large blade hot knife and 80 grit sandpaper. I didn’t know you could sand Styrofoam until this project. Once shaped, I then used drywall mud that I had left over from a remodeling project and mudded the heads and set them aside to dry. I wanted the faces to have a smoother look to them and this was something that the Styrofoam itself could not provide.
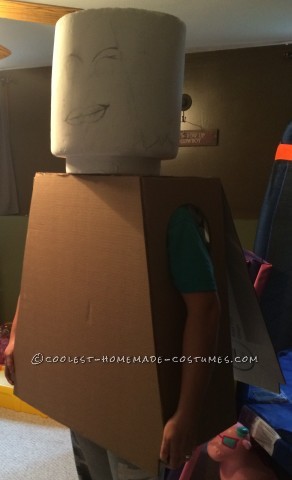
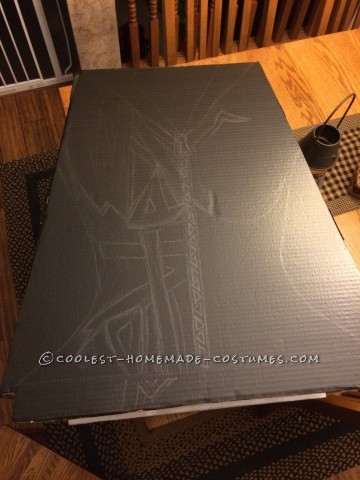
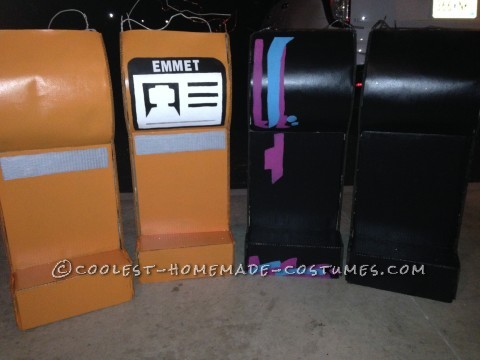
It was now time to work on the bodies of the customs. Now the bodies are probably the easiest part of the whole project and all it takes is a yard stick, a sharp utility knife and a pencil, and of course lots of cardboard. Since we already had our dimensions for the body and legs, this part went easy. The only thing I would suggest that we didn’t do at first but quickly learned was to allow yourself a 3” tab on a piece of the cardboard that will be glued to another piece. This gives you an easy and secure solution to gluing your body and legs together.
Now that the head mud is dry, take some 400 grit sandpaper and sand it till it is smooth. I am not very good at mudding dry walls and it was no different when dealing with these, so it took a few coats till I was happy with them. The next part that needed done and was probably the most difficult was the hair. That was also made out of Styrofoam and was constructed similar to the way the head was; the only thing in there was more detail in the hair. We made the hair on our costumes, so it could be removed and interchangeable, like real Lego guys.
The Lego hands which were Styrofoam as well were formed in a “C” shape and then on the back side of the “C” we cut a hole with the small hot knife so we could slide our hands in and out of them to take them off easily, but not so they would fall off. Kind of like a bracelet.
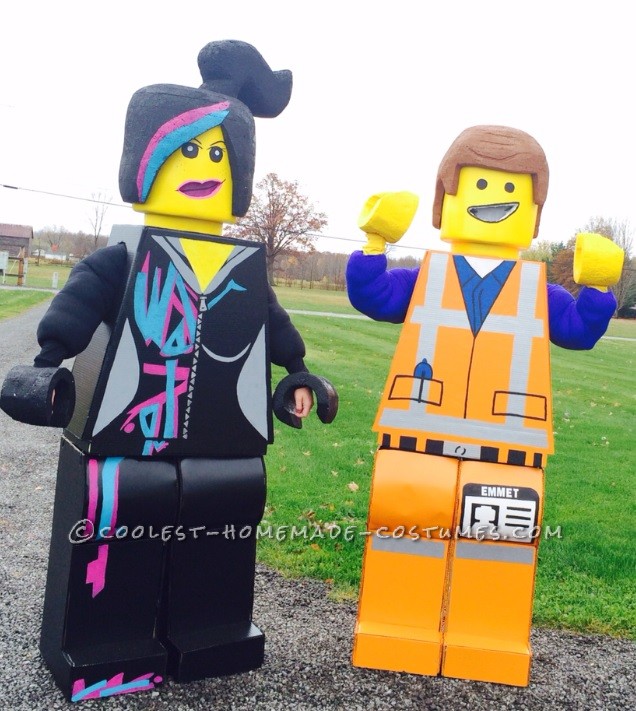
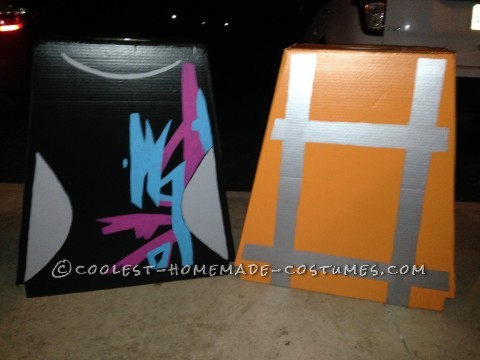
Once everything was built, it was time to paint everything. We started off trying to use spray paint, but it was too difficult, expensive and it would sometimes melt the Styrofoam so we just got quart side cans of water based paint and began using a paint brush and roller to apply the paint to them. I did all the base paint work and my wife did the detailed work. As you can see, she did a really good job on it. I was impressed.
As far as the arms go, the way we handled that was we wore a long sleeve shirt that was the color of the characters wrist, Emmet was yellow and WyldStyle was black. We then went to Walmart and found long sleeve exercise shirts that had a really flexible material and were lucky to find a blue and black one. We then took stuffing we purchased from a fabric store and started putting it between the two shirts so it was big and looked good with the rest of the body. As far as a way to see with the head on, we cut the mouths out using the small blade hot knife and painted and glued screen inside the head. We touched up the paint and added any small details to it and it worked perfectly.
We finished the costumes the day of the party and when we showed them off at the party, everyone loved them. The party had about seven different categories of costumes that people at the party could vote for, you know like best couples/group, scariest, etc. At the end of the night, we won the grand prize. Later that week, my buddy said he had to take us out of three other categories so others could have a chance to win. That was just flattering how much people liked and appreciated the work we put into them.
The cons for making these costumes I would say other than spending the last two weekends building them is the mess the Styrofoam made and also how difficult it was to maneuver in the costumes. Other than that, it was fun and we thought they turned out great. The toughest part will be to try and top it next year.


Related costumes:
 Homemade Batman Lego Couple Costume
  Coolest Lego Minfigure Costumes: LEGO Magician and Lego Sir
  Amazing Lego Men Horror Villians Group Costume!
  Cool Lego Minifig Costume
  Awesome Lego Benny Costume from the Lego Movie
  Corporate LEGO Minifigure Costumes Extravaganza
  Coolest Homemade Lego Spiderman Costume
  Awesome Lego Movie Costumes
Your comment has been sent successfully.