I don’t know if any of ya’ll have seen or even heard of BBC’s ‘Doctor Who’, but for me it is one of the greatest shows of all time! This British sci-fi show has been running for over 50 years now and is currently one of the most popular TV shows in the US and the UK. But for me, it all started less than two years ago.
On the 2nd of November, 2012, when I was 11, I went to a slumber party. It was only me and three other girls there, but we watched what I would call the creepiest Doctor Who episode ever made: ‘Blink.’ I can actually remember screaming several times when I saw it! Basically, it is about these eerie stone angel statues that move only when you’re not looking at them. And they move extremely fast- even in the time that you blink. I stayed scared to death of them for about a month and said that I would never be a weeping angel for Halloween.
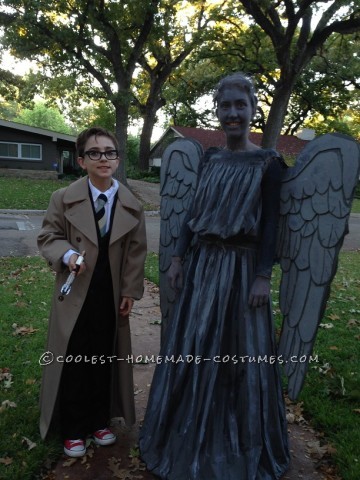
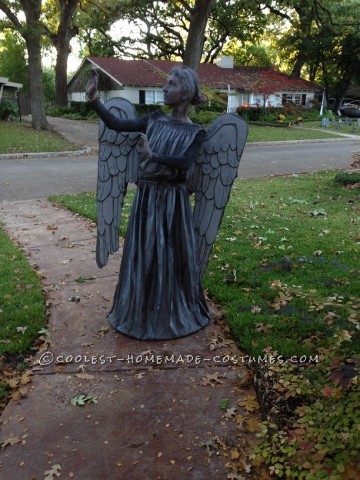
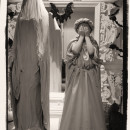
And guess what? One year later I’m a twelve-year-old strolling through my neighborhood, trick-or-treating in the most elaborate, creepiest costume I had ever made- a weeping angel.
The people’s reactions were fabulous? They’d be sitting in their driveway, handing out candy to the other kids. Then I’d walk up, and their mouths would drop open! They’d stare for a couple of seconds, look me up and down, and finally let out a nice, long flattering ‘whoa!’ Several people almost jumped when they saw me on their front porch! One lady told me I looked like something from New Orleans!
But the making of the costume actually goes back about six months before Halloween, though. In April, I found a page that showed what this one lady did to create her weeping angel costume. I was intrigued by it, and after a couple of weeks of thinking, I asked my dad to take me to Home Depot to buy some wire for the wings. What I mainly followed from this page was the wing construction. That was something that I really needed some serious help with. But here is what I did to accomplish this massive project in the order that I did it. And I definitely do not plan on making another one of these again! At least not unless I get a very irresistible offer from someone, which I kind of hope never happens.
The Wings
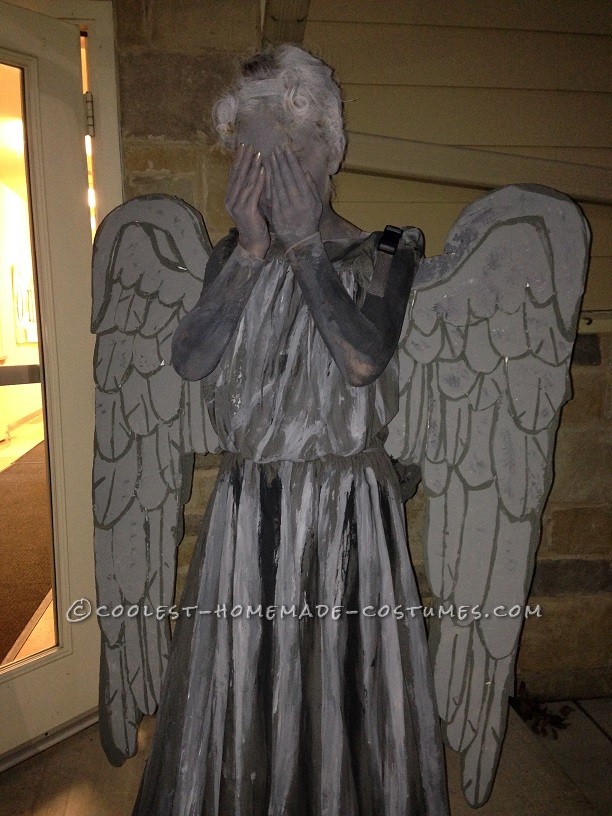
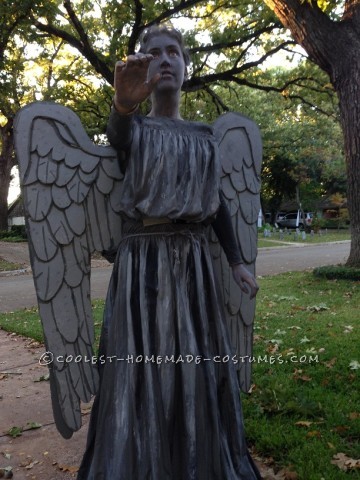
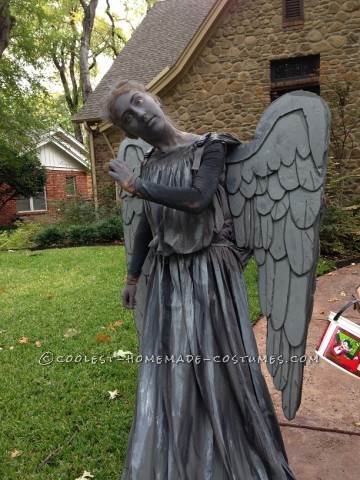
The first step was to get some wire (not too thick, but not incredibly thin either) and bend it into a sort of butterfly shape. It was about 3ft in length and 1 1/2 ft. in height. I covered it in fabric to give the wing pieces something to be glued to. This was sort of the skeleton for the wings. There was a panel in the back with the fabric-covered wire coming out like fairy wings almost. I then made some patterns out of newspaper to get the wing sizes right. I bought a foam core poster board to make the wing base. Each wing had a front piece and a back piece. These were to be glued to the wire. The reason that there needed to be a front piece and back piece was because the wire skeleton was to be sandwiched between them. So basically, that’s four wing pieces. I then bought several sheets of cell foam. This was tricky since it was kind of pricey, and I had to keep running back to Hobby Lobby to buy more. I cut out every single individual feather out of the cell foam and glued them to the foam core. Some feathers, however, needed a little texture. So I carved some lines with my scissors into them. I cut out feathers for the back parts of the wings as well. After everything was cut and glued, I painted them all grey, and put a darker grey for the lowlights.
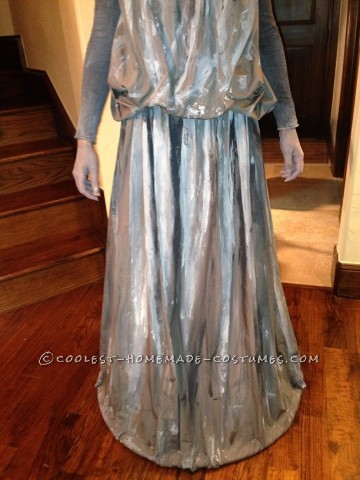
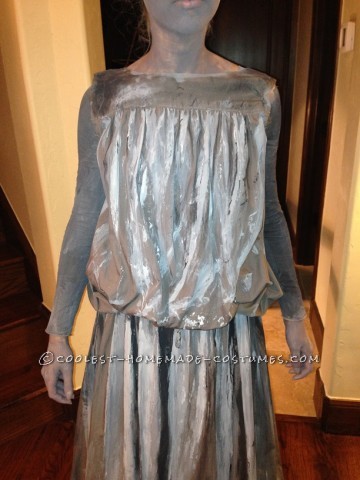
The Dress
Since I didn’t really have any sewing experience, I asked my grandma to help me out. She bought the fabric, and stayed at her house for about a week while we worked on the dress together. So we got a costume made, and I learned how to sew. After we finished the dress, I painted highlights and lowlights on it. We also pinned a hula hoop in the bottom to help hold its shape.
Putting Them Together
This is where I really needed the help from this instruction page, and I have to admit that I probably would never have thought of doing it this way. The upper back part of the dress was not sewn at the bottom; it only tied around the waist. This was so that this panel could lift up, and we could hook the wing on underneath it. I glued parachute straps with buckles on the wing base (the part that joined the two wings together) so I could hook them on easily. My grandma and I made various holes and tunnels in the dress for the straps to slip through. After the wings were hooked on, we simply pulled the back panel of the dress down over it and tied it at the waist.
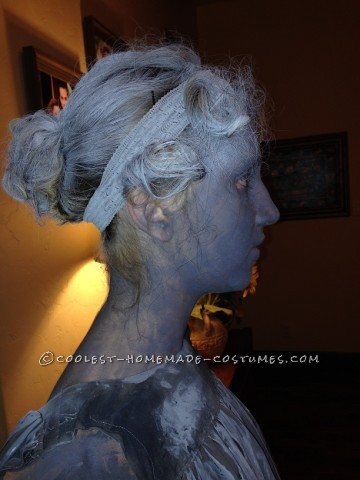
Hair And Make-Up
I used Ben Nye grey face make-up and sponged it all over my face. This took a while to not get it streaky. I also had to do my hands. I would have had to do my whole arms too, but I decided to just make sleeves on the dress. I got some old panty-hose and cut the feet out. I put them on my arms while I painted them and let them dry on me. This kept them from shrinking. Since it was kind of a last minute thing, the sleeves were not very professionally sewn on. But they were attached, and that was all that mattered at the time. For the hair I just put it up in a loose bun with a stretchy headband and pin curls in the front. Then we got grey hair paint to top it off!
I wouldn’t recommend wearing this costume to a place where a lot of walking is required, though. The dress kept scraping against the wings, and I couldn’t take large steps because of the hula hoop. So it looked really good when I was just standing there like a statue, but it was extremely difficult to walk in.
But over all, this has been one of the greatest costume experiences of my life! I’m now thirteen, I plan to make many more costumes in the future!

Related costumes:
 Coolest Homemade Weeping Angel Costume
 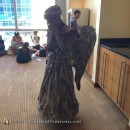 Coolest Scary Weeping Angel Costume
 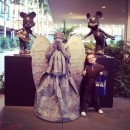 Cool Mom and Son Couple Costume: Tenth Doctor and Weeping Angel from Doctor Who
 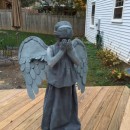 Dr. Who Weeping Angel Costume for a True 10 Year Old Whovian!
 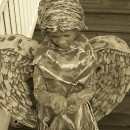 Amazing Cemetery Angel Costume
 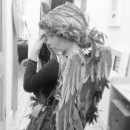 Coolest Dr. Who Weeping Angel Costume
  55+ Coolest Homemade Fairy Costumes
  Coolest Weeping Angel from Doctor Who Costume
Your comment has been sent successfully.