Envision a delicate woodland fairy flitting between forest trees. Completing the picture is a graceful, shimmery costume. Even better than that, it’s a homemade costume! The gorgeous fairy costumes here will convert you into a DIY costume maker even if you’ve never made one before. So feast your eyes on these traditional and non-traditional homemade fairy costumes for Halloween.
Take a look at the classically beautiful DIY costumes here. Also, if you’re looking for more unique costumes that are not super girly, you will find them here, too. For instance, take a look at the book fairy costume.
And, of course, these DIY costumes are not just for girls. Check out the boys here who rocked their homemade fairy costumes.
In addition, shake up the classically sweet fairy with some terrifying accessories. It is Halloween, after all. Peruse the horrifying Tooth Fairy costumes for some DIY costume inspiration.
So, browse through the collection of homemade costumes below for your best Halloween ever!
Latest Fairy Costumes
- Coolest DIY Steampunk Tinkerbell Costume
 I actually made this Steampunk Tinkerbell costume for a past Halloween, but my youngest daughter loved seeing it on her … Read more
 - Coolest Ever Homemade Tinkerbell Steampunk Costume
 Here’s how our Tinkerbell Steampunk costume came to life. Every year towards the end of August I ask my three … Read more
 - Scary DIY Tooth Fairy Costume
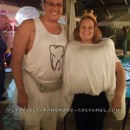
 While brainstorming my Halloween costume this year I took inspiration from my greatest childhood fear….the dentist. As a child my … Read more
 - Scary DIY Tooth Fairy Costume
 This scary Tooth Fairy costume is custom made from head to toe and is not for the faint of heart! … Read more
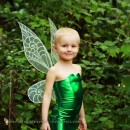
 - Adorable DIY Tinkerbell Costume
 Over the Summer I decided that I wanted to make my kids’ Halloween costumes this year. So, in July, my … Read more
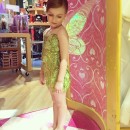
 - Coolest Tinkerbell Toddler Costume
 My 2-year-old insisted on being Tinkerbell for Halloween and I had absolutely no problem with that because my daughter was … Read more
 - Terrifying Tooth Fairy Costume
 I decided I wanted to be something creative this year, as well as scary, and the first thing that came … Read more
 - Easy, Inexpensive and Last-minute Girls Newspaper Fairy Costume
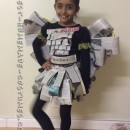 To create this unique, easy, inexpensive, most creative and last-minute Halloween, Newspaper Fairy costume you will need 1 newspaper and … Read more
 - Twisted Tooth and Tooth Fairy Couple Costume
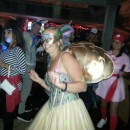
 This was our first Halloween together as a couple. We thought long and hard because we wanted something unique, fun … Read more
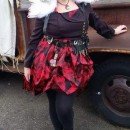
 - Homemade Fantasy Woodland Fairy Costume
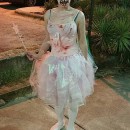
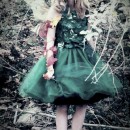
 Walking through the local thrift store, I saw this beautiful sequined dress that I decided was calling my name. At … Read more
 - Beautiful Tween Fairy Costume
 I consider myself a crafty person, but have never made my daughter’s Halloween costume. She is 12 now, and I … Read more
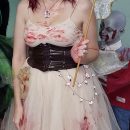
 - Sexy Absinthe Green Fairy from Moulin Rouge Costume
 This costume is modeled after the Absinthe Green Fairy from Moulin Rouge. I had so much fun designing this one … Read more

Featured Fairy Costumes
Fairy costumes by Ashley R., Slingerlands, NY
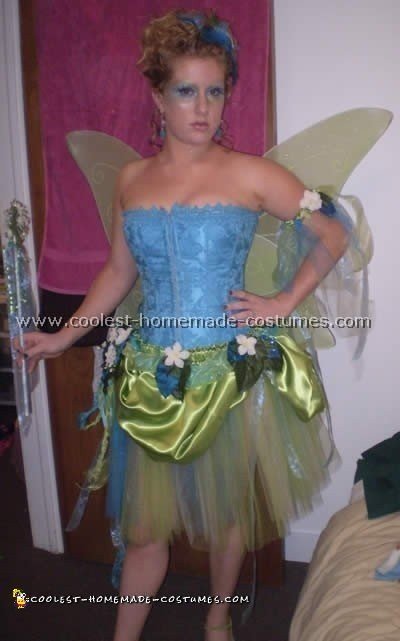
The fairy costume was constructed with the idea in mind of a “Tinkerbell” fairy costume with a twist. I wanted to be a fairy for Halloween and couldn’t find any fairy costumes with the idea I had in my head. So I decide I must design one myself.
I have a simple idea in mind. So, I take it to a fabric store and I end up purchasing about $40 worth of fabric and supplies.
In order to figure out what would work, I sketch out a design. And then my mother and I get to work!
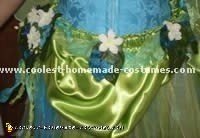
To construct the bodice and skirt, we use blue and green satin. Then we use crinoline underneath to make it pouf out a bit. After that, we pull it up on each side.
We then take flowers and leaves and glue them to where the skirt was taken up. We kind of go crazy! Seems like we just took what was left in order to make a hair piece.
To construct the wand, we glue pearls, leaves and ribbon. Most noteworthy is an old ornament. Gluing onto a wooden dowel to completes the wand.
Consequently, the whole costume took a few days but was beautiful! We had so much fun and I hope you enjoy it!
Total Spent: $40

Pink Garden Fairy Costumes
Fairy costume by Joanne B., Litchfield Park, AZ
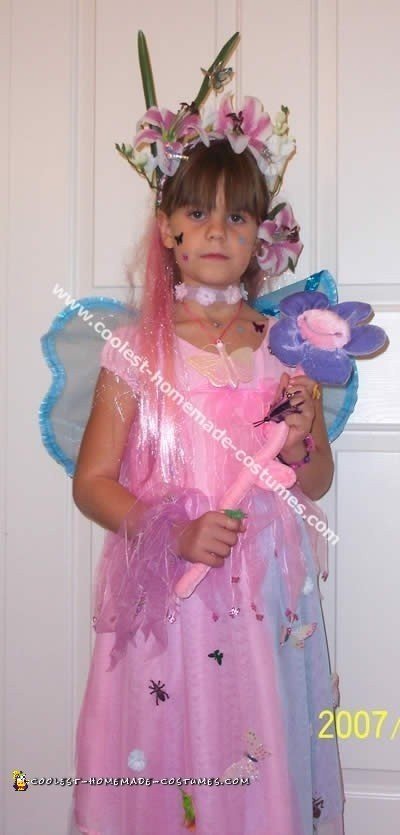
I was looking for original and inexpensive fairy costumes for my daughter. She loves flowers, insects, butterflies and fairies. I found all I need to make her “Garden Fairy” costume right in my house. I am happy to pass on the information in case it helps someone else.
First pick a dress. I chose a pink and blue princess dress that she had in her closet. Then I attached some insects on her dress.
Look for accessories to complete your costume. I found a butterfly necklace and another one with flower.
Obviously, every fairy needs a wand. Due to this, my daughter held a big flower. It totally works!
In addition, I attached some flowers on her headband and she wore her pink wig. Of course, I got some blue wings.
In order to finish the costume, she wore some insect rings and I put some insect tattoos on her face. My daughter was proud of her costume and I was glad that I spent almost nothing.
P.S. You can find a lot of great treasures at dollar store.
Total Spent: $0
The Fairy King Costume
Fairy costume by Cheryl C., Grafton.
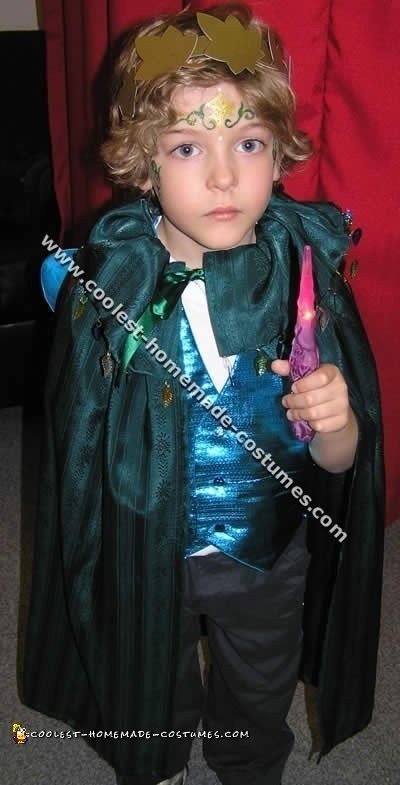
My seven year old daughter wanted to go to a fairy dress up competition. In order not to be left out, my six year old son says he wants to dress up too. But he is concerned that fairy costumes are for girls. Happily, I found a solution to this dilemma. Here it is: every fairy comes from fairy land and every land needs a king.
Making the Fairy King
The Blue vest was made using a dressmakers pattern that I had at home, the fabric was scraps were left over from a formal dress I made many years ago.
The Cloak
The bit I was most proud of was his cloak. I made it from a large left over piece of green patterned satin. Simply measure the length require against your child and allow an extra 20cm for hems and fold over piece at the top.
Hem the base as normal don’t worry about the sides as they are already edged if you use full fabric width then fold the top down to where you measure the child’s neck to be and sew down.
Above this sew another parallel row of stitching wide enough for a ribbon to be threaded through to be used as a tie up at the front.
Along the extra flap at the top, use a metallic cotton to hand sew loose loops with foil leaves attached. The loops need to hang loose so that the leaves appear to fall down. Find the center of the length of the cloak and measure against the child to see where the wings should sit. Now you can cut two slits about 2-3 cm apart length ways.
The Wings
From the inside of the cloak, then insert the butterfly wings. These had to be squashed and spread back out. Then you must sew the slits back up by hand attaching to the butterfly center as you go. The butterfly was the fabric type used to decorate the inside walls of a home and these become the wings.
The Crown
To top off the outfit I then made a crown out of gold cardboard by using a simple straight thin length stapled together at the end the same size as my child’s head. We then found a leave shape to trace around and simply cut the leaves out in the gold card board and stapled these to the band. A small piece of advice is to cover all staples with sticky tape so they cannot be caught in the child’s hair.
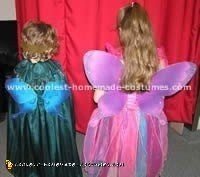
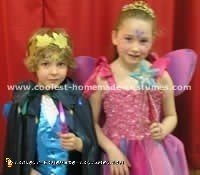
For the Fairy Costume
For my daughter’s costume we simply purchased a pre-made fairy dress from the many fairy costumes available and attached some bells to the bottom of the dress and her wings were a larger version of the butterfly used on my son’s costume and this was pinned to the dress with safety pins. Unfortunately my daughter did not win a prize but my son did win a prize. Not sure if it was the costume or the fact that he was only one of two boys willing to dress up.
Total Spent: $20
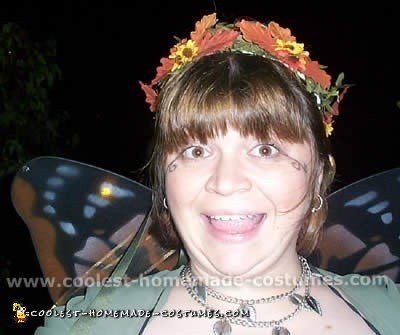
Autumn Sprite Fairy Design
Fairy costume by Jennifer W., Bolingbrook, IL
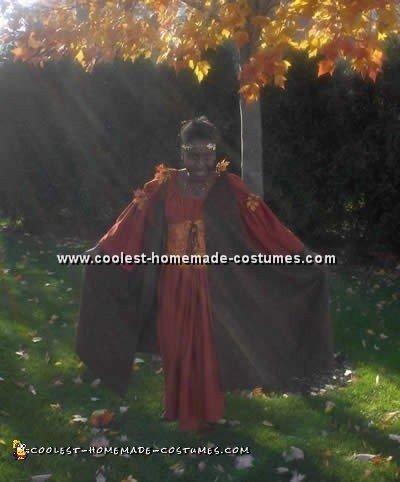
This Halloween we decided to go for Fairy costumes so I decided to be an Autumn Sprite. I made the entire Fairy costume except for the golden circlet which I purchased at the Renaissance Fair. The dress is a rust colored silk like fabric and the cloak is suede with leaf designs burned into it.
For the waist cincher I purchased 2000 fake leaves during a fall clearance sale, covered them in fine golden glitter and glued 200-300 of them onto a wool felt waist cincher I made.
I also used these leaves along with fake berries and acorns to make the pins on the upper sleeves and the cloak as well as on the “floating” necklace. The necklace I secured with invisible thread.
Finally for the Fairy costumes I needed shoes, I purchased some elk hide from the Renaissance Faire and a sheet of sole material from the local shoe store. I used a sewing awl to attach the parts of the shoe together and a package of leather cording as ties.
Total Spent: $150
Glowing Wings for Fairy Costumes
Fairy costume by Misty R,, Utah
I started with the idea that unlike other fairy costumes, our fairy must have wings that really glow. After discovering electroluminescent wires on the Internet, often called e-wire, I ordered 18 feet. That was the expensive part (about $60 shipped). If you want to save money you can skip this part, but it sure looks impressive!
Making the Wings
I formed the wings out of 9-gauge wire. You make kind of a triangle in the center of the wings to anchor them to the body and avoid using shoulder straps. Shoulder straps often make wings ride up too high on the body. The e-wire was then tied to the wire frame using clear nylon thread. This is a time consuming and painstaking process.
Next I took stretchy iridescent fabric, stretched it over the frame, sewed it with a running stitch, trimmed the excess fabric, then went around again sewing around the wire to re-secure the wires together and “tuck in” the fabric edges.
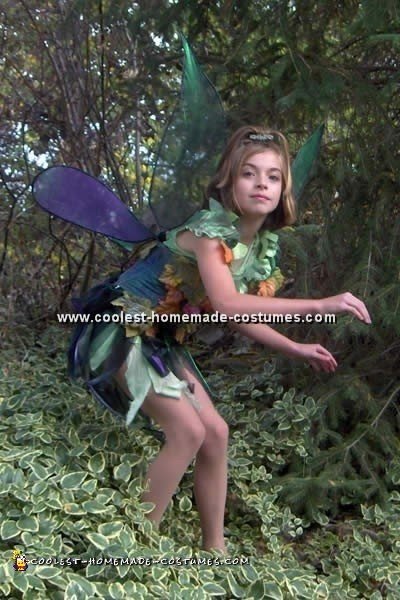
Designing the Costume
The costume itself started with a double layer dress from the thrift store. I cut the skirts into raggedy petal shapes, then I took the pieces I had cut off and re-attached them to make more “petally” skirting. Each petal is weighted with an iridescent flat bead glued to the tip. This gives them weight and a more graceful movement. The light green dress was gently spray painted with touches of dark green and brown. The neck was edged with fabric petals and dollar store fall leaves.
The final layer starts with a corset that I cut the straps from and died green. Then I cut more raggedy petal skirting from the same iridescent fabric that I used for the wings. I Sewed on more leaves and finished it off with some spray adhesive and glitter. I added green and purple glitter on the bodice to make it match the two-color tones in the fabric.
This is how the costume is worn.
Layer 1
Leotard or swimsuit. Use double stick tape to keep it from riding up.
Layer 2
The dress.
Layer 3
Wings, strapped on with ribbons or duct tape.
Layer 4
The corset that covers where the wings are connected. I also added a little pouch to the skirt to hold the battery pack that operates the e-wire in the wings.
I then glittered ballet slippers, dyed to match, and a her big sis did a great makeup job.
This was one of the most spectacular fairy costumes!
Have fun making your own fairy costumes!
Total Spent: $100
Cool Fairy Costumes
Fairy costume by Dana B., Oro Grande
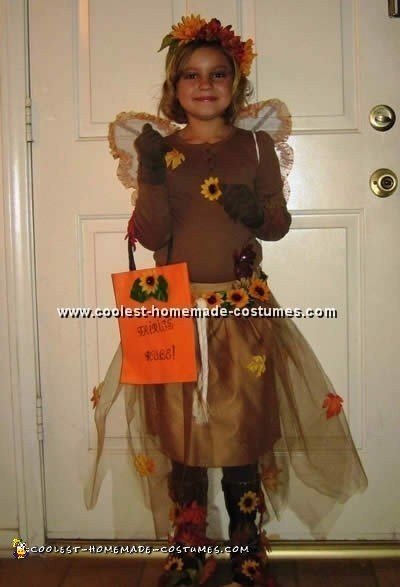
We chose, from all the fairy costumes, to make my niece a “Woodland Faerie” for Halloween this year.
We started with a plain brown long-sleeved shirt, glued fall colored leaves all over. She also wore a brown skirt that was made from a 1.5 yard piece of fabric with a tulle overlay. To this, we attached fall leaves and flowers.
She had a headband that was just made from a piece of green wire. We hot glued flowers and leaves on to that as well.
For her shoes we took an old pair of her scuffed up boots and hot glued leaves and flowers all over.
Finally, we purchased her wings from the dollar store. In order to make them stand out, we attached jewels, leaves and flowers to them. In addition, you can use glitter to accent some of the leaves and flowers like we did.
The whole look was supposed to be her looking like a faerie that just walked out of the forest in the fall.

This is the best out of all the fairy costumes we saw. A really big hit every where we went!
Total Spent: $12
Fabulous Fairy Costumes
Fairy costume by J. Myriah C., Bowling Green, OH
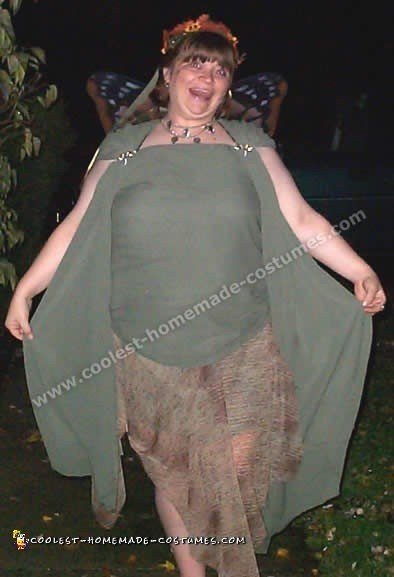
My friends and I are always trying to come up with fun and cheap ways to make up costumes. I wanted to be a fairy for Halloween. The prices for fairy costumes were crazy high! And were way out of my price range after spending so much on the kid’s costumes that year.
It all started from seeing the necklace at a yard sale for less than a dollar. I knew that was going to be part of my costume and I was going to be a fairy this Halloween.
Putting This Fairy Together
I looked for some fairy costumes patterns, but I really don’t know how to sew well. So I ended up buying some elastic and some fabric. You can use coupons to lower the costs. I used 40% off coupons for the local fabric store and made a couple of trips to get it all cheaply.
I bought enough elastic to fit snug around my waist and took some earth tone fabric with a vine print on it. Next, cut it into triangles and sewed it on the elastic so the points hang down. In order for them not to be seen through, I sewed them so they would overlap until about the knee.
I then took several yards of green fabric and wrapped it around my body and chest, crossed it over in back and pulled the ends over my shoulders. I needed it to stay up so I pinned the ends to my bra strap with dragonfly pins I found at the dollar store.
The Head Piece
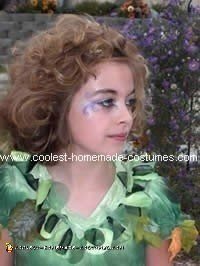
For my head gear, I purchased a circle headpiece from the bridal section of the fabric store and I had found some silk flowers at a yard sale and hot glued them on the headpiece. I tied on several pieces of ribbon to the back of the headpiece and let streamer of it all down my back. The wings were purchased a couple of days before Halloween when some of the stores were starting to put things on sale.
I wore natural looking makeup and added the vine-like swirls from the corner of my eyes with eyeliner.
Everyone loved the outfit and thought it was one of the cutest fairy costumes. Since I didn’t do any sewing to the green fabric I have it to use for another project later. You many even find me making another costume…
Total Spent: $30
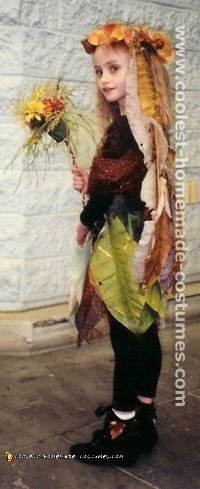
Stunning Magnolia Leaf Skirt
Fairy costume by Elspeth B., Oneida, TN

When I moved to Eastern Tennessee I was fascinated with the abundance of the deciduous umbrella leaf magnolias in the woodlands. The foggy mornings in this forested area create “fairy lands” when streams of early sunlight penetrate the fog and touch the ground. Seeing the magnolia illuminated by morning sun in this way inspired the idea for the fall fairy.
The Skirt
I created the skirt by collecting large leaves in the fall right before they were needed (which can be more than 2 feet long). I laid out the leaves (approx. 8-10 leaves) on a waist width size of 1.5″ elastic so that they overlapped well. The leaves were attached to the elastic with safety pins pushed through the petioles of the leaves.
The Wings
The wings were made with 8 more large leaves. Four similar size leaves were needed for the upper wings and four more for the lower leaves. The leaves were attached to a pair of nylon play butterfly wings we had in the dress up box.
Wire was used to attach the leaves. I put the wire around the top and the bottom of the midrib of the leaf and then through the wing nylon and then through the mid rib of a similar leaf and twisted closed so that the front and back of the fairy wing was totally covered with the magnolia leaves. This was done for each of the four wings.
To cover the wired areas, a few colorful small fall leaves were taped with double-sided poster tape over the wired areas. Gold glitter glue was used to outline the leaves of the wings and the skirt for extra shine. The leaf skirt and wings were kept on a cool porch with plastic over them so they would not dry out before use.
The Wreath
The leaf wreath crown base was made by twisting and wrapping the long bare pliable branch of a weeping willow tree in to a head size circle (like grape vine wreaths are made). Vibrant Bradford pear leaves and chrysanthemum flowers were threaded through the willow wreath to make the crown.
The Fairy Costumes Wand
I made the flower wand by pushing a wand size stick through a small yogurt container filled with flower arrangement oasis. The container was wrapped with tape to secure the stick. Then I wrapped the container with wide green raffia ribbon. I used natural raffia to secure the ribbon and wrap the stem.
Fall flowers and foliage were arranged in the oasis and metallic green netting was also added to the top of the wand. The necklace was created from glycerinated leaves from autumn olive (which have a natural silver shine on their back sides) and dried nandina berries.
The Bodice
A black leotard and tights were worn under the costume and some black boots. Small fall leaves were attached by double sided tape to the tops of the boots. About 11/2 yards of metallic copper netting was folded in half and a small head hole was cut in the middle. This was placed over the black leotard. Then the leaf skirt was safety pinned together at the ends over the netting and leotard.
The Accessories
I used wide green raffia ribbon to make a sash that covered the elastic waistband of the skirt and tied with a knot in the front of the skirt. The wings were put on last. They attached with the original nylon wings’ elastic over the shoulders.
The fairy costumes cost was only time since all the materials I already had at home or in the woods. After having all the materials needed together, creating the costume took only several hours.
As a result, my daughter loved being a fall fairy. I have a few pictures of my fall fairy taken in the woods where you might believe the fairy was real.
Make believe is fun especially with kids. I think that the huge leaves from an elephant leaf plant or maybe the large fronds of certain ferns could be used in place of the magnolia leaves. I’ll probable try some variations on fairy costumes in the future.
Related costumes:
 Top 10 Lists – Coolest DIY Halloween Costume Collections
 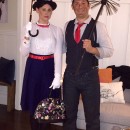 1000+ Inspiring Homemade Book and Movie Character Costumes
  2000+ Awesome DIY Animated Character Costumes
  Scary Tooth Fairy Homemade Costume
  Tooth Fairy Costume for a Sweet Girl
 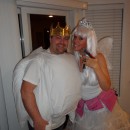 Coolest Tooth (with Crown) and Tooth Fairy Couple Costume Twisted Tooth and Tooth Fairy Couple Costume
  Beautiful Homemade Princess Tiana Costume
Your comment has been sent successfully.