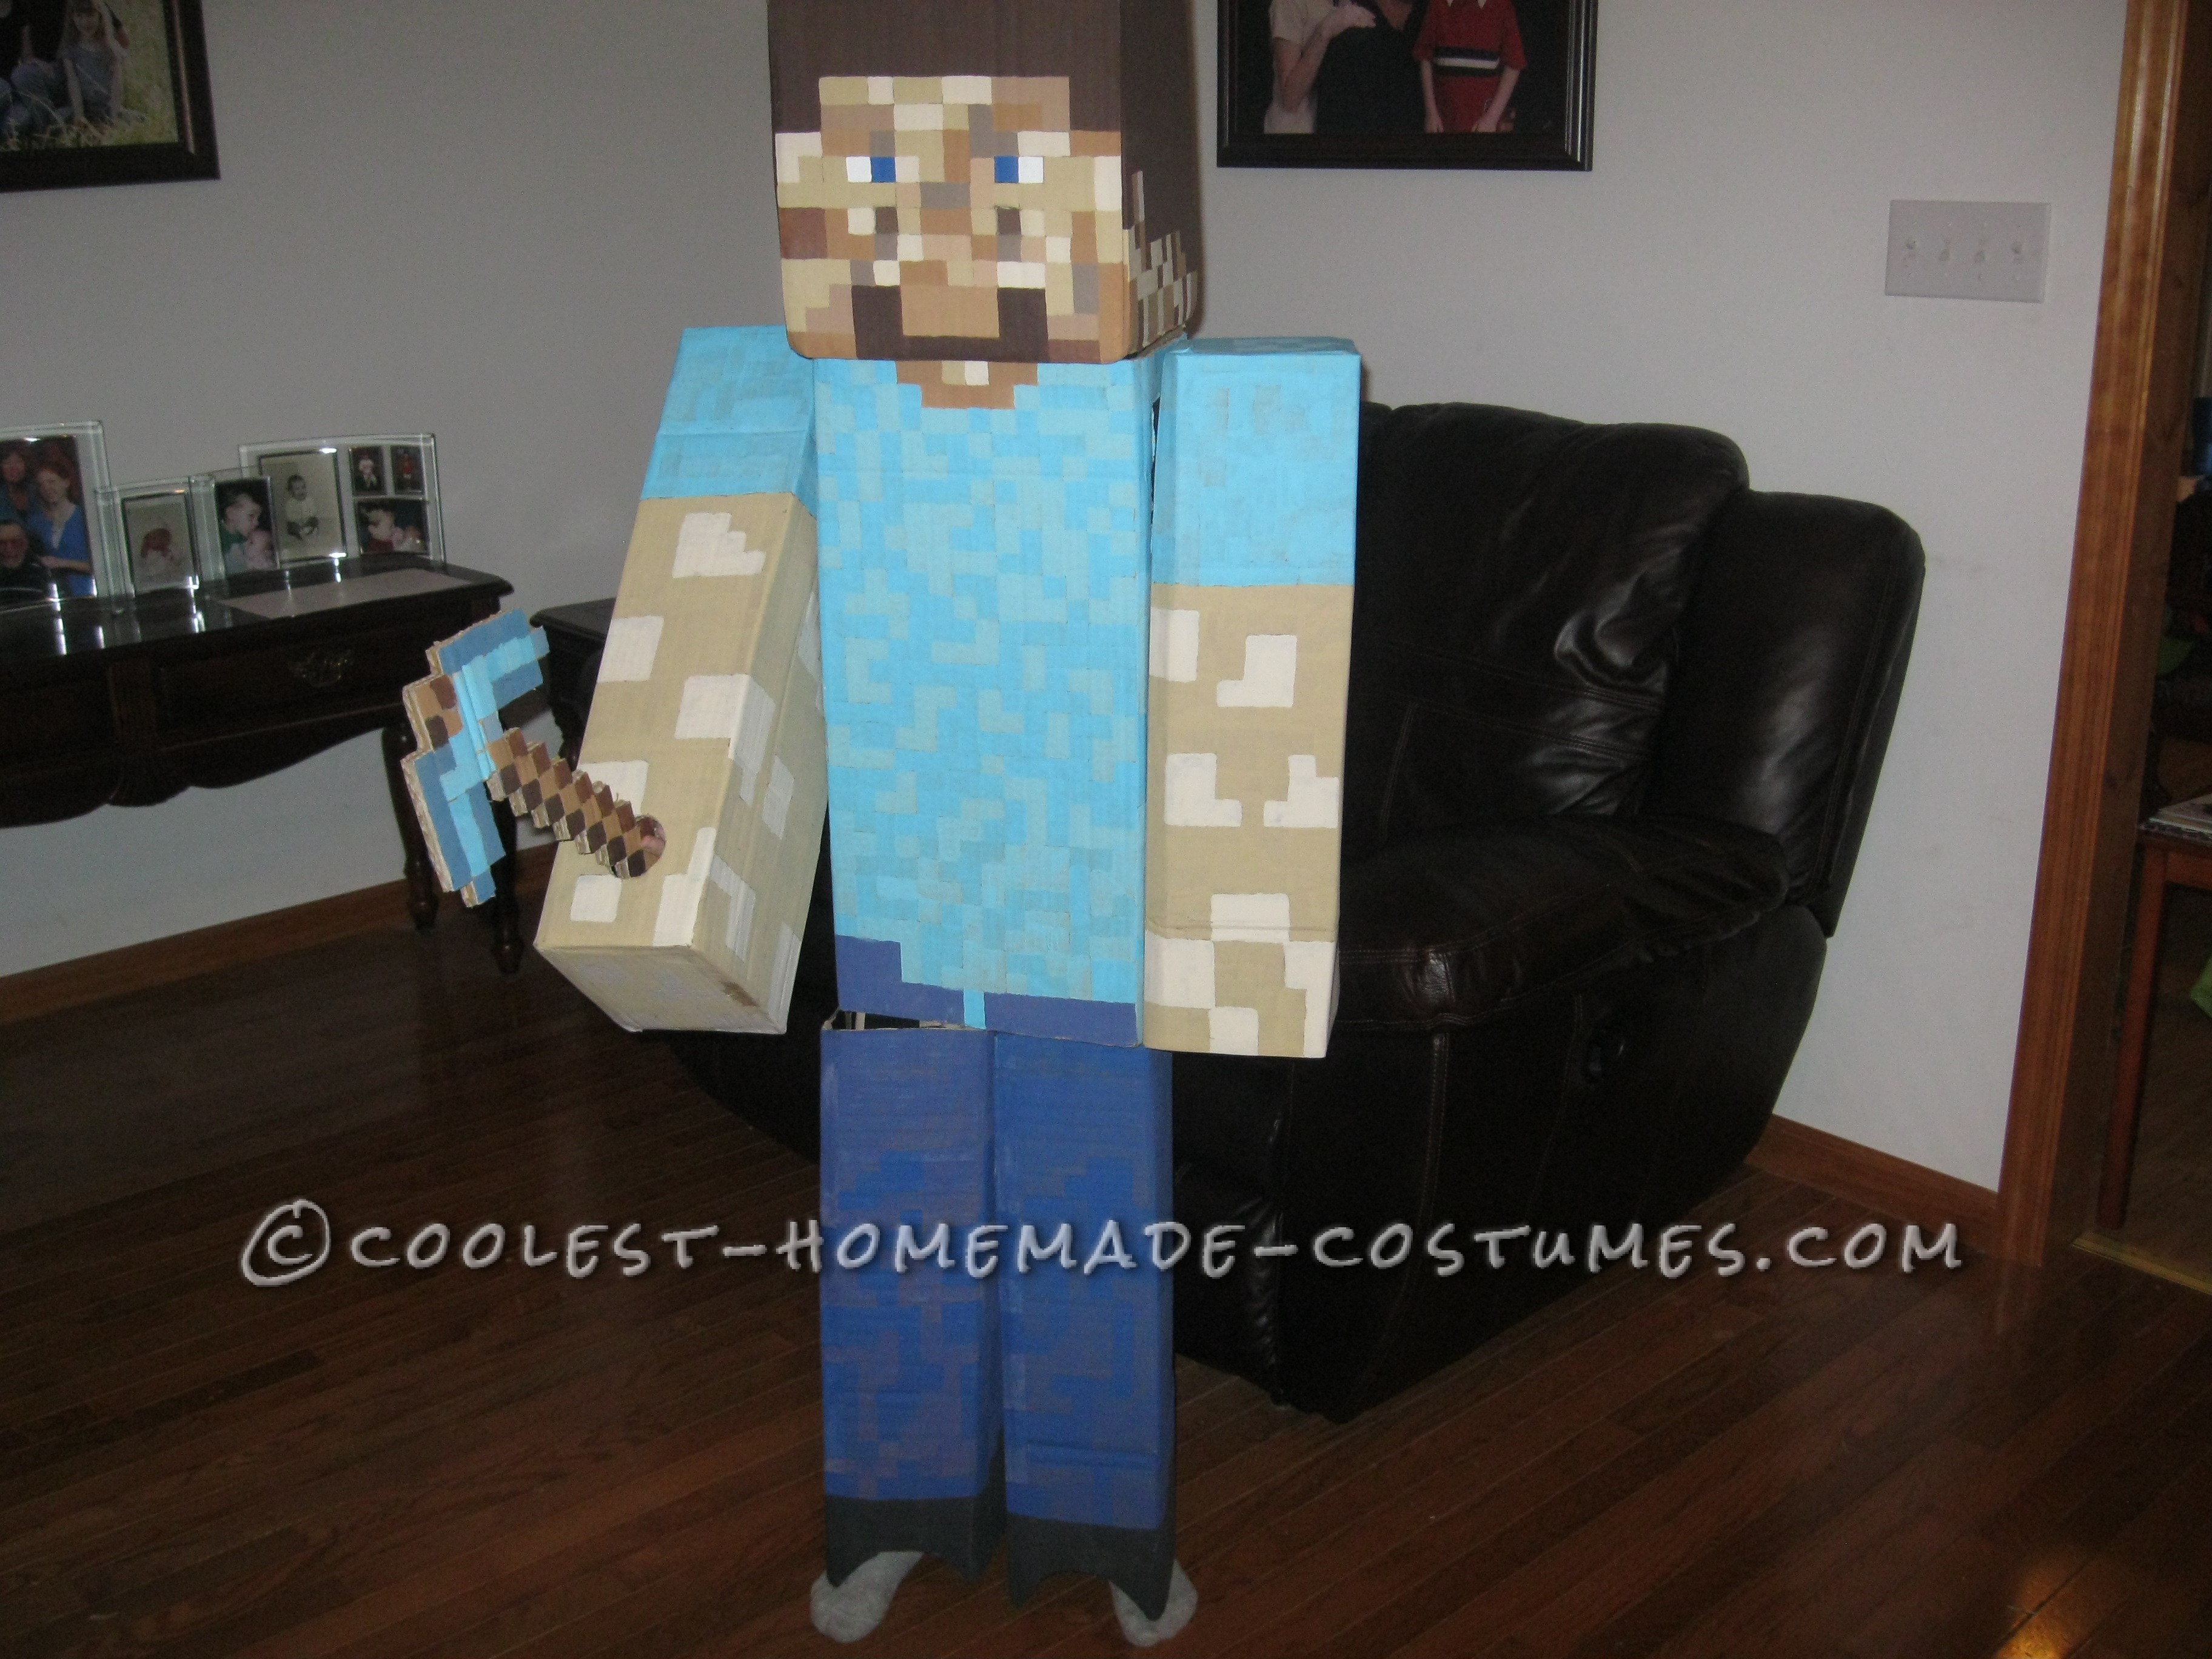
1. HOW MINECRAFT STEVE WAS MADE
This first step in making this costume was to get the measurements of my sons torso. The body should have only enough room to slide the costume on with your arms outstretched straight above your head. The arm holes should be large enough to easily slide on. Before trying the body on, we had to cut out a circle for his head to go through. I also taped a small strip of foam to the upper part of the arm holes so that it would be comfortable when wearing it. Next the head was made. After getting the dimensions, I cut the furniture box into the desired shape. Next step was to score the cardboard first before trying to bend it and make a rectangle. Once bent and shaped, liquid nails was applied and sheet metal screws were used to hold edges in place while drying. A hold was also cut out for the head to fit through. Minecraft Steve’s arm, legs and head have to be the same width as the torso. Both arms and legs together should equal the same width and thickness as the torso, and the head should be the same width on the face side but wider from front to back on the sides. I taped a helmet inside the head to support it. Next eye holes were marked and cut out and a piece of stocking was taped to the inside of head over eye holes. Now on to the arms. I used the same technique for the arms and legs as I did for the torso, scored cardboard, used liquid nails and sheet metal screws to hold ends together. I had to add end caps for the arms and cut out the area where his arms will fit into the costume. The legs will not have end caps but the lower edge should be cut out like a half crescent moon so it won’t restrict foot movement. After all the pieces of the body were made, I used a square template to mark all the pixels on the costume. Painting the pixels was next in line. Minecraft Steve has many different shades of color. I painted each individually. When using each color, I would paint random squares on all 4 sides before moving on to the next color and doing the same until all body parts were complete. After completion of the costume, velcro was added to the lower edge of the torso and the top of the legs with gorilla tape to hold them together so that he would be able to walk in it. Also, paper brads were inserted into the side of arms and torso to hold the arms on so that they could be moved. Velcro was also added to the bottom of the head and the shoulder area of the torso to keep it stable. I also made a 3D pic axe by placing liquid nails between two pieces of cardboard and then cutting out the design I had made using the pic axe template I made. A small hold was cut in the lower area of the right arm for him to hold the pic axe.
2. DIFFICULTY OF MINECRAFT STEVE COSTUME
This was one of the most difficult costumes that I’ve made. Getting the dimensions of the whole costume was very challenging. To look right, everything has to be exact. I always make my children’s costumes every year. The way I choose my theme is deciding what my children are into for that year. My son LOVES playing Minecraft and just knew this would be the perfect costume and I was right. He absolutely LOVES it.! Since Halloween is over, he has it in his room as decoration. All his friends think it soooo COOL! He even asked if I could make him more Minecraft things to go with it.
3.THE REACTIONS RECEIVED FROM MINECRAFT STEVE COSTUME
This costume received many, many compliments! People were constantly coming up to him wanting to get a closer look. Most of the children who saw it showed much excitement! We even had someone offer to buy it. My son loved all the attention!

Related costumes:
 Coolest Minecraft Creeper Costume
  Coolest Minecraft Steve Costume Ever
  Most Amazing DIY Minecraft Costume for a Boy
  Coolest Minecraft Ender Dragon Costume with Articulated Wings
 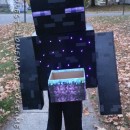 Coolest Minecraft Enderman Costume
  Cheap and Easy Costume: Steve from Minecraft
  13-Year Old Creates Bonnie Costume On Her Own
 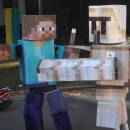 Cool DIY Cardboard Box Costumes: Minecraft Iron Golem and Herobrine
Your comment has been sent successfully.