
Happy Halloween! My favourite time of year! I always struggle with a MILLION ideas, I want to dress up every day of October, (but I don’t think work would like that). Sometimes I really struggle to come up with a great costume, so I come to Coolest Homemade Costumes for inspiration. My costume is not original, but I feel that I took it the extra step from other examples I explored on this site.
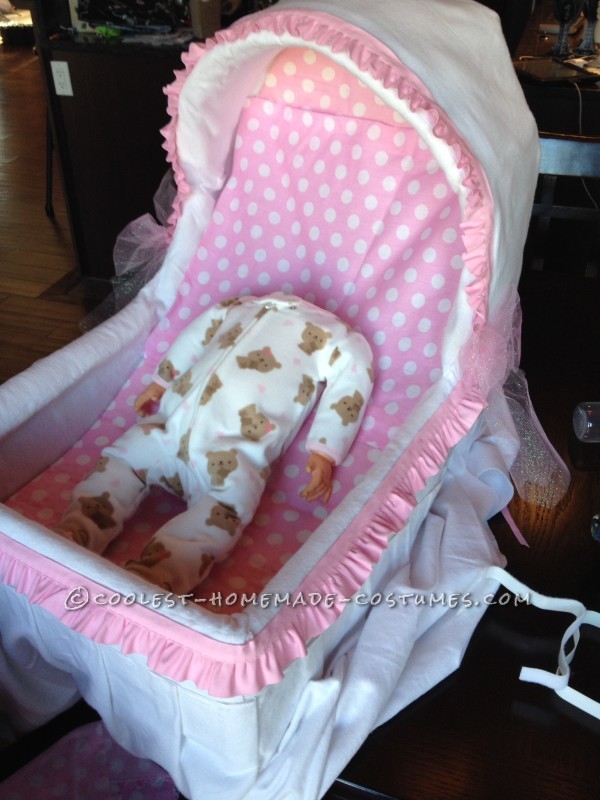
The idea I chose was an illusion costume; a baby girl in a bassinet! I didn’t care for some of the features of the other costumes I searched, so as I went, I really just let my creativity take over. I wanted it to look authentic. When all was said and done, we went to a Halloween wedding social, and I had a blast! Dancing was fun too, wiggling my arms to “I’m Sexy and I Know It” by LMFAO (wiggle wiggle wiggle wiggle wiggle, YEAH!) And the best part? I won BEST COSTUME! Whoo hoo! I won a free body piercing from a local tattoo parlor of all things, Lol!
The other fun part was taking baby selfies. I’m also adding a list of all supplies and tools I used for the costume as well, and how much I spent – in case anyone wants an idea of what it might cost. I wanted it to look as real as possible, so I spent a little more than one would need to.
Supplies: (those without $ value, I had at home already)
- Box
- 2 Coat hangers – to shape canopy
- Zip tie – to secure doll in box
- Polyester Stuffing – for doll’s arms and legs
- Foam padding ($1.00 at thrift store – a very lucky find!) – to line the whole project
- White material (10 meters) and pink polka dot material (two meters) + pink ruffle accessory (Measurement) totalled $54 at Fabricland. But you could find material, (like bedsheets) at a thrift shop. I just was being picky, and wanted my bassinet to have that “brand new” look.
- Tulle ribbon ($4.00 at Walmart)
- A doll ($3.00 at Value Village)
- Baby clothes – (I bought a new onesie, $8.00 at Walmart but could easily have bought used at a thrift shop. I just wanted new!) J FYI: Had to buy newborn/premier size to be able to fit the doll properly.
- Baby bonnet/cap (optional) – (got knitted cap for $2.00 at Value Village) Found it in the kids section, but it fit me. I must have a small head.
- Baby bottle and stuffed animal (optional) – (bottle was $1.00, and little TY bear was $2.00, both from Dollarama) You could also do a soother!
- Skewers (to work baby’s arms) – ($2.00 from Walmart for a set of four, but I only needed two – but now that I think of it, could have used the other two to work the legs, LOL!)
- Bib – free, donated by a friend
- Blue contacts and fake eyelashes – I had these from a previous costume. Thought they would look better than my dull green eyes!
Tools
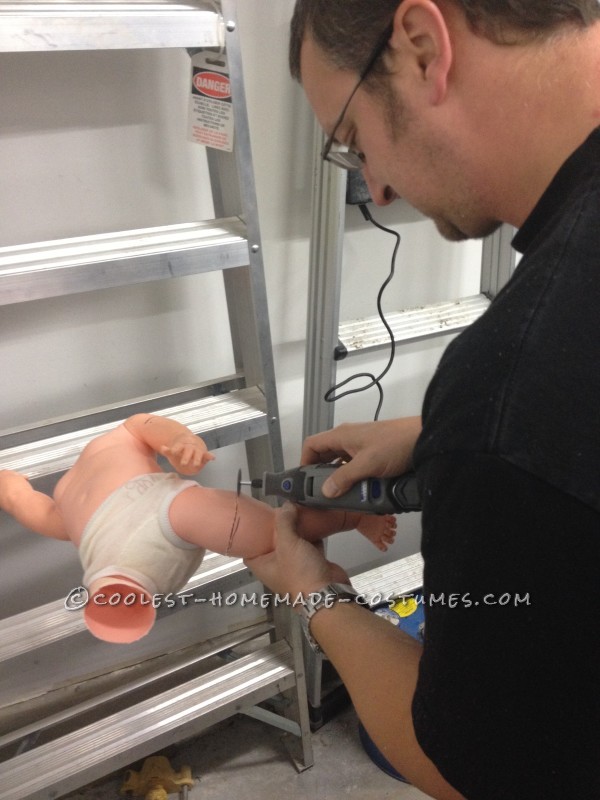
- Dremel tool – (used this to cut the doll hands/feet off the arms/legs)
- Scissors
- Hot glue gun (and about 30 sticks of glue) J (need to buy some more glue sticks, $1.75 at local Dollar Store) Mine was a small/mini glue gun.
- Sewing needle and thread
- Packing tape – to stabilize box, secure loose cardboard and tape down coat hangers
- An elastic (to help hold baby bottle to baby’s hand) glue gun would not work, neither would self-stick Velcro. Maybe if I sanded the hand down? The plastic was just too smooth for anything to stick.
Total spent on costume $78.75 (but go to thrift stores, you will not even spend half of that I’m sure!)
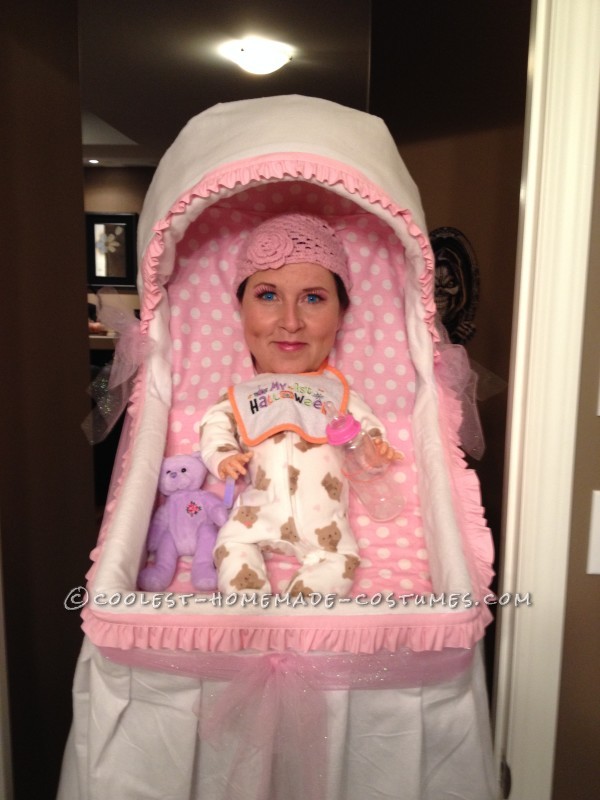
Costume front view
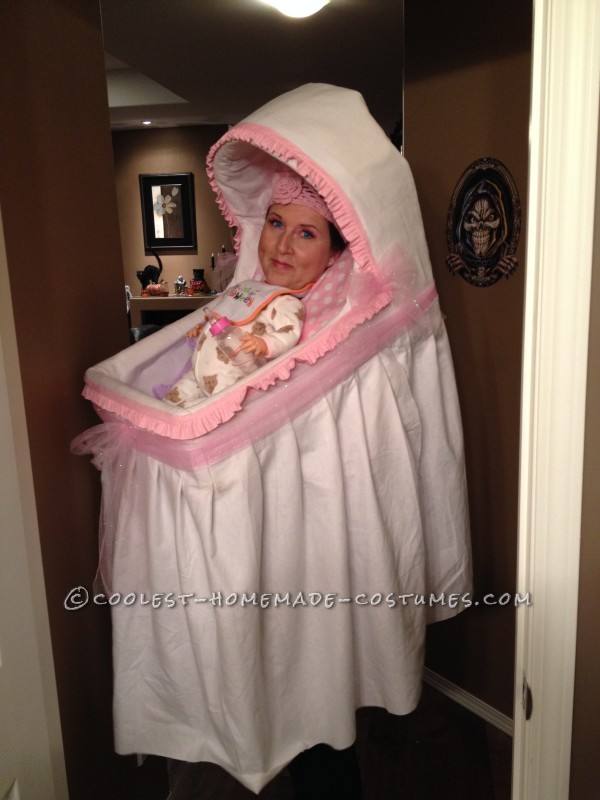
Costume side view

Baby selfie!
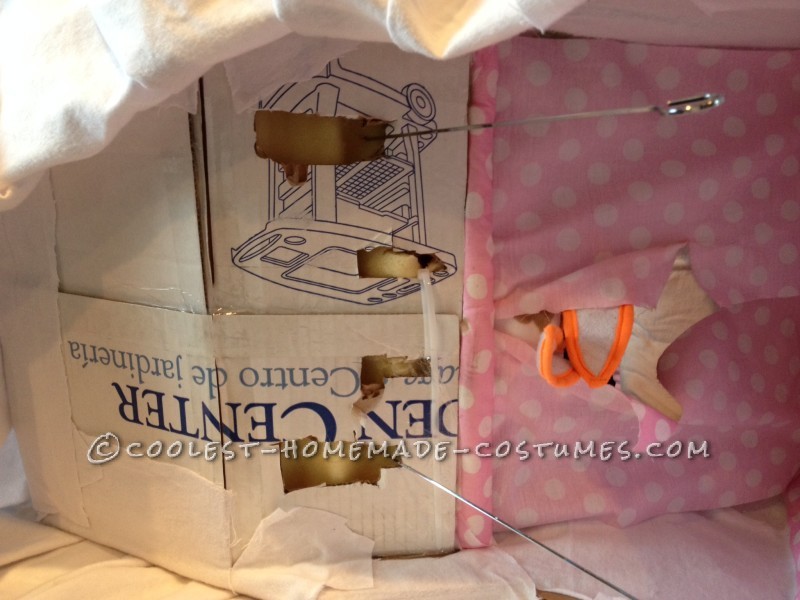
1) Create bassinet structure/frame
To create the bassinet, I used a cardboard box and two coat hangers to make the shape of the canopy. I cut an opening at one end of the box that I would poke my head and shoulders through. I kept the box a little taller at the back to help shape the canopy as well, and to have the back to lean on with my head which helped keep the box level.
I cut part of the bottom of the box to angle it up, as I knew I would have to angle the baby up to make it look like my head was sitting properly (otherwise I’d need to lay down to look like my head was situated on the doll properly). I used packing tape to keep the angled cardboard in place. I did have to cut small crescents out near where my arms/shoulders were to give me more range of motion, as I found I could not reach inside the box from around the outside – this weakened the box though, so I added some strips of cardboard to the inside to strengthen it.
Also used packing tape to attach the coat hangers – which I just bent into the canopy shape.
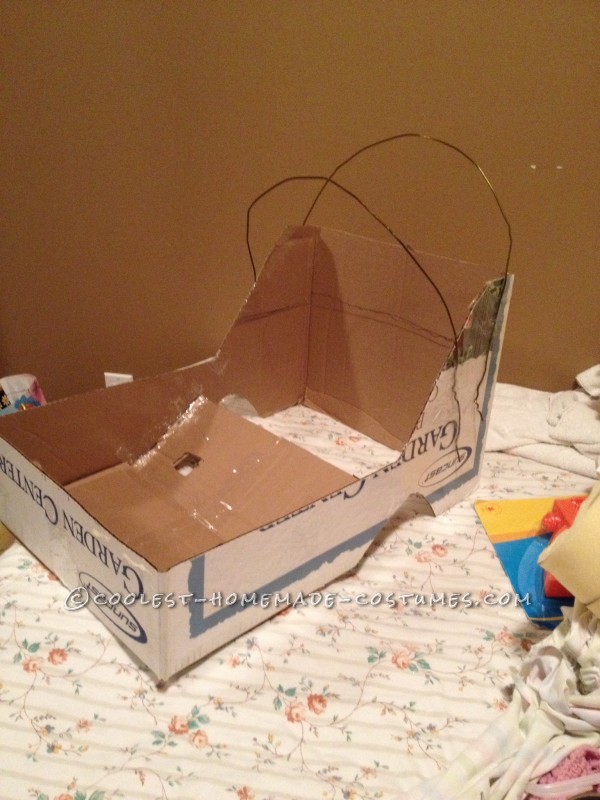
Bassinet structure
2) Add foam padding
I used hot glue and added foam padding ($1.00 from thrift shop) to give the bassinet some cushion so it wouldn’t seem thin – and to also have something to glue the fabric to. I wanted it to look cushioned and real.
I laid the foam on the table and placed the bassinet on it, and basically just cut out the pattern of the box, adding a few extra inches around to be able to wrap around and glue. I did have to use needle and thread around the canopy, because I didn’t cut properly, and just wanted to make sure the foam would stay in place there. Was worried about the weight of the material maybe sagging the foam somehow or the hot glue not holding up.
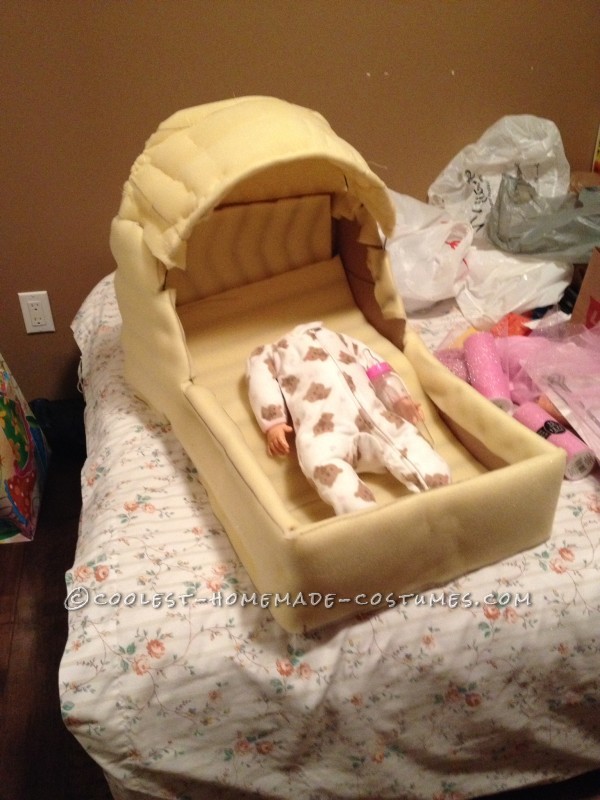
Add foam padding
3) Add material
I did the material in sections. Didn’t really have a game plan, but I bought extra material in case I messed up! I used white diaper material for the outside of the box, some of the inside and the pleated skirt of the bassinet, and used the pink polka dot material for the mattress, inside canopy and the backdrop for behind my head (to hide part of my neck and shoulders). In the backdrop, I made a cut in the material, hoping to squeeze my head through, but the material was not stretchy, so I had to cut the hole quite big, which weakened the toughness of the material, making the backdrop sag more than I wanted. I used hot glue for ALL of the material. Not one bit of sewing! I was able to easily make the pleats for the skirt – this part took the most glue, but it was WAY faster than sewing, that’s for sure! Added ruffle around canopy and box of bassinet – for looks and to also hide seams. Added tulle around seams of pleated skirt to pretty it up and to hide seams. In hindsight, I’m thinking picking white might not have been the greatest idea, because at a party many things can be spilled on it, or it can get dirt from transporting it and just general wear over time. I may have to become very good at spot washing! Printed material may be a better choice as to hide any dirt or stains.
Added material
4) Prepare & secure the doll
This was the funny part of the costume. First, I had to take the doll’s head off. When I told a co-worker I did this, she told me I would be possessed by a demon! (I think her parents told her that so she wouldn’t rip the heads off her dolls when she was little!) Anyway, I think I’m okay, no demon activity so far, well, no more than usual anyway!
I wanted the dolls arms to be flexible, so I could manipulate them like a puppet. At first I kept part of the legs/arms, but in the end, I yanked them all off and had my husband cut the wrists/ankles off – this was also sort of funny/creepy, because from in the house, it sounded like someone was being put through a wood chipper, and then going in and seeing him hack up baby parts was a little disturbing; he said he felt like Dexter!
Then I hot glued the hands to the cuffs on the onesie, and just threw the feet into the toes of the onesie to give it some shape. Then I stuffed the legs and arms with the polyester stuffing to give them shape. I ended up covering the neck hole with fabric, because when I tried the costume on, the plastic scratched my neck. I strapped the doll down to the box by cutting holes through the bottom, slicing through the foam and material and running the zip tie through a few cuts in the onesie. This part I had to try a few times, as I couldn’t get the doll in the right place to fit snugly against my neck.
It still wasn’t quite right by the time I was ready to go out, but I made do. Will have to adjust it some more.
Amputating the doll
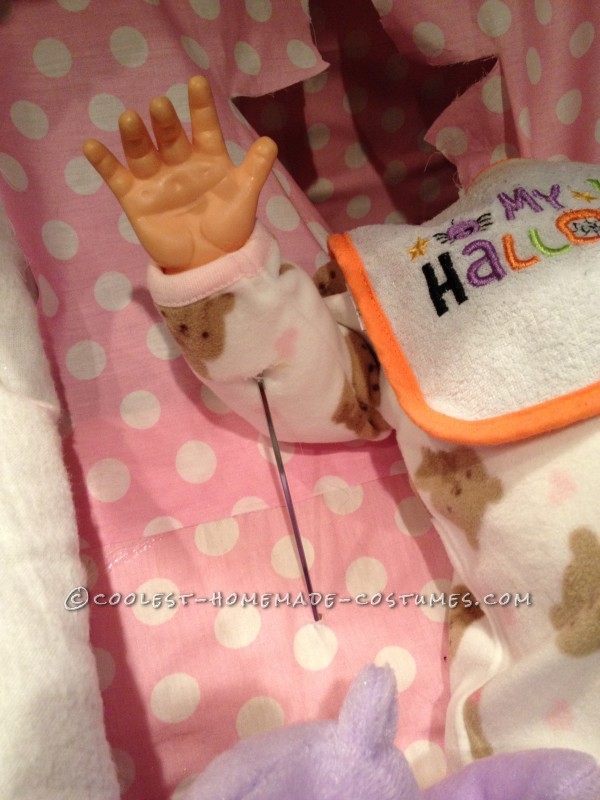
5) Add skewer to work arms of doll
I cut out holes for the skewers at the bottom of the box, and poked them through the material. Then I stuck them through the wrist of the onesie into the open wrist of the doll. Then I hot glued the entry point into the onesie so the skewers wouldn’t come loose/pop out. Now I could work the arms like a puppet – which was the BEST feature of the costume! Everyone that saw me just thought it was so funny, but wait, then I started moving the arms and waving at them, and they REALLY cracked up laughing!

Related costumes:
 Coolest Baby in a Bassinet Illusion Costume
 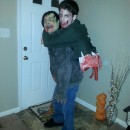 750+ Horrifyingly DIY Spooky, Gory, Dark and Scary Halloween Costumes
  140+ Mesmerizing Headless Scary Halloween Costume Ideas
 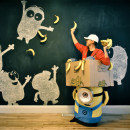 Coolest Homemade Minion Carrying a Box Illusion Costume
 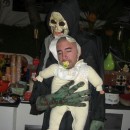 Funny Homemade Illusion Costume: Alien Baby Abductor
  Realistic Baby Abduction that Freaked Out Every Adult at the Party!
 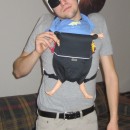 Funny Baby Carlos Halloween Costume
  Crazy Baby Octopus Costume With Moving Tentacles
Wow, really great job on this! It’s all in the details, right? Great to have a handy man too… You will probably appreciate this one too, a costume I did (with help) before I knew about this website…. http://fiveanddiamond.blogspot.com/2008/10/morticia-gomez-and-thing.html
_ Lisa (artistic tree lady)
Wow, really great job on this! It’s all in the details, right? Great to have a handy man too… You will probably appreciate this one too, a costume I did (with help) before I knew about this website…. http://fiveanddiamond.blogspot…
_ Lisa (artistic tree lady)