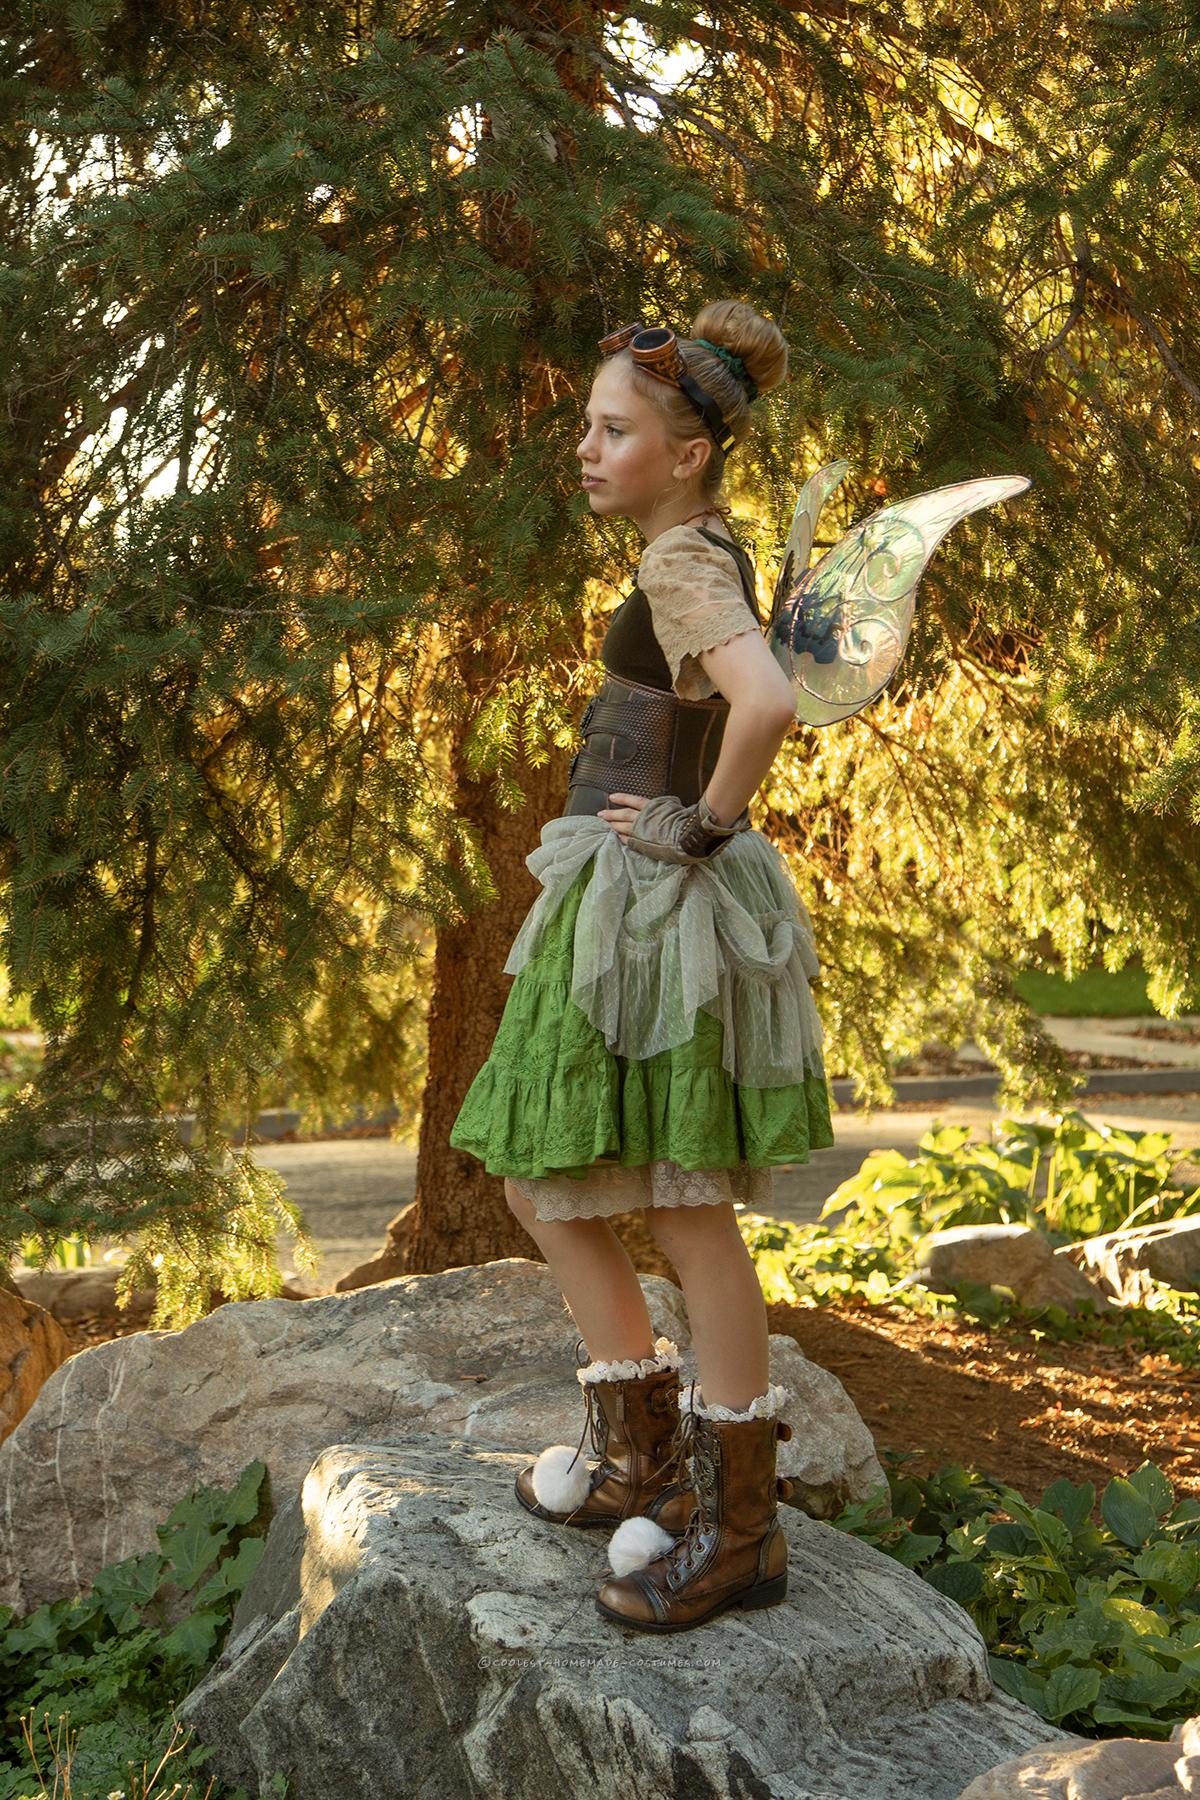
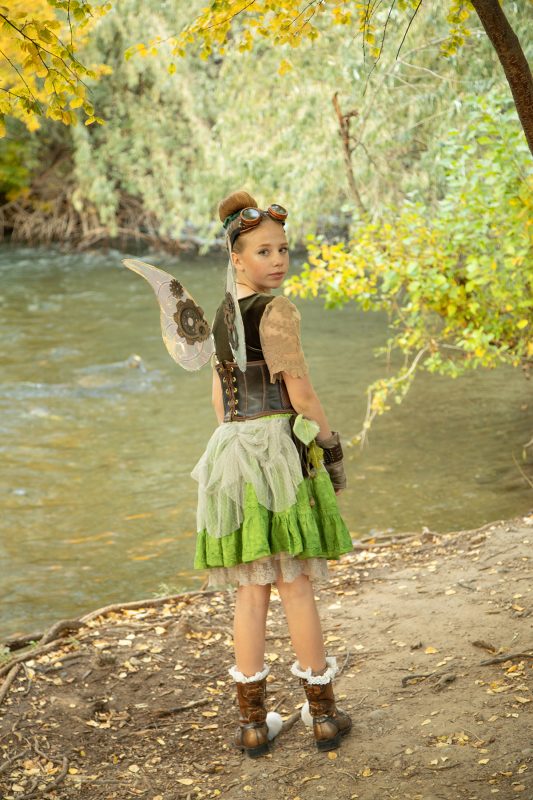
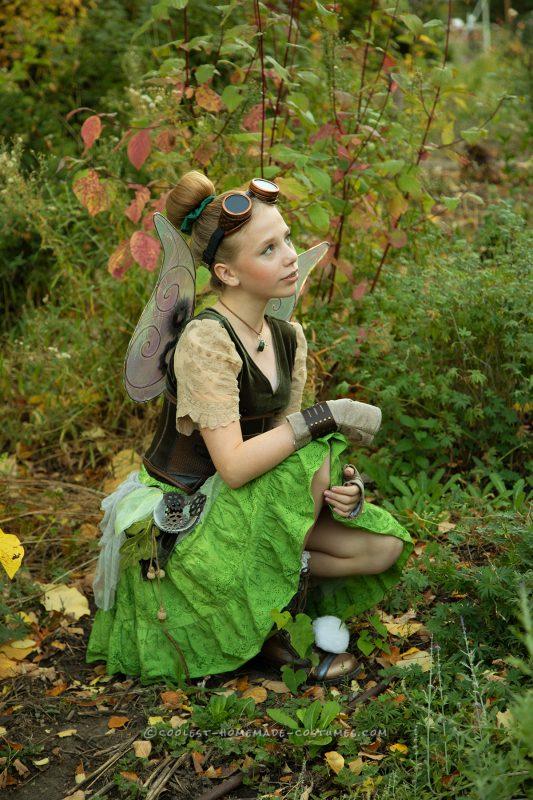
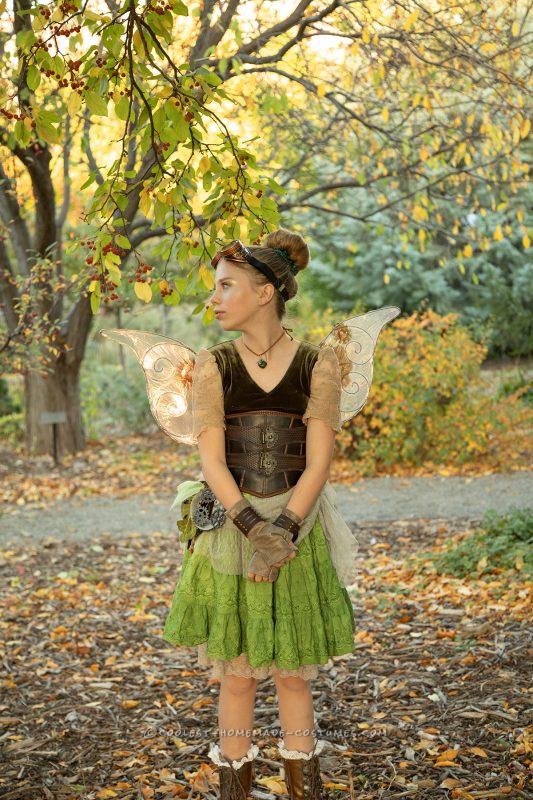
I actually made this Steampunk Tinkerbell costume for a past Halloween, but my youngest daughter loved seeing it on her older sister so much, she wanted to wear it as well. I made a few adjustments and upgrades, and it was as good as new. This costume consists of so many different parts. I was able to get much of it by thrifting clothes we found and giving them a new spin and new life.
The Top
Tinkerbell’s top is a mix of two shirts. One was a green velvet shirt that I cut the sleeves off of. The other was a lacy shirt whose sleeves got used.
The Skirt
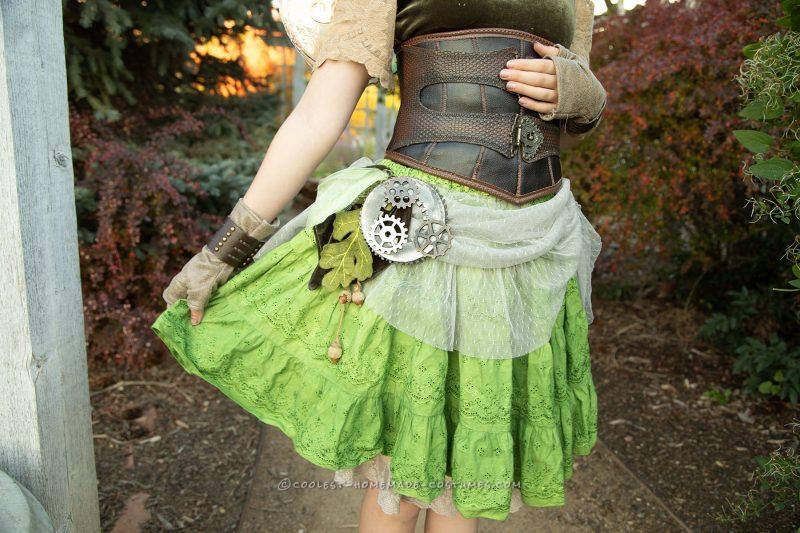
The skirt was a long, white eyelet skirt. I dyed it spring green and shortened it to knee length. Then, I used the tan tulle from another skirt to add some flounces. The tan tulle came from the same skirt that I used for the lacy underskirt, to add a peek of lace and a little more volume from some fabric store tulle.
Steampunk Touches
To make the skirt more Tinkerbell-like, I sewed on some leaves from green velvet and green felt, as well as green organza. I tied on some gathered acorns for a natural touch. To make the skirt more steampunk, I used craft foam and metallic rub-n-buff to make a gear wheel. Then, I used craft store metal gears layered on top and attached the whole thing to the waistband. It does pull on the skirt a little since the gears are heavy, but it doesn’t seem to bother my daughter too much.
The Corset
Every steampunk lady needs a leather corset, even Tinker Bell, so that was my next project. I used the duct-tape and plastic wrap method to make a pattern. Then, I used craft foam as my base and faux leather sewn together to make the actual corset. I found some metal door closures at a craft store and used those on my faux leather straps on the front. I used grommets and string to actually cinch it all together in the back.
The Wings
The wings were a lot of trial and error. I finally found the right combination of bendable but heavy, yet light-enough wire to make the design I wanted. Then, I used iridescent cellophane, sprayed it with spray adhesive, and sandwiched the wire with a top layer of cellophane. Then, I used a heat gun to melt everything just enough to tighten it up and look nice. I cut a few more gears from craft foam and glued them to the middle of the wings. A wire “U” shape allows me to tuck the wings into the back of the corset.
The Finishing Touches
The gloves were sewn from faux leather fabric, and then I cut up a thrift store belt and attached the wristbands with Velcro.
Last but not least, the boots were a thrift store find. I used rub-n-buff to make them more metallic and steampunk, and even used my last two craft store gears threaded through the shoelaces. The white pom-poms finish off the look.

Related costumes:
 Original Steampunk Assassin Halloween Costume
  Coolest Ever Homemade Tinkerbell Steampunk Costume
  ComiCon Costume for the Tallest Steampunk Elf Imaginable
  Awesome Homemade Steampunk Costume
 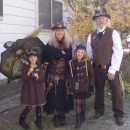 Halloween Steampunk Style Family Costume
  Awesome Steampunk Couple Costume: Steam-Powered Girl and her Creator
  Coolest Family Costume Tales of a Steampunk Alien Invasion
 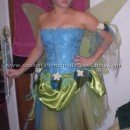 55+ Coolest Homemade Fairy Costumes
Your comment has been sent successfully.