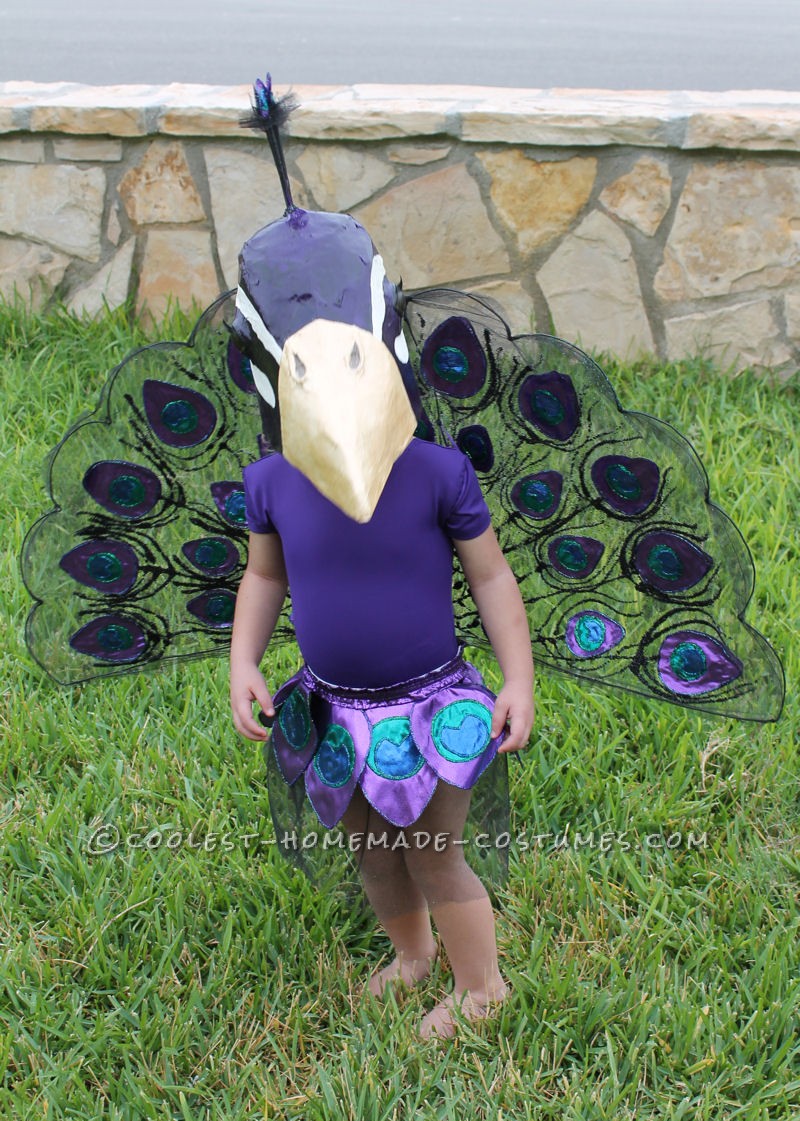
This toddler peacock costume is honestly very time consuming and has many tedious steps, but will be beautiful and well worth the time once completed. The materials used are: sheets of cardboard, heavy duty box cutter, newspaper, water and flour for paper mache, one ping pong ball cut in half for the eye, hot glue and glue gun, masking tape, wooden bbq skewers, paint and brushes, fake eye lashes, for feathers and body 3 different shades of shiny tissue lame fabric, 2 packages tulip sparkle T-shirt fabric paint in the same color, one leotard, spool of thin bendable wire, black glitter, school glue, and black sheer material (tulle), elastic for waist band, thinnest elastic for shoulder straps, sewing machine and thread, and butcher paper for drawing out large patterns.
The Head/Mask:
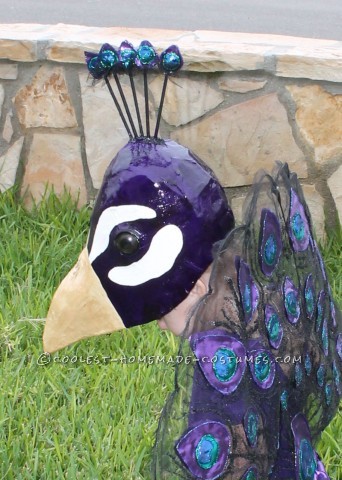
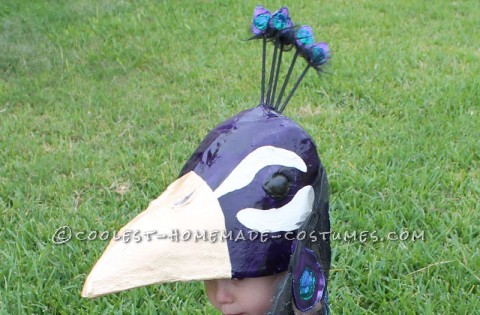
For the head you will get your sheets of cardboard cut from a box with your box cutter. Draw the shape of the head and beak of the bird and cut 2, making sure it is large enough to fit the person’s head once it’s cut out and taped to another side. I take the cardboard and work it a bit by bending it and flexing it so that it is curved. Bend and curve the other side in the opposite direction so that if you tape the ends of the beak together at the end, it will form a curve around the sides of your head like a baseball cap. Now cut strips of cardboard to tape to the sides to form a dome on the top and the back of the two sides to close off the head making a ball cap like structure. It should fit comfortably on the head like a cap.
Next comes the paper mache. It gets very messy, so prepare your workspace with a tarp for easy clean up or just work outside for hassle free clean up. Mix flour and water in a large bowl to a soupy consistency. Warm water is best. Tear strips down the news paper (because it’s easier tearing down than across). Dip the strips, scrape off excess goo back into bowl, and apply to head/mask by laying flat and smoothing out wrinkles. Continue until the entire head is covered. You may wish to put on more layers to make it a harder, more durable mask. Let it dry thoroughly. Make sure that the opening for your head doesn’t get smaller while its drying, because it has happened to me before and it will become quite uncomfortable on your head, esp. if it’s a kid who’ll be wearing it. Place it on something wide enough as your head to dry, like an upside down coffee can or flower pot so it won’t lose it’s shape or size while wet.
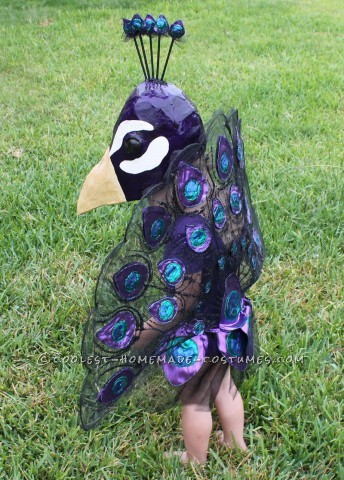
Put in direct sun on a dry and warm sunny day for best and fastest drying or just place a box fan in front of it inside. Once dry, you can continue to draw your markings on the head while looking at a good photo of a peacock from online. Draw where the eyes will be glued, white stripe lines, where the crest on the head would go, etc. Get an ice pick or a nail and poke some holes to accommodate the wooden skewers that you will use for the crest on the head. Cut them as long as you wish and stick them about a half inch into the pre-punched holes. Glue them from the inside and outside with hot glue. Glue each ping pong eye in place with hot glue. Once dry, outline the eyes with a t-shirt paint color that came in the package that you do not intend to use for your feathers. Paint your desired colors. I found a nice pearly translucent gold color for the beak and painted over white to achieve the color in the photo. Paint the eyes last. You might want to put a coat of varnish on the eyes to make them glossy and realistic or just use glossy paints. After it is completely dry, attach the fake eye lashes to the top of the eyes, right where the edge of where the eye begins and the outline of t-shirt paint ends.
Fan Tail:
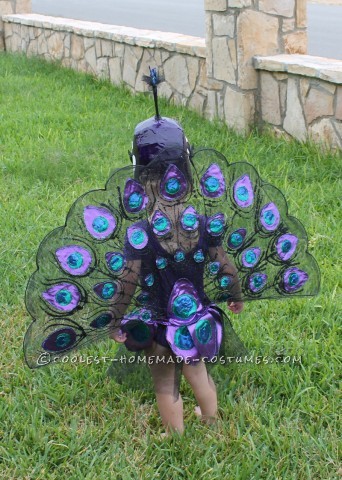
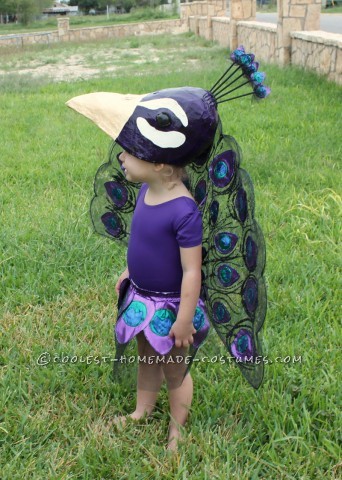
For the fan tail, get the butcher paper and draw out your fan tail. You will use the spool of wire to bend the shape outline, and then use that same pattern to cut two fan tails out of the black mesh material, leaving enough room for a seam allowance for those of you that are familiar with sewing. Bend the shape of the fan tail with the wire, but leave about 3 inches extra slack on the end to twist together. Also, there will need to be two support wires that will run from the bottom middle of the fan tail, to the top and to each side of the top most curved feather hump. This will keep the wire frame from bending and collapsing on itself from the weight and add some support. Once your wire frame is bent and the wire ends (about 2 or 3 inches worth) are twisted together at the middle and bottom of the frame, you can sew together the two cut pieces of mesh in your fan tail shape as if you were making a pillow, but leaving the entire bottom side unstitched. Either turn the stitched mesh inside out like you would if making a pillowcase or just leave ends as is. Take some masking tape and wrap all the twisted wire ends several times to make it soft so it won’t stab or scratch and spray paint the entire frame black. You can also wrap the twisted parts several times with fabric to make them softer, preferably with black. Now carefully stitch the bottom side of the fan tail together with a sewing machine, paying very close attention to not break your needle on the wire or just hand stitch. I put one very good thick stitch by hand at every valley in between the humps at the top of the wire frame, stitching the mesh around the wire a few times to keep the mesh and wire from sliding out of place.
Feather “Eyes”:
Now moving on to the pretty, sparkly lame material. Start by making a pattern on paper for the feathers. Draw a large tear drop shape, and then a smaller oval shape in the middle, and then a smaller shape that looks like an upside down Pac-Man (pizza with a slice missing?). These three shapes together are a feather “eye”. Each shape in the “eye” will be a different color. Find out how many large shapes you will need for each hump in your fan tail. The top feather eyes will be largest, then the next row of eyes will be medium, then the next small, then smallest. Count how many you will need for each size and then draw the patterns for the different sizes and cut out and trace the patterns onto the lame for how many you will need for each size. Make sure you make a front and back for each eye, because since the fan tail is see-through, you will need to glue an eye to both sides in every spot.
In other words, when you figure out how many eyes you will need for each size from your pattern drawing, double it! Make sure you include enough smallest sized eyes to sandwich together on top of each wooden skewer on the top of the mask for the crest. Also make enough extra of the largest eyes for the skirt pleats or make another larger size of eyes to go all the way around the skirt waistband. This is what I meant by the tedious and time consuming part! I didn’t enjoy having to trace all those little shapes and worse, cutting them out was horrible. I had wrist cramps!! Had to take lots of breaks!
Once all your shapes of all sizes and colors are cut out, then with one dot or a few, glue the three shapes of one eye together for each size. Once you are done doing that tedious task, outline each color of each shape for every glued eye in the same color of glitter T-shirt paint as the fabric. This is necessary because the tissue lame will fray and fall apart if you don’t finish off the cut edges with the paints. And then all that tracing and cutting would all be in vain! Even though its necessary to use the paints to keep the eyes from falling apart, it also makes them look very beautiful in the end! Real peacocks seem to sparkle with their vibrant, jewel toned feathers, so the more sparkle, the better!
Once the t-shirt paints are all dry, hot glue them in place onto the fan tail mesh. Once one side is done, flip it over and glue the rest of the eyes to the back of each eye glued on the front. Now using the school glue and black glitter, draw some frilly feather curls and lashes around each eye as if it were a real peacock feather. Let completely dry. You may choose to do this to the other side or not. If you choose to only glitter one side, make sure the glittered side is on the back side and not the surface that will actually be touching the person’s back because the glitter tends to be scratchy and irritating to bare skin. Measure each shoulder for how much elastic to use for the arm loops, making sure that it will hold the wings but not be too tight. Now hold the fan tail in place on the person whom the costume is for or ask for assistance if the costume is for you. Find out at what height the fan tail should be worn on your back. Then make marks on the fan tail directly behind your shoulders where you will attach the thin elastic to hold the fan tail onto your back, like traditional store-bought fairy wings. It worked out perfect for my daughter because I was able to attach the elastic by hand stitching each loop to the two support wires that run through the middle of the fan tail. I painted my elastic to match the leotard so it’s practically invisible.
Skirt:
Now measure the waist of the person that the costume is for. Cut the elastic to the appropriate length. In the same color of lame fabric as your leotard, you will cover the elastic to make the waistband of the skirt. Stretch out the elastic and make marks on the lame fabric at the ends of the stretched elastic. Cut a strip that is wider than the fabric, but the length of the marks that you just made. Take the top and bottom edges of the cut strip of lame fabric and fold them in and press with an iron on a medium setting. Stitch the fabric onto the elastic while it is stretched out, then when released, it will shrink down, gathering the material. Now pin in place to the back side of the elastic, each pleat of the extra larger feather eyes that you have prepared to make the skirt. Leave enough space on each end so that the elastic can be stitched together at the ends. Once all pinned, carefully stitch and avoid running over a pin with your sewing machine needle. Now take some of the leftover black mesh that you used for the fan tail and cut a strip that is longer than the elastic waistband, but is the length that you would like it on your legs. The more longer the fabric is than the elastic, the more frilly and tutu like the skirt will be. The less longer, will end up looking more like a mini-skirt.
Using the sewing machine, stitch a very loose stitch along the top of the black mesh. It might help to do small stitched sections that are only about 4-5 inches long. Take the end of the thread and pull it and the fabric will start to gather up. Gather up the entire top of the black mesh for the skirt and then tie a knot in the thread to hold it in place for stitching. Pin the gathered top edge of the mesh to the back side of the elastic and stitch on. Now stitch the ends of the elastic together. The skirt is now complete.
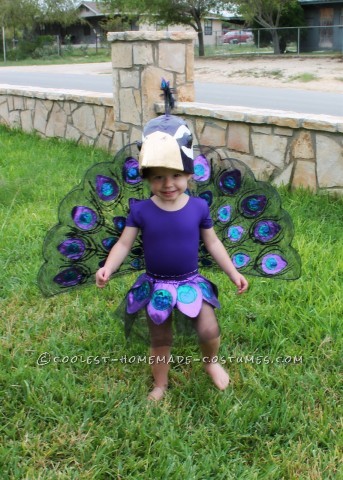
Now put it all on. The leotard first, then the skirt next, and then fan tail. The twisted and taped wire end at the bottom of the fan tail frame should be tucked into the back of the skirt. You can even hand stitch these two together if you wish. Now put on the mask. Now all you need is to pick out the perfect pair of shoes. Maybe some dance slippers, black Mary James, flats or jellies would do. Now you are ready to go trick or treating or to the costume party! This is a very tiring costume to make, so doing a little at a time helps. Give yourself a week or two or a month to get this done in order to keep your sanity! Enjoy!
Finalizing:
Now put it all on. The leotard first, then the skirt next, and then fan tail. The twisted and taped wire end at the bottom of the fan tail frame should be tucked into the back of the skirt. You can even hand stitch these two together if you wish. Now put on the mask. Now all you need is to pick out the perfect pair of shoes. Maybe some dance slippers, black Mary Jane’s, flats or jellies would do. Now you are ready to go trick or treating or to the costume party! This is a very tiring costume to make, so doing a little at a time helps. Give yourself a week or two or a month to get this done in order to keep your sanity! Enjoy!

Related costumes:
 12 Coolest Homemade Parrot Costume Ideas
  Top 10 Stunning Homemade Peacock Costumes to Inspire Your DIY Costumes
 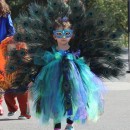 Beautiful Peacock Costume for a 3 Year-Old Girl
 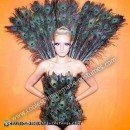 Linda’s Awesome Homemade Halloween Peacock Costume
 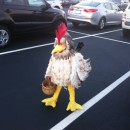 A Chicken So Realistic, She Almost Laid an Egg!
 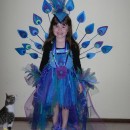 Pretty Homemade Peacock Costume
  Grooviest Homemade Leopard Frog Costumes
 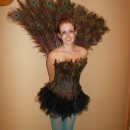 Sexy Homemade Peacock Halloween Costume
Your comment has been sent successfully.