
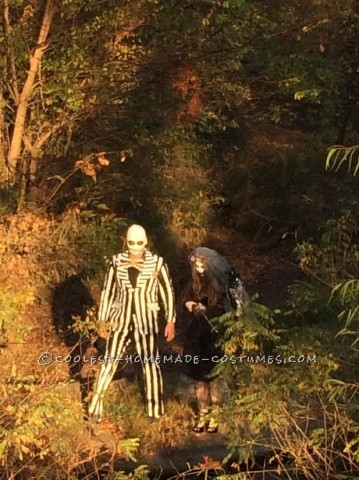
How did we come up with this Mr. & Mrs. Skellington costume idea?
A couple of years ago I was shopping for pumpkins at a local store. Carving pumpkin has always been one of my favorite activities for Halloween! As usual I was taking my time trying to find the perfect pumpkin for the design I was wanting to carve, but I was starting to get discouraged as each pumpkin I selected seemed to be sinking in or extremely lumpy. I was about to give up and walk out of the store when I heard a males voice say, “Do you need help finding a pumpkin ma’am? I am sure I can assist you for I am the Pumpkin King”.
This made me laugh as I turned around and said, “The Pumpkin King? I think not! I don’t see Jack Skellington!” We laughed and I allowed the “Pumpkin King” to help me find the perfect pumpkin. Being that he was 6’4 he was able to reach pumpkins I couldn’t even see and I was very satisfied with the pumpkin he selected for me.
As he escorted me to my vehicle he asked if I would be available for dinner sometime in the near future, thus starting the beginning of our relationship. We are now engaged to be married, so this year we wanted to create our costumes as a couple. It was easy enough to decide which characters we wanted to be; however Jack Skellington does not have a bride so we decided to create her! Being Mr. and Mrs. Jack Skellington not only symbolizes the beginning of our relationship but also our eternal love in our marriage and in the life after.
What items did we use to make this costume? And how?
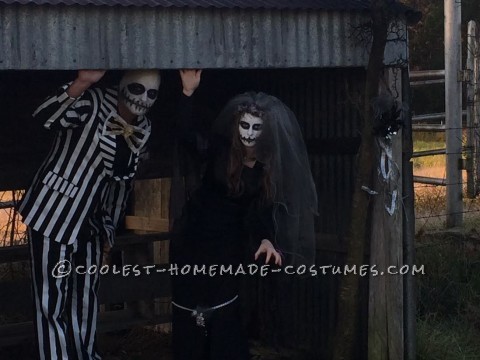
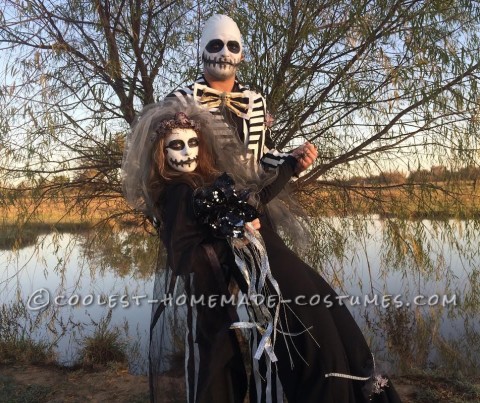
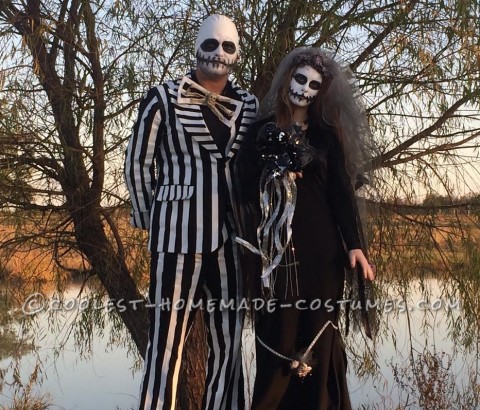
Items used for Mrs. Skellington:
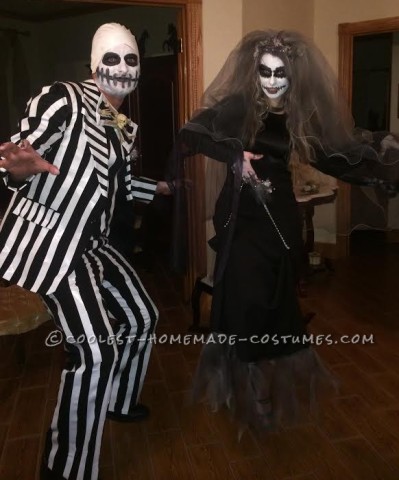
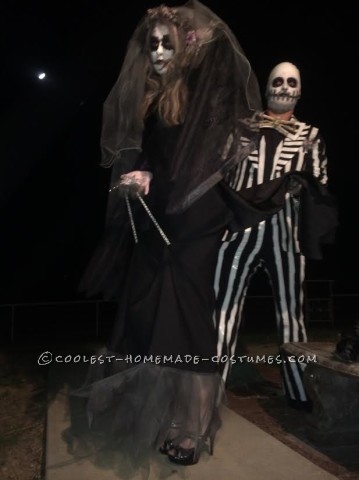
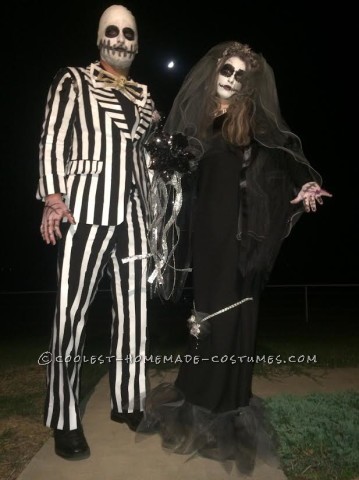
- Dress – We purchased a long, black, short sleeved dress from a second-hand store.
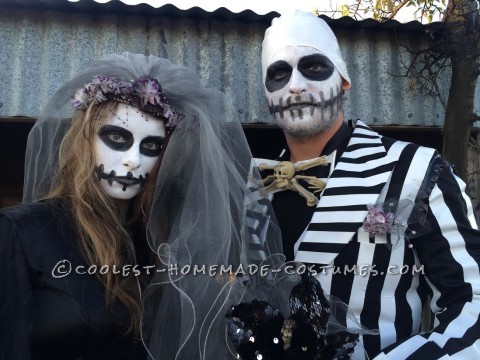
- Veil – We bought an old hat veil from the second-hand store. We removed the hat from the veil and lightly spray painted the veil netting black. Next we removed the flowers from the the hat and hand brushed them purple. Then we hot glued them to an old comb headband and sewed the veil to the back of the headband. Next we took some black leaves from old silk flowers and plastic spiders then randomly attached them to the veil.
- Dress Train – We used an old black neck shawl to make the train. In the center of the shawl we attached a large snap to the center of the shawl and also to the center of the of the dress. Next we lightly spray painted some old netting black and formed it into a bow then hand sewed it to the center of the dress train.
- Sleeves – We took an old portable door screen and cut it into large rectangles to fit the hole opening of the sleeve area and attached them by hand stitching them to the dress. We left the end seems open and cut triangle edgings at the bottom of each sleeve.
- Hem Trim – We took old netting and lightly spray painted it black. Then we cut long rectangle strips out of the old netting. Next we cut triangle shapes on one end of each rectangle making enough to cover the bottom of the dress. Once finished we sprayed the rectangles with fabric stiffener and let it dry. Then we sewed it to the bottom edge of the dress hem as to point outward for when walking.
- Front Dress Lift – Lower front dress decorated to use as dress lift if needed. We used a silver notion and sewed it to the dress trim on each lower front side seem. We formed a loop in the center of the notion to fit my index finger we hot glued it in place to keep its size – using this to lift up the dress away from shoes as needed – we accented the notion with old lightly spray painted black netting and formed it as a backing by cutting multi-layered rectangles and folding them in half. Next we took some old baby breath – removed it from old veil – we painted them purple, by hand brush, and fastened them together with black electrical tape and hot glued them to the silver notion.
- Bouquet – Using a single black sequenced stem flower and one accent silver streamer we attached them with black electrical tape and used white netting that we lightly spray painted black and formed it into a rounding background then attached it to the flowers with hot glue.
- Wedding Ring – We used a silver beaded notion trim and hot glued it together to fit my ring finger and topped it with a large plastic spider.
- Necklace – A silver vintage choker from the 1960’s – a gift from my mother
- Black Long Sleeve – Nylon black undershirt for warmth
- Shoes – Store bought dress shoes
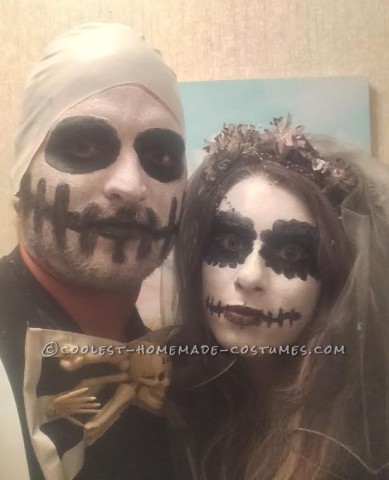
- Make up – Purchased from store and hand painted onto face and hands
Items used for Mr. Skellington:
- Black tux – Purchased from second-hand store.
- Pants – Using 1″ continual strips of white duct tape we attached it to the front and back of the pants in 2″ intervals from the waistline area to the bottom hem edge the tape was cut at the pocket for easy access.
- Vest – Using 1″ continual strips of white duct tape we attached it to the vest on the font and back in 2″ intervals – Starting at the shoulder seam and going down to the bottom of the vest. We decorated the pocket tops with four small strips of white duct tape – cutting at the pocket opening for easy access.
- Jacket – Using the same duct tape procedure as the vest – Other than removing the outer sleeves from the jacket leaving only sleeve lining because the jacket was so tight. Then we attached duct tape strips to the jacket sleeve linings.
- Bowtie – Using an old black portable door screen we cut it into a small rectangular square and 3.5 inch strips of white duct tape was attached across the square. The center of the square was gathered and stitched. Head, feet, upper leg, and body parts from a plastic skeleton were used to decorate the bowtie. A 1″ by 12″ screen strip was sewn to the bow tie to go around the neck and a large snap was sewn on the strip sewn on the strip for easy removal.
- Wedding Ring – We used a silver beaded notion trim and hot glued it together to fit my ring finger and topped it with a large plastic spider.
- Shoes – Store bought dress shoes
- Make up – Purchased from store and hand painted onto face and hands
- Bald Cap – Spray painted it white purchased as flesh color
What reactions did we get when wearing this costume?
We had reactions of all sorts! Some marveled at our work, others were standoffish, and a child even screamed! All were compliments in our eyes! We plan to keep our costumes for years to come as memorabilia not only because of the hard work that was put into creating them but also because of all the fun we had while we were in costume.
What inspired us to create these costumes? Why should you pick us as your winner?
What inspired us were the first words ever exchanged between the two of us. “Jack Skellington the Pumpkin King” story of how we met will never get old. We think you should select us as your winner not only because this symbolizes our love story but also because of all the hard work and detail put into our costumes!

Related costumes:
 Coolest DIY Nightmare Before Christmas and Jack Skellington Costume Ideas
  Best Homemade Jack Skellington Costume Ever Made
  Cool Jack Skellington Homemade Mask and Costume
  Jack Skellington Sr. and Jack Skellington Jr Costumes
 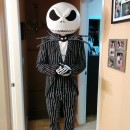 Amazing Jack Skellington Nightmare Before Christmas Costume
 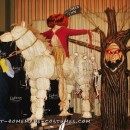 Epic DIY Tim Burton’s The Nightmare Before Christmas Group Costume
 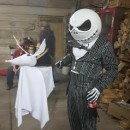 Cool Jack the Pumpkin King Costume
 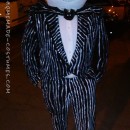 Cool Jack Skellington Costume
Your comment has been sent successfully.