
I have always loved the Nightmare Before Christmas! I know there are many fans of the movie and over the years, have seen some great costumes. At the same time there are some pretty cheap ones you can buy which just don’t do justice. Five years ago, I saw a great Jack Skellington costume walking down the road on Halloween and thought “I have to do that one year”! At the beggining of October my fiance, a friend and myself were at Value Village looking for halloween ideas when I found an amazing suit jacket that fit me perfectly! It only cost $20 and that was the start of a very long costume build.
I will try to give a detailed step by step of what I did so others can use it as a guide. There are two Jack costumes which used stilts and helped me with my build. If you are looking at this, you have probably seen there’s. I give a lot of credit to them (sorry, I don’t know their names) and couldn’t have done this in the time frame I had without taking some of their tips and putting them to use!
The Suit
Ill start with the suit.
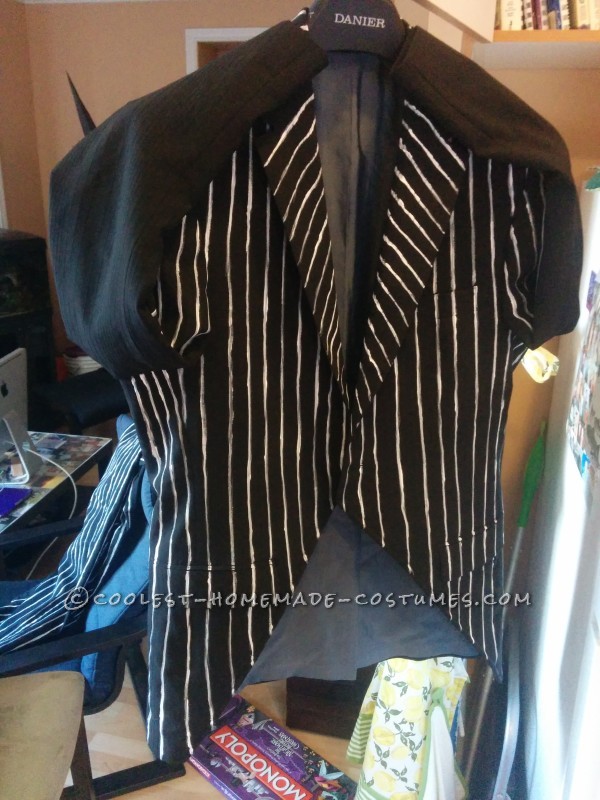
It was the easiest, yet one of the most time consuming parts of the costume. I started with getting the jacket. It’s a Hugo Boss (I know) which fit me Perfectly! I am 6’3″, so most jackets look too boxy on me if they are not tailored. Whoever owned this jacket before must have been exactly my size! My sister does some sewing, so we folded the bottom front parts of the jacket and sewed them up. We cut off the extra fabric and put on a big white button. That was the easy part! Then came the stripes, so many stripes. :-S I knew it was going to take a while to do, but it took forever, ha ha ha! I used a white fabric paint and a brush to put the stripes on. I kept the jacket on the hanger and painted sections one at a time and then would let it dry before doing another section. So for example, I did the back first, let it dry for a couple hours. Then the front, dry, outer sleeves, dry, inner sleeves, dry, collar and so on.
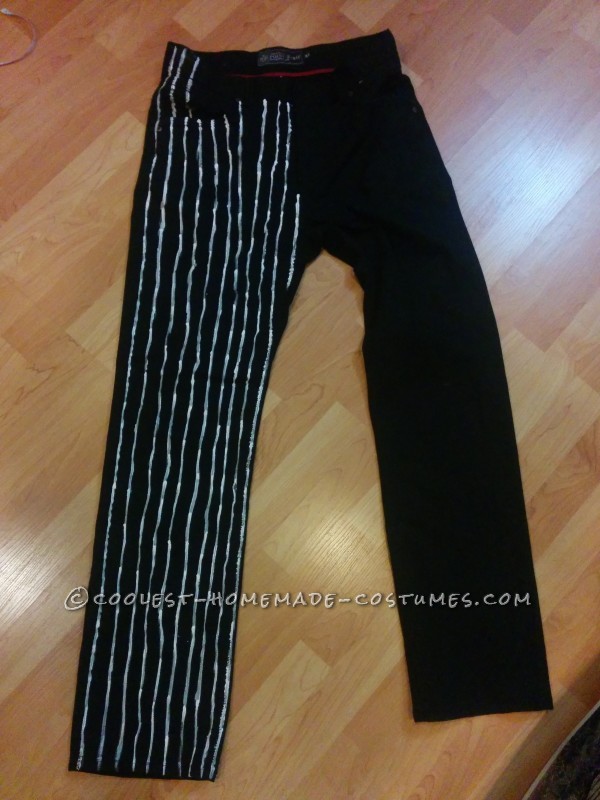
The pants were some black ones I hadn’t worn in years, so thought they’d be perfect. They were easy to paint as I could do the entire front, let it dry overnight, flip them over and then did the back. They were easy, but still very time consuming! I would say the pants alone took around three hours total.
Since the jacket was now folded at the bottom, I wanted to do something as I didn’t like the look of a white shirt showing. I bought a plain black t-shirt and cut it from the neck down to where the button would be for the jacket. I painted stripes on the shirt and it was almost like a vest. I put the pants on with the shirt and marked where the lines were for the pants. This makes it look like the lines continue from the pants up the body.
After everything was painted and dried, I ironed each part of the suit to “set” the paint. This is done so you can do the clothing and not have the paint run. You are supposed to iron a section for five minutes, bit by bit. So it turned into a couple hours of ironing but it was worth it. Where I live, it rains a LOT, so I didn’t want all my hard work getting ruined.
Lastly, I bought two things which I didn’t need to modify. First was a plain white cotton turtleneck. This was Really hard to find! I went to five stores before finding one at Walmart of all places, ha ha ha! The second thing was a pair of skeleton gloves. I was going to buy some better gloves and paint on the skeleton bones, but I didn’t have enough time this year.
The Tie
I really wanted to have a good tie! I looked at a lot online but the one I liked the most was from still of the actual movie!
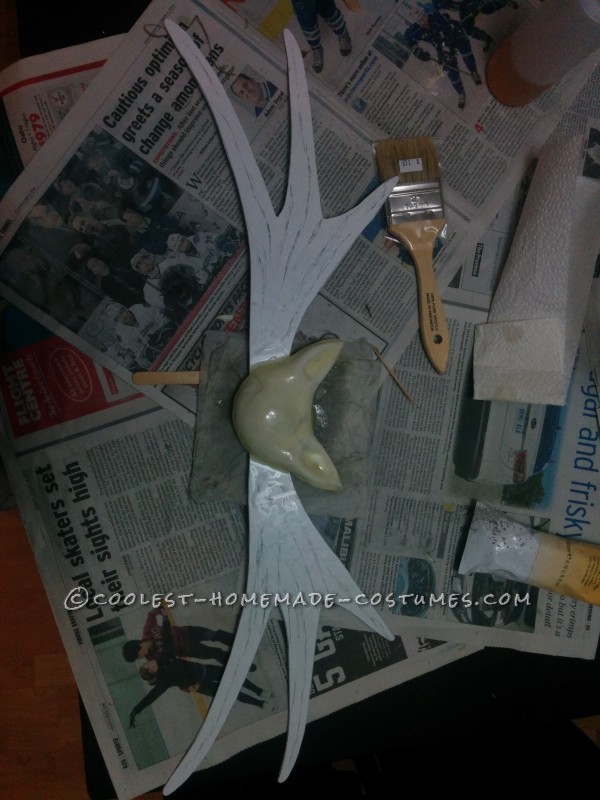
For the bat head (or is it a cat head?) I used Crayola Model Magic air dry clay. I cut out the shape I wanted out of some cardboard and sculpted the clay on top. After it was mostly dry, I covered it in two layers of 2-part epoxy. I bought some industrial grade epoxy and did two coats on the front and two on the back. Each coat took about 24 hrs to dry, so it took four days to get the epoxy work done.
I cut out the “wings” from a sheet of polystyrene I had from last year’s costume build. I ended up with two pieces and fused them together to make it stronger and less wobbly. I then epoxied the head to the wings and used the epoxy to make raised lines which I would later paint. I did this as I wanted the wings to have some texture.
After everything was dry, I spray painted the whole thing flat black and after that dried, hand painted the white lines and eyes.
To finish it off, I epoxied a white piece of fabric on the back so I could tie it on.
The Mask
Finally the mask!
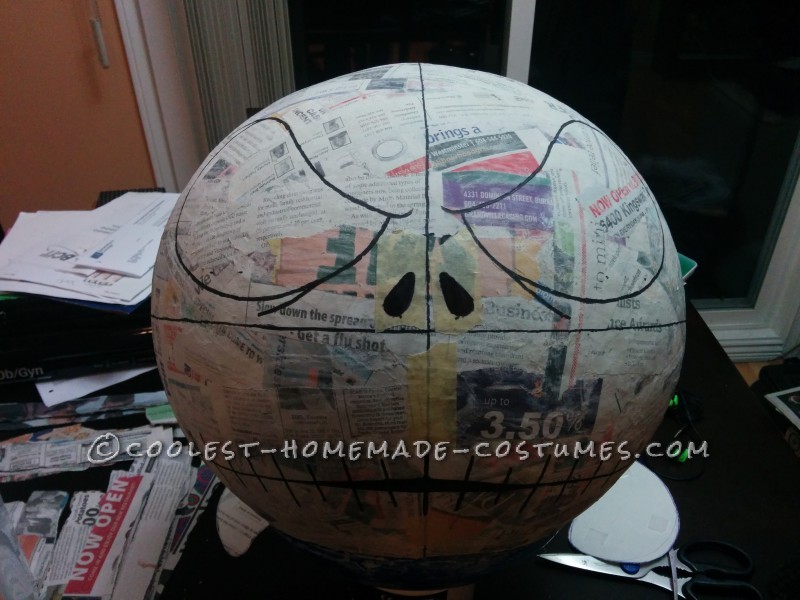
I started the mask on October 7th and finished it the DAY I was going to a party. This is because of all the layering I did. I started with getting a punch balloon and blowing it up to what I thought looked like a good size. I drew a circle that looked like it would fit my head and then started paper macheing. I didn’t cover the hole I drew as I thought it would be easier than cutting it later and I also made that area a little thicker to make it stronger. I used good old white flower and water for the paste and newspaper strips. I ended up doing four layers and letting each layer dry for 2-3 days. After the 4th layer dried, I drew on what I wanted the face to look like and used Model Magic to sculpt eyes, nose and mouth. After that dried, for a couple days I did a 5th layer of paper mache using paper towel. I used paper towel and it is easier to shape so worked well around the eyes and mouth. I let that dry for three days and then cut out the eyes and mouth. After that, it was time to started epoxying.
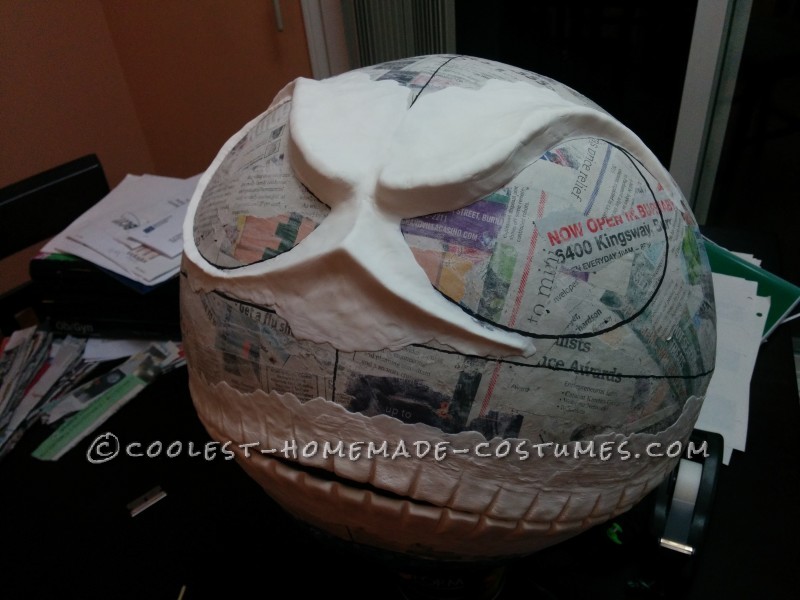
I used industrial 2 part epoxy. I did two coats on the inside and let it dry. I checked how flexible the mask was after and found it too flexy at the hole. So I got some fiberglass cloth and fiber-glassed the inside area around the hole to strengthen it. After that set, it was Much stronger! I then did two layers on the outside and after that dried, started speckling.
I used some drywall speckle from home depot that starts off pink and turns white when it dries. I was really worried about it cracking but wanted something I could easily shape and sand. I ended up doing about three layers of speckle with sanding in between. This was one thing I really took my time doing as I wanted the mask to look as smooth as possible. Once it was sanded and shaped to what I was happy with, I did three more layers of epoxy. Like I said before, I was very worried about the speckle cracking/chipping as its very brittle, which is why I did so many layers of epoxy. After that dried for a couple days, I sanded that down and started painting!
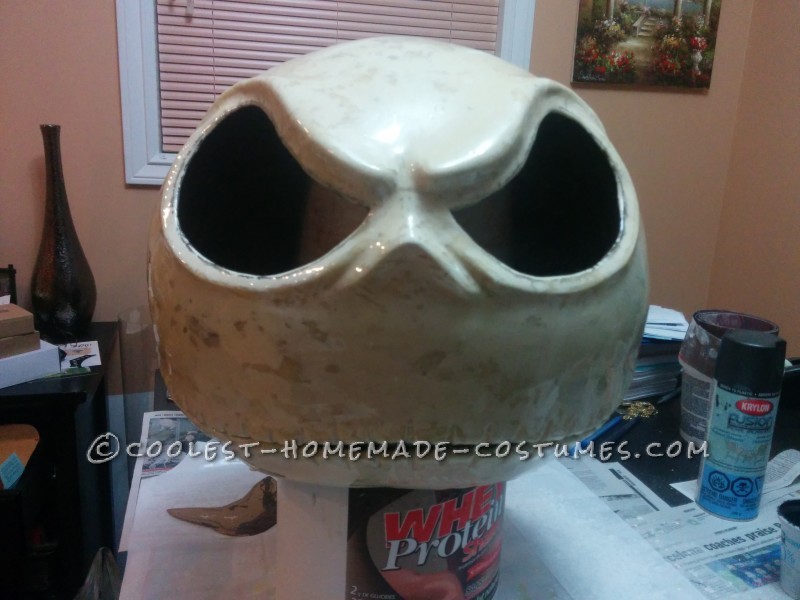
I first started with three coats of primer paint. After that was fully dried, I sanded that down to smooth it out a little more and then did three coats of white automotive enamel paint. I am a mechanic and know how strong that paint is! I let that dry for a couple days and then painted the black accents around the mouth and nose. After that was fully dry, I finished it all off with three coats of Satin Clear Coat to seal everything in and protect the paint .
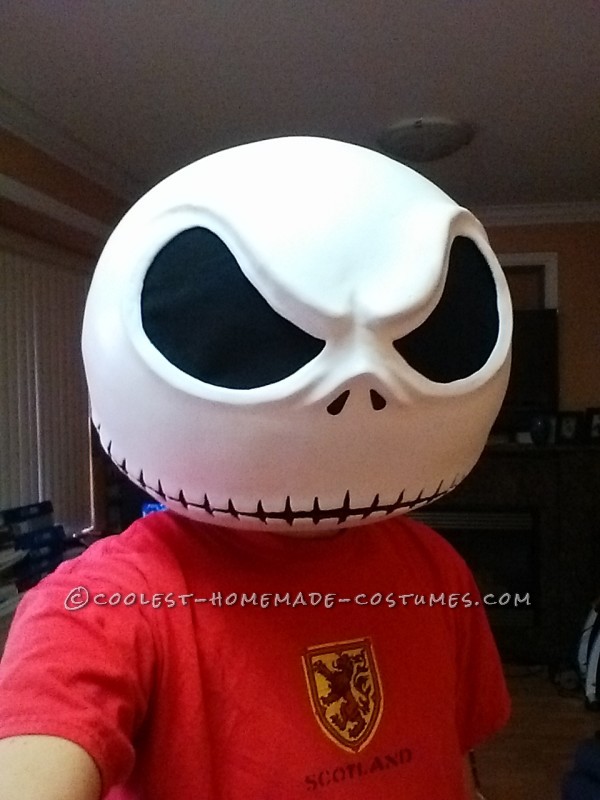
Finally, it was time to finish it off! I bought a cheap bicycle helmet and cut it using a hacksaw to get it to sit properly in the mask. Once it was fitted, I used epoxy to glue it in. After that was set, I used some black fabric and glued it in for the eyes using a hot glue gun.
The mask was VERY strong, not too heavy and very comfortable to wear. I was dancing in it all night and it was on solid with no problems!

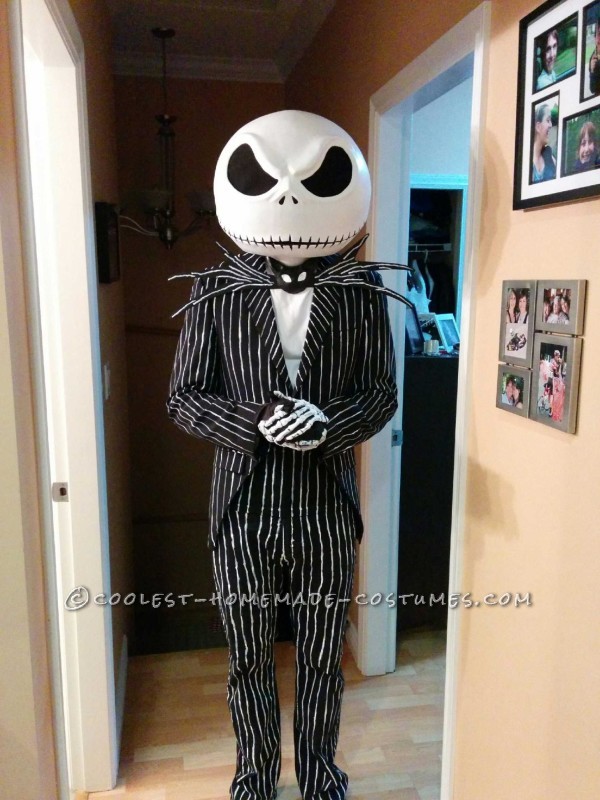
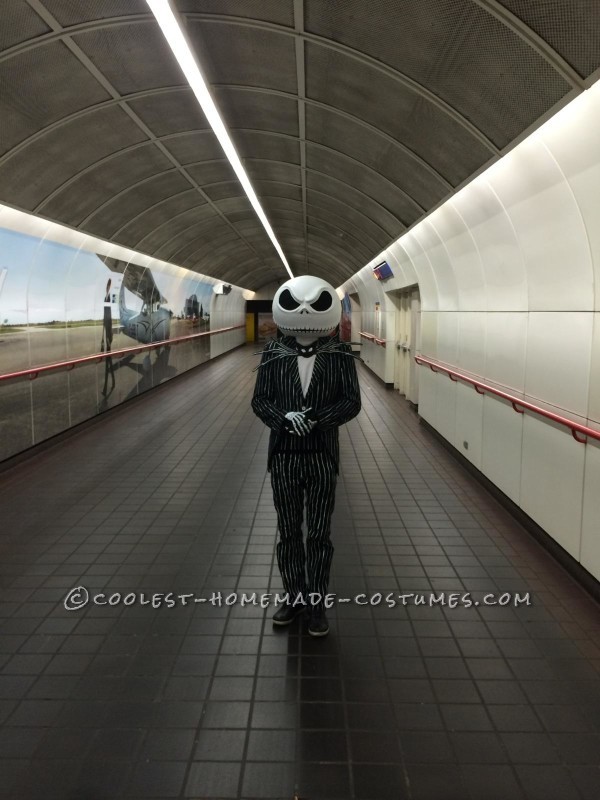
The Final Result
In the end, the costume was a HIT. People were wanting to take photos with me everywhere we went. Even when we went for some late night McDonalds, people were taking pictures.
It was also a great costume to wear! The suit was very comfortable, I didn’t even notice the tie was there and the mask wasn’t too hot, I was able to hear people (which can be a problem with other masks), it was very secure and not wobbly; and best of all, I was able to drink through the mouth using a straw! All in all, I am VERY happy with the end result and hope you like it as much as I do.
Well, I think that’s about it, so good luck with your own costumes and Happy Halloween! :-D

Related costumes:
 Creative Tim Burton’s 9 the Movie Costume
  Creepy Homemade Jack Skellington Costume
  Awesome Family Guy Group Costume
  Coolest Jack Skellington Nightmare Before Christmas Costume
  How to Train Your Dragon Valka (Hiccup’s Mom) Costume
 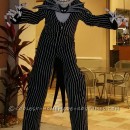 Larger Than Life Jack Skellington Costume
 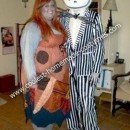 Coolest Homemade Jack and Sally Nightmare Before Christmas Couple Costume
 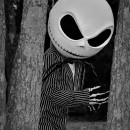 Best Homemade Jack Skellington Costume Ever Made
Not sure when this was posted but Dude this is Awesome!!!!, much better than that crap you get from party city or some other part store. I’m going to start working on one as well. Epic job though man. It looks AMAZING!!!
i want to buy this costume from you.
i want to buy this costume of you.
Nice!!
Nice!!