I hope you enjoy our Toaster and Oven costume idea. Supplies List: Large cardboard box, medium size cardboard box, miscellaneous scrap cardboard, one 6″ cardboard cake, round one 8″ cardboard cake, round one sheet white poster board, one sheet black foam board, 1 package fake eyeballs, one fake hand, one package fake cockroaches, one fake brain, one fake heart, one 8.5″ x 11″ black picture frame (glass removed), lightweight metal tray, lightweight pot, Paper Mache, glue, newspaper strips, tissue paper, black construction paper, orange markers, white crayon, one touch light, mounting tape, contact cement, Elmer’s glue, spray primer, high gloss black spray paint, high gloss white spray paint, chrome paint, high gloss clear spray lacquer, small pillows.
My child’s oven costume originated from a cardboard box and a tight budget. I needed original Halloween costumes I could make with items found around the home in recycling bins and from dollar stores. The oven costume was born! I found nothing like it. The closest comparison was a “Bun in the Oven” costume for moms-to-be. Not quite what I had in mind!
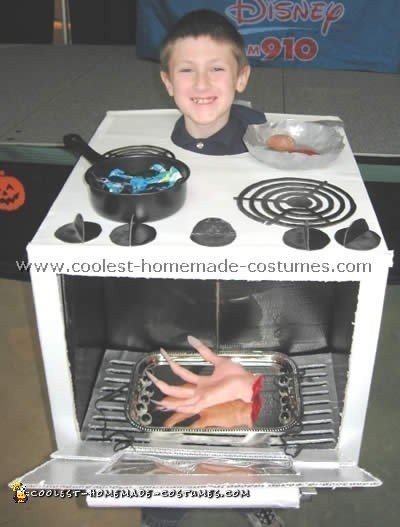
The first challenge was finding the right box for the oven costume. We found the perfect one behind a furniture store. It was a chair box and it had spray foam dried inside. A quick sanding took care of that. The bottom flaps were glued to the inside to add structural support. The top flaps were glued in place to create the stove top. A dollar store sheet of white poster board covered the top to make a smooth surface. I used plates for the head and arm holes. I only needed to find the right sized plates from my own cupboard. Make sure to take the nose into consideration. I measured for the arm holes by standing my son next to the box to see where his arms would emerge. Based on that measurement I started the arm openings 1.5 inches from the top of the box. I did not want them too high or too low and this matched the slope of my son’s shoulders. You might want to line these cut-outs with felt or tape to keep them from chafing the skin.
I raided a dumpster behind a Joann’s store for the oven box and to create oven knobs, burners and a handle. The handle was a tightly rolled sheet of cardboard glued with contact cement. I rolled two more sheets to support the oven racks. I made sure to cover each with as much contact cement as possible. I weighed them down with shoes and eventually bricks to keep them from unrolling before the glue dried. The interior oven was attached to the bigger box using Elmer’s glue. We made sure the boxes were a snug enough fit to make this part easy. Just make sure the interior box is not too deep. You need to leave room for the child behind it.
I made the oven costume knobs by finding a cardboard box from Costco that had held cans. The cans had pressed perfect circles into the cardboard so it was easy to cut them out. I used four circles for the burner knobs and one for the oven dial. I then cut out half circles for the knob grips. I notched each round piece and half circle so I could fit the half circle over the full circle to look like a real knob. I used Elmer’s glue to keep them together. For the burners I bought two cardboard cake rounds from a Party America store. One was 6″ and the other was 8″. The total cost was about $1.50. I found an online image of a coil burner. I used my computer’s standard picture editing software to blow the image up to 6″ and 8″. I printed each and cut out the white areas. I then taped the image to the cardboard circles, traced the image and cut out the unwanted cardboard using a Xacto pen knife. The burners and knobs were spray painted with primer and gloss black spray paint purchased from Kmart. The same paint was used inside the oven box after I glued the oven rack supports in place. I finished each with a clear high gloss spray lacquer bought at Meyer.
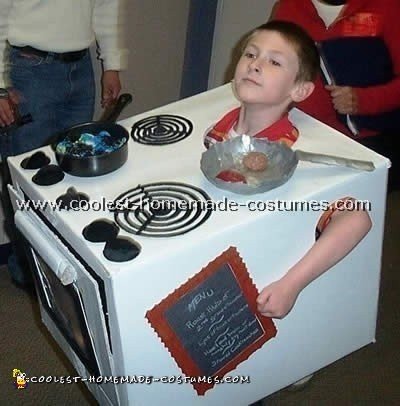
Before painting the entire oven range (the biggest box) I cut out an opening for the oven door and for a window in the middle of the oven costume. For the window of the oven costume I traced the inside opening of a black picture frame from a dollar store. I also attached the oven door handle with more contact cement. There is no need to worry about attaching the door to the inside of the oven as I found out. I wasted two pieces of elastic string but you don’t have to. For the oven window I used a sheet of plastic (a page protector for scrap booking) but you can leave it open or use plastic wrap. It is a lot of trouble to use a sheet protector. Once the oven door was lacquered I glued the plastic to the frame and the frame to the oven door. Once the oven range has been painted and lacquered you can use more contact cement to glue on the oven knob and stove dials. I turned the knobs for the burners in use (low for the front left pot and high for the skillet in back). The oven knob was turned to a medium setting. For even better detail you might want to add “Hi” “Low” and “Med” to the knobs and temperatures to the oven knob using a white paint pen or similar. I did not have that on hand.
I bought a piece of black foam board from a dollar store and wasted a red Popsicle just to use its stick. I traced around the Popsicle stick on the black foam board. I made sure not to cut out the area the metal tray would rest on to keep the support structure strong. A pen knife was used to cut out the tracings. I then sprayed the foam board with chrome paint but that did cause the paper (that covers the foam) to pucker up in some spots. You can glue it back down or skip the chrome paint. Use contact cement to glue the fake hand and eyeballs to the metal tray. I found mine at a dollar store. The eyeballs and hand came from Party America. While I was gluing I weighed down the hand with a coffee mug to keep the contact points in place. Then glue the tray to the foam board oven rack. Once the black interior oven has been lacquered, glue the oven rack to the supports inside the oven.
For the menu I used a piece of construction paper from a tablet of mixed colors we already owned. I used a white crayon to simulate chalk. The frame was made from cardboard. I freehanded a scallop pattern on the outside. I then colored it in with an orange marker. Both were glued to the outside of the oven at an angle. The menu reads: Menu – Roast hand of second grade teacher, eyes of trick or treaters, heart and brain of naughty boy next door, and stewed cockroaches. For the cockroaches I bought a lightweight pot from a dollar store. I used Elmer’s glue to attach a wad of scrap tissue paper inside the pot. Then I used more glue to attach the cockroaches to the tissue paper. Have fun with the angles and make sure a couple of roaches are “crawling” up the sides of the pot. Creepy fun!
The skillet was made by paper Mache from a small frying pan I already owned. I covered the pan with plastic wrap before laying down the strips inside of it. I tried to keep the edges consistent to it looked real. I used other strips along the handle and overlapped those with the strips inside the pan so they wouldn’t separate. Once it was dried I spray painted this pan with chrome paint and lacquer. The fake brain and heart were then glued down using contact cement. This took awhile to “stick” but it was well worth it. I used mounting tape to attach a tap light to the interior ceiling of the oven. I found a package of two tap lights at the dollar store so this cost just 50 cents. Once the costume is fitted over the child, stuff one toss pillow in front of his belly and put another behind his shoulders. If you have more time and money than I did you might want to devise a belt that wraps around the child and attaches to the inside of the box to help take the weight off his shoulders? Also use a long sleeved turtleneck shirt to prevent chafing if you did not cover the arm and head openings. The “raw” cardboard can leave marks. Just before going out open the oven door carefully and turn on the tap light. One last word of warning: This does not work well on staircases because the child cannot see their feet.
This oven costume was a fun costume to make. I still cannot believe it all came from my head and worked so well. It took me some time to come up with original Halloween costumes, this one being a huge hit wherever we went and I was very proud of what I had created. Time to make: Approximately three weeks of spare time.
Total Spent: $27

Related costumes:
 Original Pregnancy Announcement: Bun in the Oven Costume
 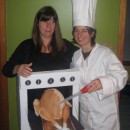 Coolest Chef and Turkey in the Oven Pregnancy Costume
 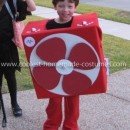 Coolest Box Fan Costume
  Coolest Homemade Mad Chef with Spooky Surprise Costume
 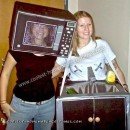 Coolest Homemade Microwave and Sink Kitchen Duo Costume
 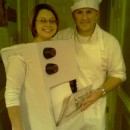 Coolest Bun in the Oven and Chef Costume
 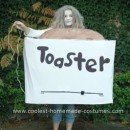 Coolest Toaster Costume
  Awesome Pregnant Woman’s Costume – Bun in the Oven
Your comment has been sent successfully.