In July I started probing my husband about what we wanted to do for Halloween. Yes it was July because I know that we tend to put more effort into Halloween costumes than we should and we tend to procrastinate.
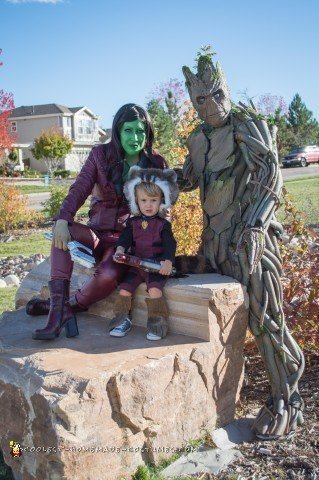
His response? He wanted to make Groot. Groot! from Guardians of the Galaxy, which would mean I would be putting together a Gamora costume including painting my face and making a Rocket costume for our almost two year old. That is aside the point for this contest entry. But really? Groot? Of all things, you want to make Groot? Is this going to be another Iron man? (where a couple of weeks before Halloween we have to bail and pull out our old pirates of the Caribbean costumes because we just didn’t have the tools at the time to make it). Why would he pick Groot?
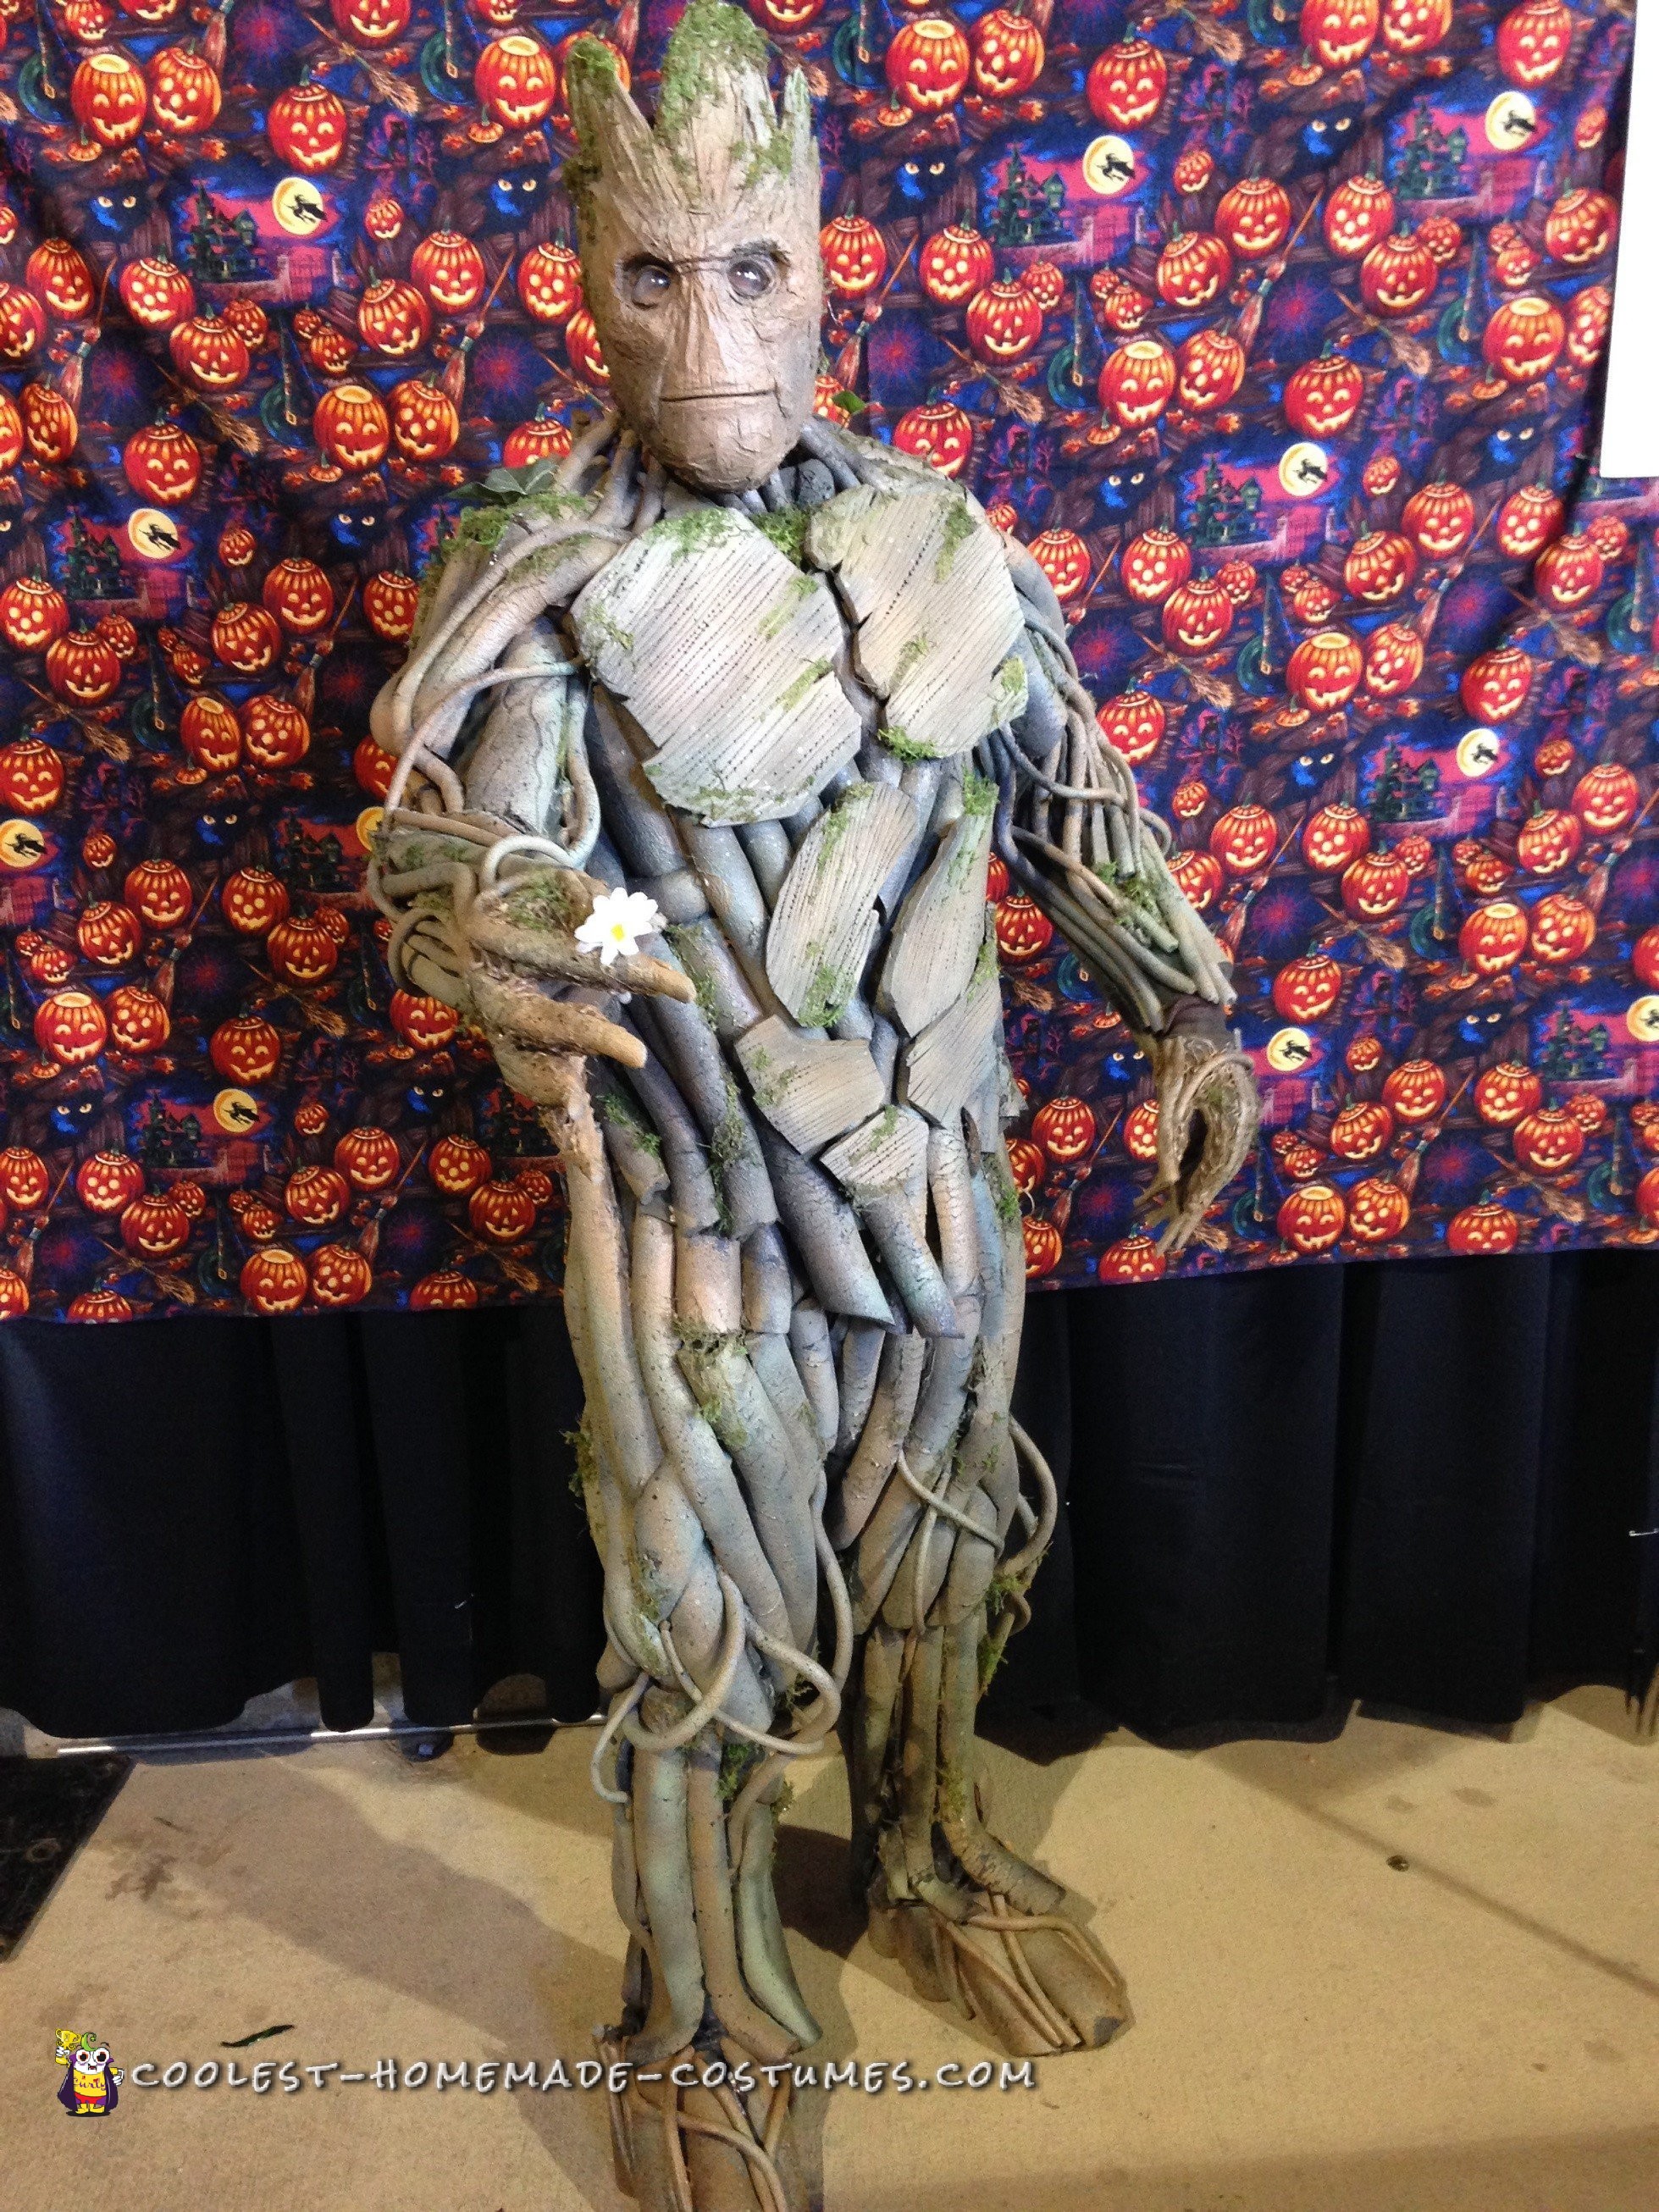
Well the first time Frank saw the movie the Guardians of the Galaxy, Groot stood out to him as one of the most unique characters from any of the Marvel movies and instantly fell in love with the character.
When it came time to make a decision so that we could start working on our costumes, he thought how amazing it would be to have a legitimately good Groot costume. It would be something that would push his skill set and would have to go all in or nothing.
Because Groot was such an iconic character, he knew he would have to do it justice putting incredible amount of pressure ensuring that he put everything he had into it.
After a few weeks of probing if there was anything else he wanted to make, I finally succumbed to the idea of him making Groot, and me once again, being covered in face paint. Every evening starting in mid-September after little Rocket’s bedtime while I worked on Rocket’s costume, Frank started to work on Groot.

Supplies AKA a Bunch of Random Stuff
First you need all of the materials and a base to build on. We thought coveralls would be a great idea so we found some of those at a thrift store. (Spoiler, you do not want coveralls, pants and a long sleeve shirt is what you want).
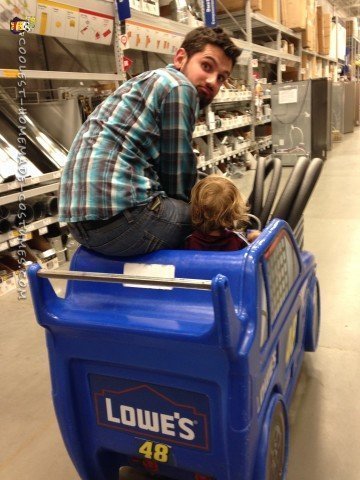
Then you need poly foam plumbing insulation tubes from any hardware store. When your toddler asks you to sit down in the cart with him, you must oblige.
In reality gathering supplies happened as we realized we needed them in the process, so many trips to multiple stores happened. I eventually stopped counting how much money I spent on materials, because I knew this was something that was making my Frank happy, so I just went with it.
All Materials We Used for Groot:
- Base (long sleeve shirt, pants and gloves).
- Poly foam plumbing insulation tubing of various sizes.
- Poly foam door frame insulation piping of various sizes.
- Poly foam floor matting.
- Ridiculous amounts of hot glue and a hot glue gun.
- Cardboard.
- Thin craft foam.
- Yarn.
- Paper towels and white glue for paper mache.
- Four-five cans of spray paint tans, browns, greens, and blacks.
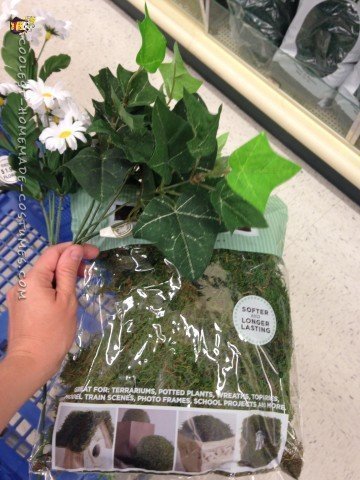
- Craft moss and cheap craft fake flowers and leaves.
- Plastic container for car headlights to use for the eyes.
- Velcro.
- Aluminum foil.
- Dollar gardening gloves.
Body Assembly
Frank used various photos of Groot from the movie and the action figure as reference photos, as well as just trying to follow basic anatomical structure.
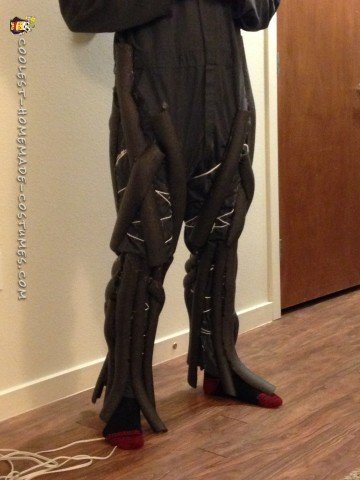
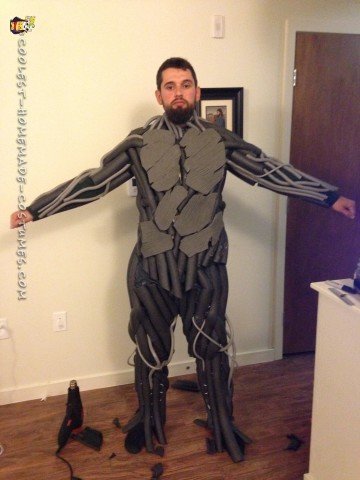
He cut the larger plumbing insulation tubes in half., then he started to glue them to the legs of the coveralls with hot glue. He was nearly done with covering the legs and he realized that the legs had no muscular shape, rather the plain tube shape of the coveralls. I encouraged him that if he was going to do this, to make sure that he liked what he made, so he ripped them off and used yarn to pull the fabric tighter around the ankles so that the shape of a calf muscle could be seen. Then he re-glued all of the plumbing insulation back on the legs.
As he started working on the upper body, we realized that he could no longer get in and out of the coveralls, which would be significantly more difficult once all of the tubing was glued. (It was hilarious if you can imagine someone trying to do the worm on the floor to get out of some coveralls).
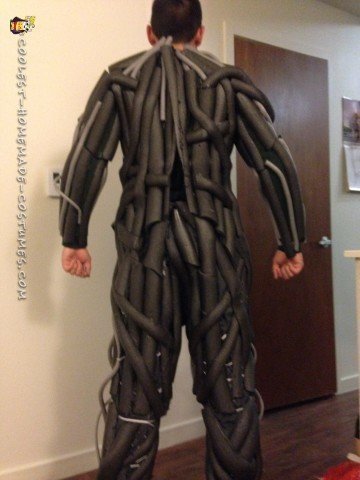
He ripped off the few upper body parts he had done and cut the top off the coveralls so that the legs were just pants. He found an old long sleeve shirt and began gluing the plumbing insulation to that. He used the smaller door insulation tubing for most of the forearms, neck, and to add accents to the legs.
He then realized that he also had a hard time getting into the top still, so he cut the shirt down the middle of the back and one of the tubes down the middle. He later placed a strip of Velcro on each side the length of the back to be able to close the shirt. Then he cut out patches of the flooring poly foam for the shapes of the chest, abs, and shoulder blades as well as added texture to those with scissors and a rotary tool. Those were glued in place, but he didn’t like how the shapes turned out, so he ripped them off, made adjustments and re-attached them.
He realized that he still had a day before he needed to wear his costume, which meant he had time to make hands and feet. For him, you really can’t forget to address anything, or else its not a complete costume.
He glued some of the door insulation tubing on a pair of dollar gardening gloves and put accent hot glue around it as well for veining. (This is a little out of order from how Frank did this, but goes along with body assembly) Approximately an hour before the first wearing of his costume, he put a layer of aluminum foil around his slip on shoes and glued some of the plumbing tubing and door tubing to the aluminum foil to create shoe covers.
The Mask AKA the Money Maker
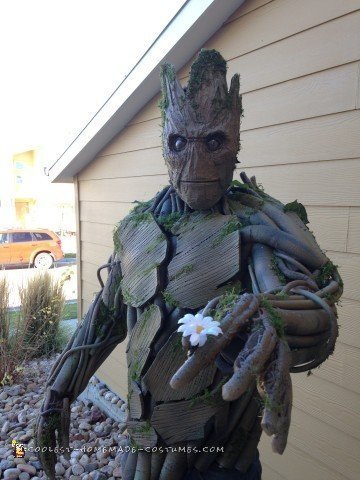
Frank cut a cardboard box for the basic shape of the mask and used craft foam to form the chin as well as on the inside of the face to make it a little more comfortable to wear. He then used paper towels and watered down white glue for paper mache to build up the shape of the cheekbones, eyebrow ridge, nose and mouth.
He was able to achieve a lot of the texture on the mask from the paper mache and hot glue dribbled on the cardboard. After the paper mache dried, he also used a rotary tool to carve detail on the nose bridge, mouth, etc. He really feels like this mask sets him apart from any other homemade Groot costume that he’s seen on the internet because it most closely matches the real Groot without being professionally molded.

Detail Work AKA Making it Look Like Groot
It was hard to find the exact color of browns/tans/greens/ and greys that you can see in Groot’s costume, so we did the best that we could.
The first color Frank got was too tan and he had sprayed that all over the whole costume. Another color he got had texture to it thinking that it would help the costume seem more realistic, but the color would come out inconsistently so it had a horrible effect on being able to control the color.
He got a few more colors the next day and tried again. He concentrated the greens near the edges where he was planning to put moss, and the lighter brown highlights on the more prominent parts. Through all this he was able to finally get a color that seemed close enough to the real thing with depth, variation and speckling. He spent quite a bit of time our there painting, so that three weeks later and our little Rocket still says “Painting, Painting” whenever he looks at our back porch.
Frank took the plastic cover to the package of a pair of car headlights that he cut out and glued in the eye holes of the mask to give that bottled look in the eyes. Craft moss was then glued in various places on the tips of the mask and on the body, as well as a few leaves on the shoulders. He cut a hole in the palm of his gloves so that he could push a fake daisy out to give a bit of an extra effect.
Show it off AKA Have Fun!
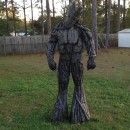
The creation of this costume was seriously a labor of love. I must admit, I was amazed with how well it turned out. I shouldn’t have been so surprised because I know my husband is artsy and capable of building things, but this was simply amazing.
The costume had to be completed a week before Halloween for our church congregation’s party. I had to miss out on the party because our little Rocket came down in a viral infection, but I insisted that Frank go to show off his work and test it out.
Our friends helped him into his costume in the parking lot and their little three year old was afraid of him, even though he tried to give her a flower.
We attended a downtown event on Halloween to trick or treat at stores. We even signed up for the costume contest, but realized that the judging was well after little Rocket would need to be down for a nap, so we had to leave before getting the chance to see if we could win.
Frank also went to a local football game on Halloween wearing his Groot costume. One guy walked up behind Frank and started poking at his costume, when Frank turned around it surprised the guy and he said, “Oh my Gosh, you’re real” and then asked to take a picture with him.
A police officer at the Football game stopped Frank to ask him how in the world he made the costume, and then proceeded to tell him how amazing it was. Crowds of people constantly yelling out “Hey its Groot!” as he walked by and over a dozen people asked for photos with him. It was so fun for me to see Frank get recognition for how amazing his creation was as well as the validation of his artistic skills.

Related costumes:
 One of a Kind Homemade Groot Costume
 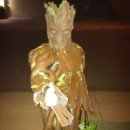 Super Cool Groot Costume for an 11yr Old Boy
 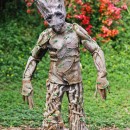 Awesome Groot Costume Made in Just Two Days!
 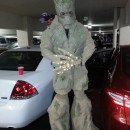 Amazing 8′ Tall Homemade Groot Costume
 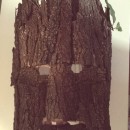 How to Make a Groot Mask for Under $10
 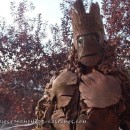 Earth-Made Groot Costume
 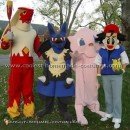 65+ Coolest Homemade Pokemon Costume Ideas
 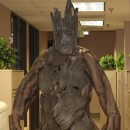 Amazing Homemade Groot Costume
Amazing!! I love it! Great, great job! All your hard work really paid off! I love the paper mache mask. Really so accurate! It’s so exciting when a project like this turns out the way you envisioned it! Right?!
Well done you!
Amazing!! I love it! Great, great job! All your hard work really paid off! I love the paper mache mask. Really so accurate! It’s so exciting when a project like this turns out the way you envisioned it! Right?!
Well done you!