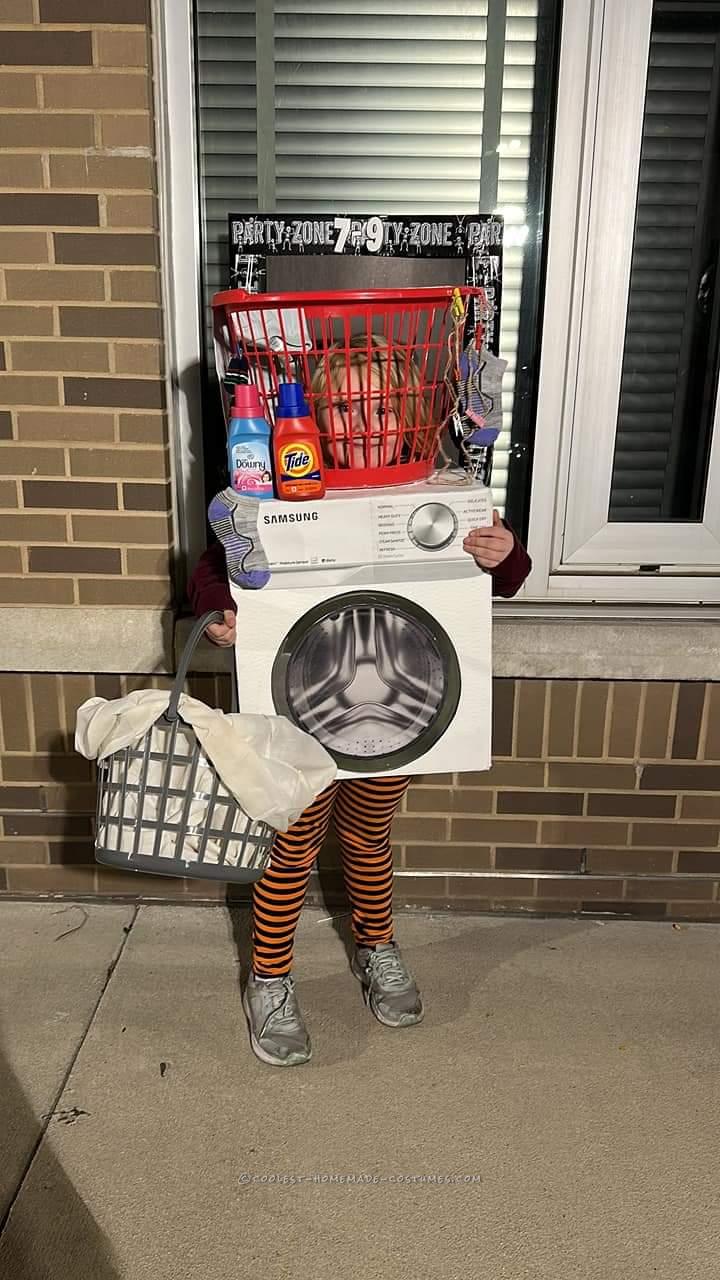
Marvel is proudly showcasing her DIY Samsung washing machine costume. Halloween has become a cherished tradition for us, where we embark on a creative journey to craft a unique homemade costume each year. Inspired by several washing machine costumes we encountered, we decided to put our own spin on it. The result was a remarkable costume that took home the title at our local trunk-or-treat costume contest. Marvel stood out as the centerpiece of the “showroom floor,” captivating the attention of many. The entire process, from crafting the costume to showcasing it, was an unforgettable experience filled with joy and excitement.
Gathering the Essentials
To bring our washing machine costume to life, we assembled the following materials:
- 1 rectangular cardboard box
- 1 medium laundry basket
- 1 small laundry basket
- White paint
- Glue sticks
- Hot glue gun
- Clothes hangers
- Silver serving tray
- Printer and computer for printing logos
- Small bottles of detergent or fabric softener
Assembling the Costume
- Box Preparation: Begin by selecting a cardboard box that comfortably accommodates the torso without restricting leg movement. Cut a hole at the top for the head and two side openings for the arms. Remove the box’s bottom.
- Applying a Fresh Coat: Use white paint to cover the entire box, achieving a uniform and vibrant appearance.
- Laundry Basket Integration: Once the paint is dry, attach the medium laundry basket’s rim to the head opening using hot glue. This will form the washing machine’s drum.
- Creating the Control Panel: Utilize a computer and printing capabilities to create two separate 8.5×11 prints: one featuring the brand logo and the other displaying the machine’s control dials. Additionally, print the internal washing machine components on an 11×14 sheet of paper.
- Attaching Logos and Internal Parts: Adhere the internal parts print to the silver serving tray, ensuring a secure bond. Subsequently, attach the tray to the box using glue. Next, affix the brand logo to the box, completing the control panel assembly.
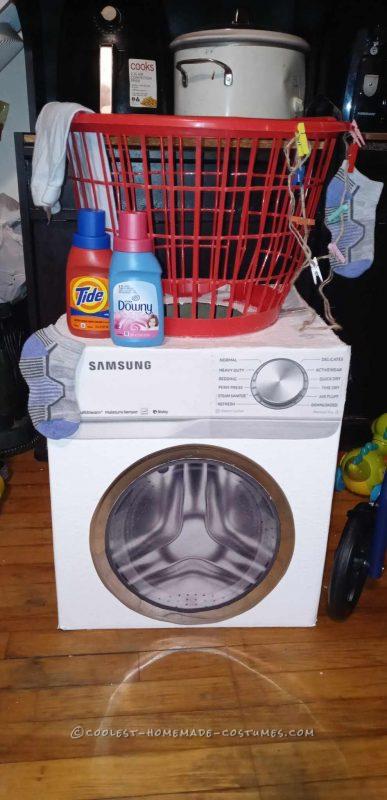
- Adding Detergent Bottles: Enhance the realism of the costume by gluing the small detergent or fabric softener bottles to the top of the box, positioning them near the laundry basket.
- Personalizing Touches: To add a personal touch, fill the basket and the surrounding area with socks, pants, and underwear, mimicking the contents of a typical washing machine.
- Candy Collection Basket: Incorporate a small laundry basket, designated for candy collection, to complete the ensemble.
With these steps completed, your DIY washing machine costume is ready to spin into action!
Estimated Time and Cost
Creating this washing machine costume requires approximately 3-4 hours of dedication. The total cost for the materials involved falls under $10.
Ready for the showroom floor 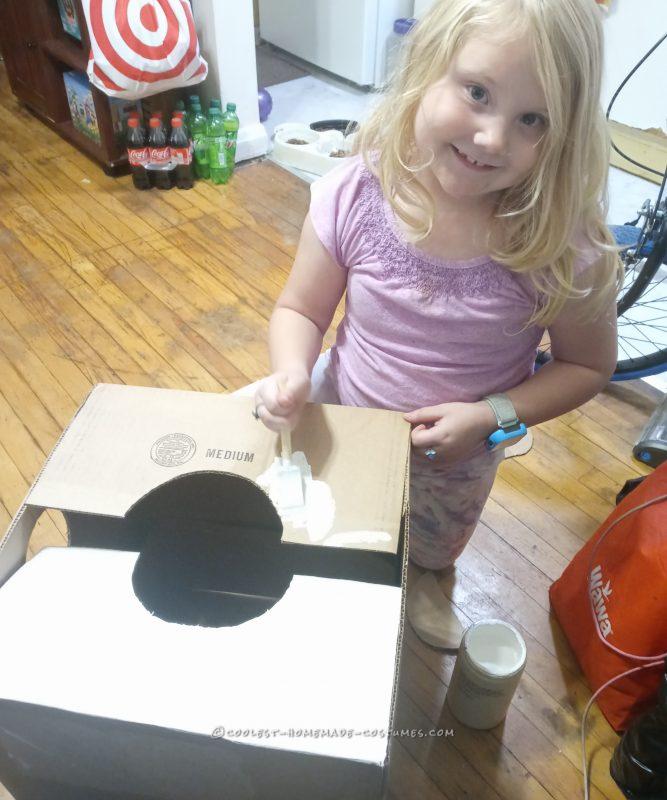
Painting her washing machine

Related costumes:
 Coolest Washing Machine Costume
  Coolest Airing Our Dirty Laundry Group Costumes
  Lia’s Winning Shakey Washing Machine Costume: A Halloween to Remember
  Nasty King Henry VIII Costume with a Bloody Head in a Basket
  Cool Duo Costume: A Gumball Machine and a Quarter
  Coolest Homemade Basket of Laundry Costume
  Coolest Homemade Human Laundry Basket Adult Halloween Costume Idea
  Coolest Homemade Captain Static and Super Softener Couple Costume
Your comment has been sent successfully.