This year, I decided the costume theme our family was going to be Disney’s Frozen.
I was completely mesmerized by frozen (like the rest of the world) and knew I had to make that dress! More than that, I felt like Elsa’s ‘let it go’- helped me on a personal level as well. I won’t go into too much detail, but last year I found myself stuck in a dead-end job that I had come to loathe. I was angry that despite the efforts of my small team supporting this huge corporation- we were all denied raises and titles equal to the work we were doing. I was stuck in a rut and not being challenged or growing professionally was driving me crazy!
Things went from bad to worse when the company was purchased and I knew I had to get out. The message from “Let it go” helped empower me to take a leap of faith, and to trust in my own abilities. After a bad day at work I’d “belt it out” in the car during my 1 ½ hr commute- and somehow that made me feel better (I guess you could say it was my theme song for a while). Fast forward a few months and now I have an amazing portfolio, A job that I love with an Amazing company and coworkers, and I feel confident in my own abilities. I feel like a modern Elsa, ready to take on the world – I just needed that dress.
Even though I typically don’t make costumes, I know everyone will be wearing; I decided it had to be this year for a few reasons: 1) My toddler (20 months) is the perfect size to portray an accurate life-size Olaf, 2) he loves the movie (and warm hugs), and 3) even though I knew there would be a million other Elsas running around and knew most of them would be little girls that I could inspire and give confidence to, the same way Elsa did for me (tear).
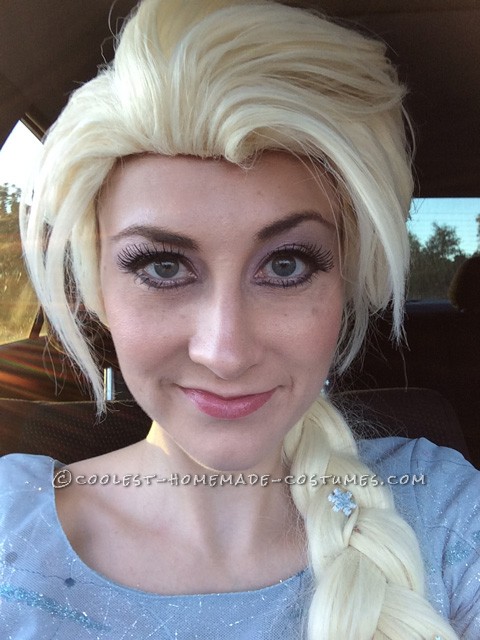
I knew Elsa’s elaborate costume would take the longest- so I started a few months before Halloween- It was a little overwhelming so I created a task list with a budget for each part of the costume. Then I did a ton of research online to find a wig that looked authentic, real, and was in my price-range. (a bad wig can ruin an awesome costume).
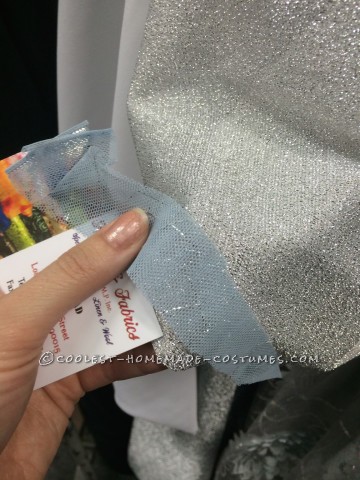
Fabric: finding fabric that had the right drape, aesthetic, and color was more challenging than I anticipated, and since the skirt and cape use so much yardage, I didn’t want to spend too much per yard. I also wanted to make sure my costume was modest, so I ended up using two fabrics in the shirt so that it wasn’t sheer, and also add more shimmer. The skirt was 2-tone chiffon (which started pulling apart at the seams) L, cape: shimmery organza (I wanted it to be light weight so that when I walked, it would float behind me like in the movie)
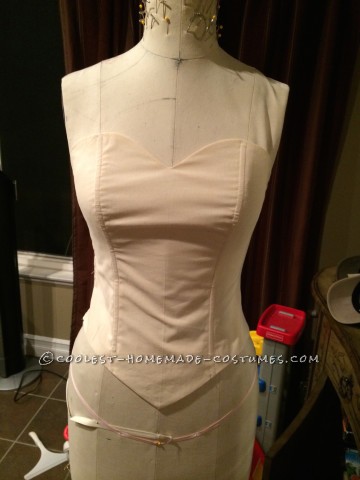
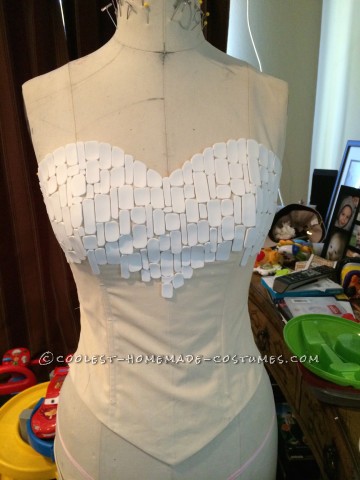
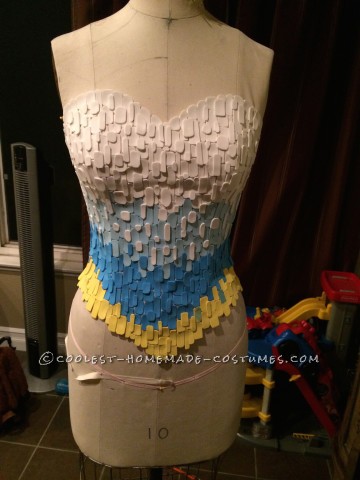
Corset: (it won’t take that long, NOT!) I draped the pattern on my dress form and made a pattern. I just used muslin since I was going to cover it anyway. I used boning in the front to add shape. I looked for sequin fabric to make the corset but nothing was quite right, so I cut out several rounded rectangles, ovals, and squares from foam sheets while watching movies after work/weekends- this took much longer than planned. They didn’t have a pack of all white foam sheets at the 99cent store, so I just used colors and bought a single sheet of white for the top since that was going to remain white. I glued everything with amazing goop. I used a whole tube and got a massive headache since my toddler thought it was a game to turn off the fan that was keeping it ventilated. (Oh well- hopefully, I didn’t kill too many brain cells.) Gluing the pieces took longer than planned as well- I remember telling my husband “it’ll be easy” and he thought I was nuts- (I probably am!) It was basically a puzzle to fit the pieces together without large gaps- but it was worth it! The foam gave the corset a nice hourglass shape but was still flexible enough to bend and move in.
Paint away! After gluing, I had to paint all the foam with an ombre effect- I used folk-art paint in a metallic teal at the bottom, a pearl glacier blue, and a metallic white at top. I focused the lighter shades at the front and darker on sides in a “v” shape to give the illusion of a smaller waist and fuller chest. **note to self- next time use a fabric that matches to avoid having to paint between all the foam to hide the muslin-** Other than that, the painting was fairly easy and captured the look I was going for. :)
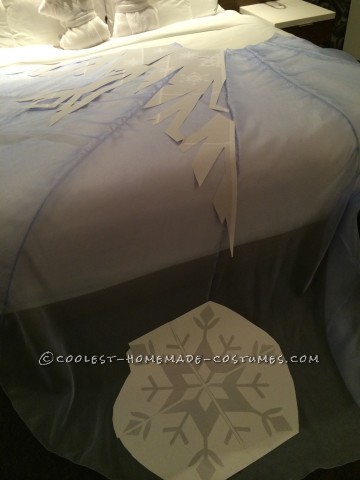
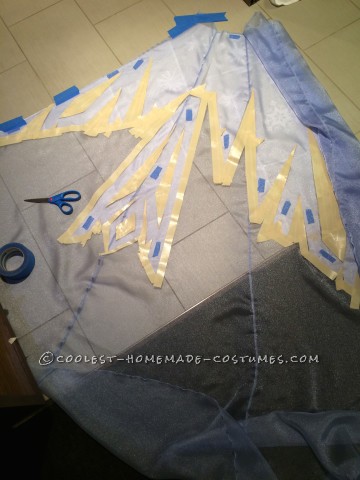
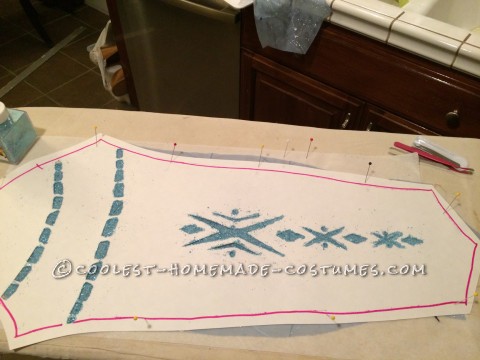
Next came the Cape– The initial creation of the cape was pretty quick; I was able to drape and cut the cape before my son woke up on a Saturday morning. I serged the seams to give it a French seam look without the extra effort. Getting the pattern on the cape was a whole different story. I designed the layout of the cape on my computer, and had to recreate the snowflakes on Elsa’s cape because I couldn’t find the correct ones on the web. I made a template and used it to mask off the pattern.
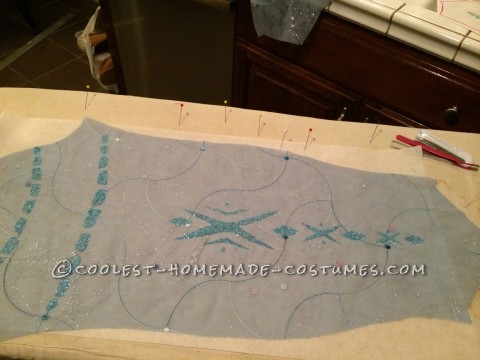
(I ended up taking this with me on a work trip to Canada in my carry-on bag and did this in my hotel room at night. My coworker came in and helped me and we were able to mask one side in a night (I had to do the other side when I got home- I wore volleyball pads on my knees, so I looked pretty ridiculous). I also cut stencils of the negative space snowflakes by creating a sheet of tape on my cutting board and Cutting them out with a box-cutter creating custom stickers. The rest of the snowflakes I cut stencils on cardstock. I’ll be perfectly fine if I never have to cut out another snowflake in my lifetime.
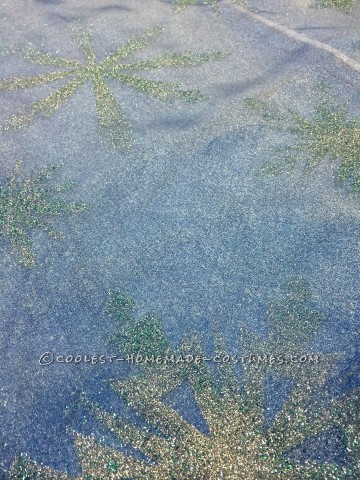
Glitter! I wanted this cape to be more subtle than some of the other ones I’d seen out there. In the movie it is very tonal not ‘in-your-face’. To get the right color, I mixed a light teal blue and white extra-fine glitter that I got in a large container at Wal-Mart. I also used Glitter-Blast Spray and sealer in Silver. I first sprayed the silver and would add the loose glitter on top while it was still wet- Then sealed it- I used about three cans of spray. The 1st can started malfunctioning and wouldn’t stop spraying, so it ran out pretty quickly. :(- My awesome husband saved the day and ran to our 24hr Wal-Mart and bought me two cans (just in case) at around midnight- (at this point, I had already been working on it for several hours) I finally finished around 5:30 am.
I was really happy with how it turned out- but I would do it differently next time (if there is a next time)- Unfortunately, after wearing a few times, most of the loose glitter came off (that’s why you can’t really see it in the pictures), so it would have been better if I used embellishment glue and just did the loose glitter without the spray. I might do this to touch it up for Christmas- I’m going to make an appearance as Elsa at our Church Christmas party to take pictures with the kids and do a “let it go” sing-along :)
The Skirt– I won’t go into much detail on the skirt, as it is pretty standard. However, I should have made it much longer with bigger seam allowance as I didn’t account for how much Chiffon slides around, stretches out, etc. Also, since I had to line it, I thought I was being clever by surging the two layers together and then surging the seams. This totally backfired, creating seam puckering and shredding at the seams on the top layer. I ended up having to use fray-check, clear thread, and a fine needle to re-sew all the seams while tucking in the shredded parts; It helped, but it shredded again each time I wore it. :(
Shirt Pattern: The shirt gave me a few problems as well. I used a shirt I already had as a template, and made adjustments until my proto fit great- but the real fabric didn’t stretch as much as I thought (it is restricted by embroidery stitches and reacts more like a rigid) I didn’t have enough fabric to re-cut the whole thing, so I just re-cut the sleeves and added a panel to the side seam (since most of that is covered by the corset anyway).
Once the pieces were cut, I had to add the glitter pattern. The original plan was to use rhinestones, but when I tried ironing them on, it instantly melted a hole in my sleeve (luckily, I had accidentally cut out an extra sleeve). Instead, I painted my template with embellishment glue and added glitter. This ended up being a blessing in disguise as it took much less time and I Like how the glitter color ties in with the rest of the dress. Sewing was a little bit of a pain matching up the glitter pattern on the bodice and sleeve (I thought this part would be easy, so I saved it for last and ended up rushing to get it done the day of the event).
Tame the Mane– As can be expected, my wig came in much more disheveled than in the beautiful image online. It was super fluffy and resembled an awkward Dallas mullet from the 80’s on steroids! My sister-in-law and I attempted to flatten and relax the hair with a blow-dryer, curling iron, and some hair cream. It helped, but it still wasn’t doing what I wanted it to do. After she left, I played around with it in the bathroom while my toddler was taking a bath. It was amazing what WATER could do! I ran my fingers throughout he whole wig with water and hair cream giving it a more realistic look and simulated highlights. I then used water and hair cream to separate the hair and mold it into Elsa’s hairstyle. I used bobby pins to hold it in place and let it dry. Then I added the side-swept loose braid, and tugged at it to make it thicker.
Snowflake hairpins– I ended up finding plastic snowflakes at JoAnne’s in a pack with two sizes. I glittered them and glued them to bobby pins. I used two on my flip-flops as well since I ran out of time to make Elsa’s Ice pumps.
Make-up (I’m ready for my close-up!) I used the lightest makeup I could find from the 99cent store and used my nice powder to set it. I made my eyes look bigger by painting white on/under my bottom lash line. I then re-drew in the shape of my eye with eyeliner approx. 1/8” below my bottom lid. I winged out my eyeliner and attached fake eyelashes starting at the extended part. A little mascara, blush, and lipstick, and I was good to go. ** a little tip- add a little dab of blush on tip of nose to give a cold nose winter flush**. And Viola! Elsa has arrived!
My Favorite part about creating Elsa, was learning and growing creatively. I tried a lot of things I had never done before (some of which I may never do again). In a way, I feel like I created my own couture gown. :)
My Favorite part about Being Elsa is the joy it brings to little girls, boys, and adults alike. I had several strangers take their picture with us who’s kids truly were convinced that we were the ‘real deal’. Every time I saw a little girl staring at me, I smiled and said ‘hi’ and they were so excited! After attending a Halloween festival, we met up with my in-laws at Corner Bakery for dinner. Of course my Husband (Kristoff) and toddler (Olaf) simply took off the outer layer of their costumes and left them in the car looking perfectly normal. I, on the other hand, couldn’t do that so easily- so I went to dinner as Elsa.
As I was feeding my toddler and eating my sandwich, my family informed me that a family with little girls had come in and were staring at me. So I went over and said “hi” and asked each of them their names. We then took a picture and the littlest one- (probably about 3) kept hugging my legs and wouldn’t let go; she was so cute! This opened the door for the adults. Our waiter got a picture with me to send to his niece, and another lady to send to her granddaughter. :) It felt good making people happy.


Related costumes:
 Authentic Frozen Family Costume – Elsa, Olaf, and Kristoff
  Frozen Elsa Costume That Warmed My Six Year Old
 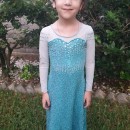 Elsa the (Very Tiny) Snow Queen Costume
 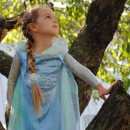 Best Elsa Costume Ever
 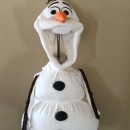 Coolest Homemade Toddler Olaf Snowman Costume
 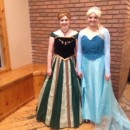 Homemade, Movie Quality Anna and Elsa Costumes from Frozen
 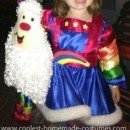 Coolest Child Rainbow Brite Costume
 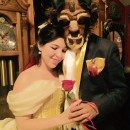 Tale as Old as Time – Beauty and the Beast Couple Costume
Your comment has been sent successfully.