You don’t need to be a computer engineer to assemble the coolest robot costumes ever. Learn how to create your own awesome version of a droid-like costume. All the DIY inspiration is here in this futuristic-inspired robot costume collection.
Halloween fans of all ages will love these shiny homemade costumes. Take a look at all the various costume designs here. Ranging from adorable to super sleek, there is something for everyone.
Also, you can choose the abilities of your DIY robot costume. You will see examples here like the Partybot which played music everywhere it went for an instant party.
In addition, get inspired by all the fun costume details here. For instance, there are light-up robot costumes, vintage style robots, cylindrical shaped robots and even a rusted robot.
So break out the dryer vents for a metallic homemade costume. Impress the neighborhood this Halloween. Then, share your robot costumes with us here!
Latest Robot Costume Ideas
- Coolest Homemade Cardboard Robot Costume
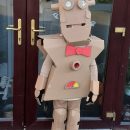 I started this cardboard robot costume with my son’s wish to be a robot, with a H&M box, masking tape … Read more
 - Awesome Articulated (Carboard!) Robot Costume with Tape Player
 My girlfriend and I always spend too much money on supplies to make our Halloween costumes, which is a big … Read more
 - Cool Flashing and Blinking Homemade Robot Costume
 This cool Flashing and Blinking homemade Robot Costume was a fun costume to make. After viewing some other robots on … Read more
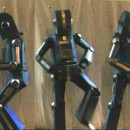
 - Epic DIY Robot Costume
 BrainStorm is made mostly of aluminum, along with PVC, plastic salsa bowls, and a good amount of electronics. I used … Read more
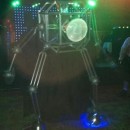
 - Coolest Robot Costume for a Future Theme Party
 For New Years Eve, my friend Curtis threw a “Future Theme” party. From the moment I heard the theme, I … Read more
 - Easy and Cheap iPad Air Inspired Halloween Costumes for Meccanoid Robots
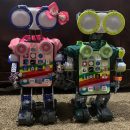 I own two Meccanoid Robots, and their names are Phoenix (G15 Model) and Nova (2.0 Model). I received Phoenix in … Read more
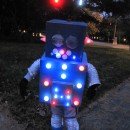
 - Amazing Homemade Light Up the Night Robot Child Costume
 My son is obsessed with robots. My first idea was a classic cardboard box style costume. The problem is he’s … Read more
 - Amazingly Adorable DIY Pink Robot Costume
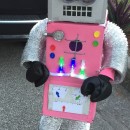 Our 4 year old, Charlotte, asked to be a robot for Halloween. My husband said, challenge accepted! We made the … Read more
 - Awesome Homemade Futurama Bender Costume
 My 9 year old son was determined to have a Bender costume for Halloween. In addition, he had a lot … Read more
 - Mom and Son Cardboard Robot Costumes
 I made these cardboard robot costumes because my son decided he wanted to be a robot for Halloween. Since he’s … Read more
 - Cool DIY Robot Costume
 This costume is a remake of a previous one I had made for a Halloween party. The first one was … Read more
 - Riley The Robot Costume
 I always look forward to Halloween, so that I can dress my little girl as some sort of Princess or … Read more

Featured Robot Costumes
Costume by Heaton J., St. Louis, MO
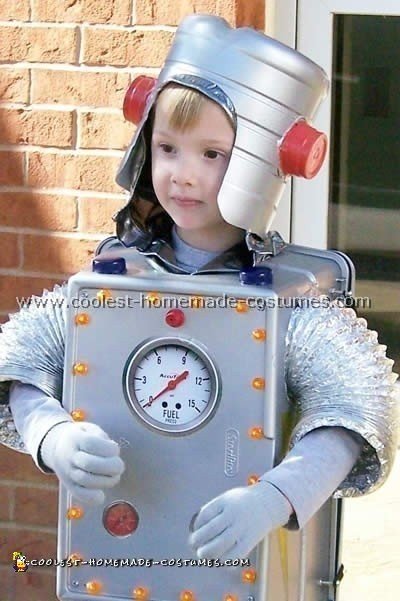
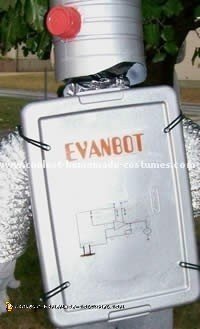
First of all I have to thank this website for getting me going on this robot costume. My three year old son really wanted to be a robot for Halloween and I did not like the over priced cheap costumes you could buy. I found this site and borrowed some excellent ideas from the other robot costumes I saw here then added a few personal touches and the outcome was excellent..
I started with the hardest part; what to use for the body that a three year old wouldn’t tear up between pre-school parties, family trick or treats and Halloween night. I took him to Target and found a cheap plastic container that could fit him and still allow him to be mobile. (idea from Michael K.) I found a spray paint for plastics and color was “hammered metal”, it worked great because it looked like worked metal.
Using a dremel, I cut the bottom out the neck and the arm holes. I used dryer venting for the arms and drilled tiny holes in the body and I used small wire to “sew” the arms to the costume (so a three year old wouldn’t rip them out every 10 mins.) I used a bleach bottle for the helmet. The gauges I found by searching images on the web and printed them on cheap photo paper and glued them on. He wore gray jogging pants and jersey gloves. Grandma made a little silver hood out of silver dress material.
Lights, Camera, Action
The lights were battery powered orange Halloween lights, the round part popped off so I was able to drill a hole big enough to stick the round part through on side and connect to the light on the other.
We got so many compliments on this robot costume and people were chasing us down the street to get another look at it and ask where we got it. I was so proud I was able to give my son such an original costume.
Total Spent: $40
Cheap and Fun Robot Costume
Costume by Mike S., Pasadena, CA
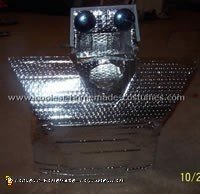
For this Robot costume I used empty cardboard boxes, tin foil, dryer vents, window screen material (covering face), circuit boards, meters and etc. from Electronics Surplus store, thumb tacks and hot glue.
Total Spent: $2
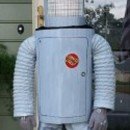
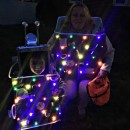
Ingenious Sensory Sensitive Robot Costume
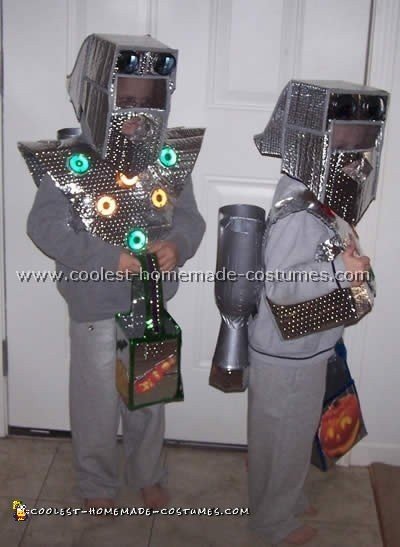
Costume by Michelle B., Fort Leonard Wood, MO
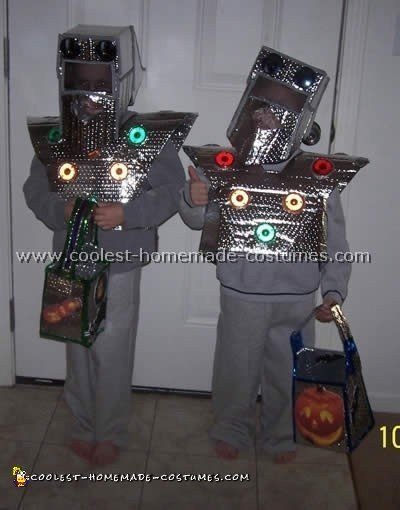
My two sons’ are four and six years old. My oldest son has a condition called Sensory Integration disorder. This causes a problem when it comes to some things such as how he’s dressed.
I would have loved to simply paint some boxes and say “here you go – your robot costume”. But I knew that would never work and that he really wanted to be a robot this year. My solution to a no cardboard box robot was to use the sun reflectors for car windshields ($4.00 each, I used three to make two costumes).
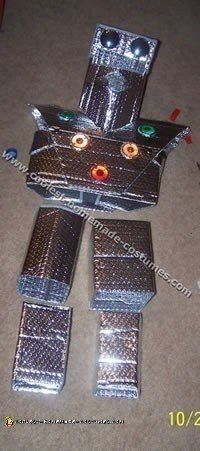
I cut it to make a chest piece to start with and then I used snaps to attach a rectangle tummy piece to wrap around and hold the chest piece on.
For the helmet I used the same material and my trusty hot glue gun. I just kind of went at it with no plan in mind on how I thought it should be once completed. The curved parts that wraps around your rear view mirror added detail that I thought really made the costume!
For the eye area I glued in a piece of screen and for the mouth/nose I used a sink strainer. The robot eyes are made from blue blind spot mirrors for cars. The chest piece was completed by adding blinking reflector lights for bikers/walkers at night time. The final touch was the “rocket packs”. Made with two liter bottles by simply cutting off the bottom and wrapping them in gray duct tape.
I glued them together and added plastic cups at the bottoms. We placed red lights into each one so it appeared to have “fire” coming out the bottom. The rocket packs doubled as Halloween candy holders!
Robot Costume Fueled by Candy
My oldest would knock at the door say trick or treat and turn around and say “I’m fueled by candy”! Then they would drop it in and he’d be on his way! (This kept him from trying to sneak candy all evening too!) We did empty them often to keep them from weighing too much and pulling away from the chest piece.
My blinking robot boys had a blast and their costumes were comfy enough to keep on all night and they could wear their coats (we bought gray ones just for this) under their costumes.
We had to keep the robot costume simple in order for my son to wear it and he said “this is the best Halloween ever. People called me cool dude and awesome and loved my costume!” I might never get away with store bought costumes again!
Total Spent: $40

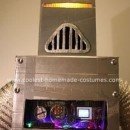
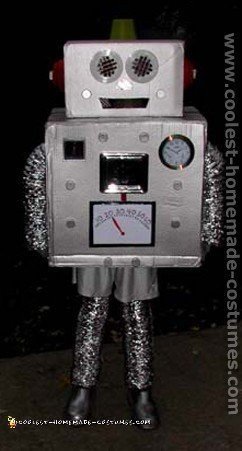
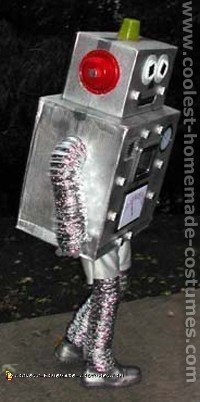
Cool Robot Costume
Costume by Elizabeth H., Chicago, IL
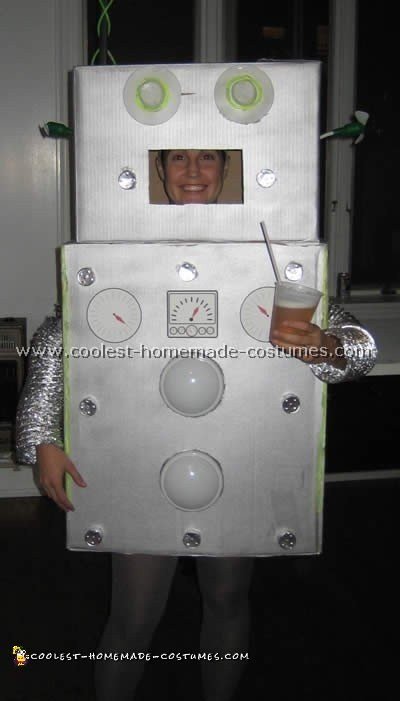
This was the first time I have ever made my own costume and I think after this Robot costume, I will always be a homemade kind of girl! The robot is one of the easiest costumes to make and yet one of the funniest to wear out. As I walked down the busy streets of Chicago I had people cracking up and staring at me everywhere I went.
The two boxes I found at the local hardware store for free as I was picking up the dryer vent tubing that I wore on my arms (ended up ditching them halfway through the night though a little annoying).
I spray painted the boxes with silver enamel paint and then headed to the dollar store where I found the rest of the costume.
The eyes are sink strainers with glow bracelets glued around them. On the side of the head I cut holes and had two battery operated fans sticking out which kept the people who kept me company cool but also dodging me to save their hair.
The antenna was simply the packaging that the glow sticks came in with a tennis ball wrapped in tinfoil stuck on the end. The different dials were all done on the computer and the buttons are all tea lights.
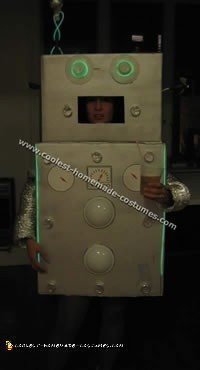
Light it Up
The lights are the type that you push on and off and I found these at the dollar store as well. Instead of trying to find vent tubing for my legs I simply wore gray tights with gray sneakers that I already owned. One tip that I would advise if you make a robot costume is to put screens on the side of your head so that you can see to your sides, I ran into a lot of people for lack of vision. Also to cut the arm holes large enough that you can use your hands freely – I could not bring my two hands together or up to my mouth and had to drink through a very large straw all night.
Best part of the night: hearing Mr. Roboto played and knowing it was your theme song!
Total Spent: $20
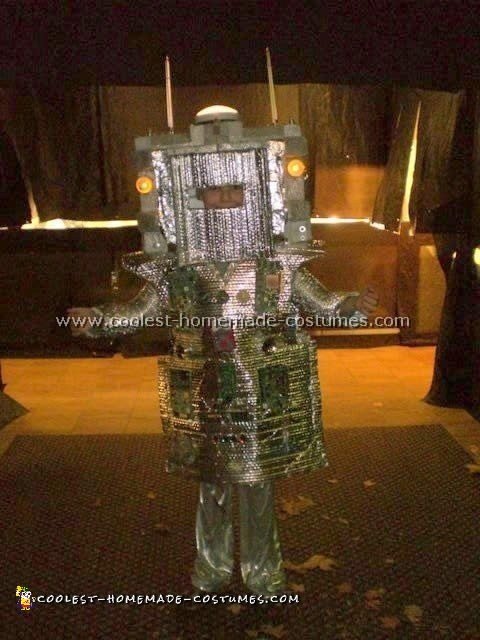
Showstopper Robot Costume
Costume by Erika M., Woodinville, WA
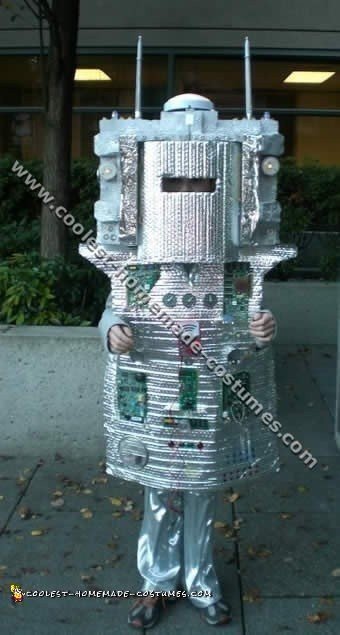
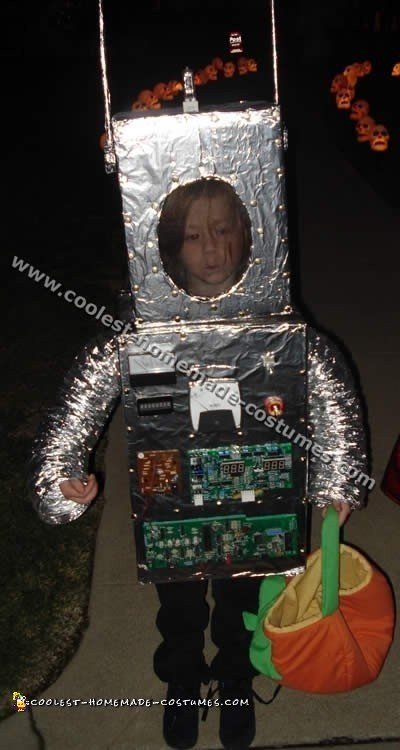
My son came up with this Robot costume when he saw Styrofoam from a box and put it on his head. This costume was so fun and easy to make. We trick or treated at Microsoft and people left their offices to come and see his costume and it put a smile on everyone’s face. It was really a showstopper.
You will need for this Robot costume: two Styrofoam chunks glued together from a box (as an easy alternative you could just paint the face silver), helmet, Velcro night lights that flicker and CD’s for ears, antennae’s are plastic swords that were broken off and stuck into the Styrofoam, bike lights that flash red and blue), silver spray paint, flexible dryer duct for arms, sheet of silver bubble insulation for water heater (home depot), silver fabric to make pants silver, ski cap or you could spray paint it, misc items to glue or Velcro onto body (CD’s, compasses, washers, old computer boards, silver strainer, silver drawer knobs, colored gems from craft store, mini flashlight, colored glitter glue, battery tester from hardware store).
Helmet
Two spray painted silver Styrofoam pieces from a box glued together. I used CD’s, shiny side out, Velcro to each side of head for face. Flashing battery bike lights attached to top of head, two plastic spray painted silver swords broken off and stuck into top of Styrofoam head, two glade night light candles that flicker with a battery one night light for top of head.
Body
Purchase a 6′ by 2′ piece of silver bubble insulation for water heaters. Fold in half and cut out a triangle for the neck and cut notches for the arms. Velcro or glue anything to the body to appear like a robot. We used CD’s, compasses, washers, old computer boards, silver food strainer, silver drawer knobs, colored gems from craft store, mini flashlight, colored glitter, glue and a battery tester from hardware store.
Arms
Pieces of flexible dryer ducting. Legs: Silver fabric sewn into simple pull on pants. Sweat pants would work just fine if you can’t sew. This Robot costume took about four hours to make not including the drying time for the spray paint and the shopping for the items.
Total Spent: $50
Contest Winner!
Costume by Groovy R., Los Angeles, CA

Thanks to the Robot costume ideas on this site, my son won the costume contest!
Total Spent: $50
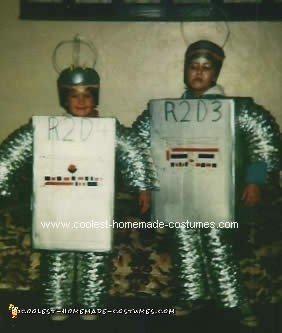
Made With Love By Dad
Costume by Kristin M., Ephrata, PA
Halloween was a time of year that my father always looked forward to for a few reasons:
1. He got to spend time with my sister and myself. 2. He took us trick or treating knowing full well that he would get 1/2 our candy. 3. He loved to make us costumes! Even though I was young you can tell by the expression on my face (the one on the right) that this WAS NOT the coolest costume in my mind! I don’t know why I felt this way.
Star wars was way cool at the time so my father decided to make us a Robot costume. Heck we looked like distant relatives of R2D2! (which is where dad got the idea from in the first place.) Dad was an ingenious man. He would use materials that he could scrounge up in the garage in the shed or on the job.
For the Robot costume my father used materials that he found lying around such as curved pieces of wire, free in garage, body boxes, free from an appliance store, silver face paint, cut in half bleach bottles, and metallic slinky-like ducting material.
It might not have been too cool back then but now I can look back at it and laugh! You know just recently this Robot costume came up in our conversation. Dad commented on how much I disliked this Robot costume. I tried to sugar-coat it the best I could but once again the face said it all. But anyway, thanks Dad. It was pretty cool.
Total Spent: $8
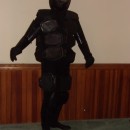
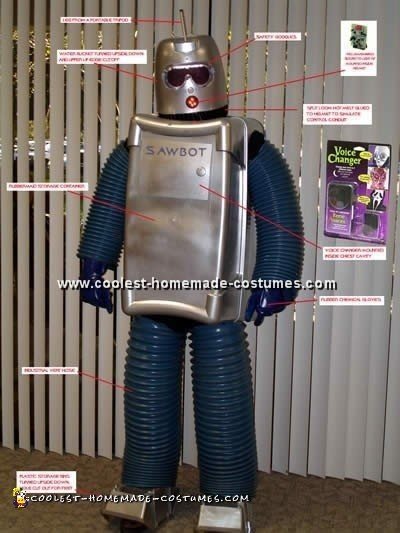
Futurama’s Bender Costume
Costume by Michael K., Orlando, FL
I wanted to do a “Bender” robot costume from the “Futurama” show but I couldn’t find a suitable body that would fit around me. So, I found a Rubbermaid storage container and cut out the holes for the head and arms.
I completely removed the side opposite the head opening so I could basically just step into the costume. The back was simply the snap on lid. To disguise the fact that I was using a big storage container I removed the securing lip of the lid and the main container. This did make the container more flimsy.
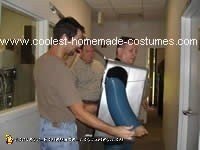
I used a Roto-zip to cut out all the holes. Do not try to do this with a hacksaw as the container will crack and break! The helmet is just a water bucket painted silver with the lip removed. I was surprised at how many people asked where I got a robot helmet.
The arms and legs were tricky… but I was lucky to find out that my company was throwing out some old industrial vent hoses. The spray paint was formulated for plastic and I used about 3 cans of it for my Robot costume. It did tend to scratch easily though.
Total Spent: $100
Super Tall Robot Costume
Costume by Molly P., Lakeview, MI
My son wanted a robot costume and I had him draw me a picture. I used a heavy duty computer box for the body with head and arms cut out. I used dryer vent for arms and legs. After pushing it through the holes I had cut for the arms I taped it with duct tape on the inside.
Then, I flattened out the dryer vent at the top two pieces for the legs and taped it into the bottom of the box to hang in front.
I used a Build a Bear box for the head since it already had convenient holes cut out on each side and in front for his face. Then I used the styrofoam from the computer box to make the face on top. Next, I taped two pieces together with duct tape and then taped it to the box.
I also used two push on battery operated lights for the eyes (this was a great effect at night when we went trick or treating, everyone saw him coming). I spray painted the whole thing with silver spray paint. He put it on over his head, with the biggest box resting on his foam covered shoulders.
Total Spent: $20
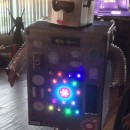
Domo Arigato Mister Roboto
Costume by Christine M., Trenton, MI
This costume is Mister Roboto with lights and sounds! This was a fun robot costume to make.
I started off with 2 boxes. So that none of the writing from the boxes showed, I turned the boxes inside out and taped with packaging tape. I then spray-painted them with sliver enamel spray paint and cut out holes for arms and head. I also cut out the bottom of box.
Accessories
All my accessories I bought from various dollar stores. The hot glue gun was best to put everything on the robot costume body. I used Tea light candles for buttons (remove candle), cell phone for sounds, and 3 flashlights (there were smaller onest that I had strapped to the robot costume head).
I cut holes in the box and screwed lights from front. Also, I used Pie tin pan cellophane (came in 3 colors) and battery operated Christmas lights (tape the battery to the box.).
The 3 flashlights he turned on from the front (I made the holes, so they fit snuggly in the box). The knob on the robot costume that actually moves was from the middle of a strainer (bought at dollar store). I unscrewed and cut a hole in the box and screwed it right in.
Head
The head of the robot costume was made with a fry strainer (cut in pieces and used for eyes and mouth). For one antenna I used wire hanger wrapped in tinfoil and spray-painted; for the other antenna I used a toothpick holder. I used Ranch dressing containers for the ears and spray-painted silver with shish kabob sticks glued in and foil covered chocolate balls (from a candy store).
Arms and Legs
I bought silver gloves at the dollar store also and used Dryer vent for arms and legs.
Feet
For his feet, I used boxes and wrapped tin foil around them. For the party on Halloween night, I sprayed-painted an old pair of shoes silver. He received so many compliments on his robot costume and lighted the way for everybody.
Total spent: $10
Robot Costume With Personality
Costume by Hayden F., Saint Clairsville, OH
I saw the robot costume here on your site and decided to make my own with its own personality. This costume was for my nine year old son.
Making the robot costume: I used two regular cardboard boxes I already had on hand. I spray-painted with fast dry silver spray paint (I had all the holes cut before spray painting). Securing the pieces required the all mighty HOT GLUE GUN.
I went to the dollar store and purchased an outdoor thermometer (on the body), two plastic sink strainers (eyes), red plastic bowls (for the sides of the head), rubber slip over shoes, and a blinking flashlight (top of the head- it is actually taped inside of the head and the yellow “bowl” sits on top of the costume head and a hole is cut into the cardboard for the light to shine thru).
For knobs, I used water bottle lids spray-painted silver. I found a picture of a clock in a Cabela’s catalog and scanned it for the robot costume clock. I then placed it on a CD for a shiny border. The “gauge” thing was made with some puffy paints I had.
Heading to the Hardware Store
My husband picked up the dryer vent duct at a hardware store- he bought 25ft, but only maybe half of that was used (he can use the rest at work). I cut holes for arms smaller than the dryer duct and shoved them inside, so when he wears the costume he can just slip it all on over his head.
The box comes about down to his hips so he can sit down if needed. He wore thermals and gray shorts. The legs were covered with the dryer duct to about mid-thigh; they wouldn’t fit any higher, and he is a skinny kid.
At the top of his legs I secured the dryer vent with duct tape. On the back of the robot costume I had silver knobs and the pie plate with cut outs and cellophane- like the radiation symbol.
He loved this costume and had a lot of compliments on it. The robot costume only took about 4 hours to make (this includes spray-painting and shopping). The light on top is really cool, too.
Total Spent: $10
Coolest Retro-Bot on the Block
Costume by Lori H., Fuquay-Varina, NC
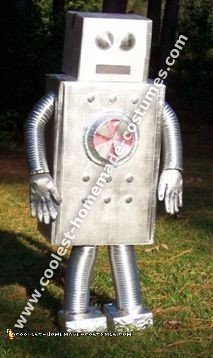
My ten-year-old was Retro-Bot this year. The costume was made out of 2 boxes spray-painted silver.
For the eyes, I bought sink strainers. I cut out squares and then glued the sink strainers over them. My daughter actually looked through them. I used gray tulle to cover the opening for the mouth. For the arms and legs, I used dryer vent duct.
I covered each side of a shoebox in tin foil for the robot costume shoes. The gloves were from the dollar store, spray-painted silver. On the body of the costume, I glued on spray-painted water bottle lids. I also used an aluminum pie pan that was cut out with red plastic wrap taped into the triangles.
The best tip I have for anyone using cardboard boxes for their costumes is that if the paint won’t cover up any writing that is on the box, take the box apart at the seam and turn it inside out. You can then glue or tape it back together. I used a cup box and the writing still showed through with several coats of primer and silver spray-paint. I threw it away and started over using the inside-out method.
Related costumes:
 Top 10 Lists – Coolest DIY Halloween Costume Collections
  1000+ Inspiring Homemade Book and Movie Character Costumes
  2000+ Awesome DIY Animated Character Costumes
  750+ Horrifyingly DIY Spooky, Gory, Dark and Scary Halloween Costumes
  140+ Mesmerizing Headless Scary Halloween Costume Ideas
  Halloween Home Made Costume Contest Winners – Hall of Fame
  800+ Game and Toy DIY Halloween Costumes
  500+ Coolest DIY Web Series and Television Character Costumes
Your comment has been sent successfully.