Ever since I was little, I have enjoyed watching sci-fi movies. Especially those that included aliens. I always wanted to come up with my own alien species and this year for Halloween I finally got my chance. Being a sophomore in college studying biology makes it hard to find free time. But Halloween is important to me and my boyfriend, Jesse, so I try to make costumes for us every year. This is my third year making costumes but I had no experience when I started so everything I do is accomplished through a lot of trial and error. I wasn’t happy with store bought costumes and wanted to make something that we can enjoy that will also make our friends, family and strangers alike smile.
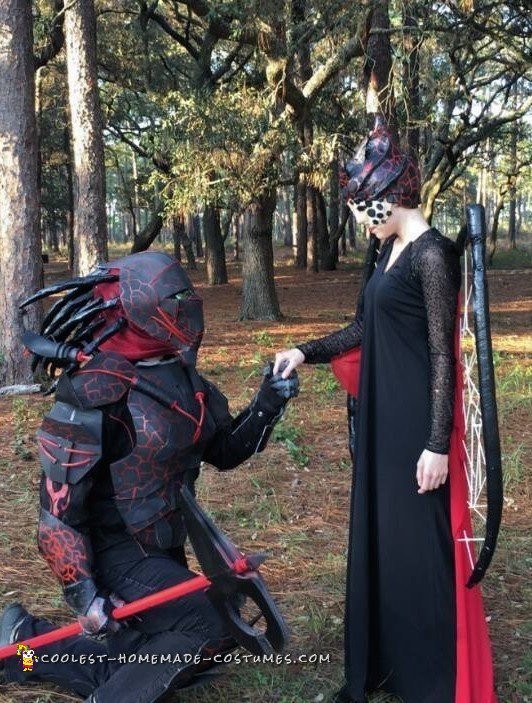
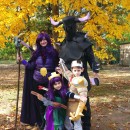
Is there life on other planets? The answer to that question is yes. Humans have never met any extra-terrestrials, but that is all about to change. Ardere is a small volcanic planet in the cigar galaxy which is inhabited by intelligent, heat loving humanoids. Female Arderians have heads that look like they are covered with lava and lava rocks. They also have exposed boney wings. Males have long quills that extend from the backs of their heads. Tragically, the planet of Ardere is dying and soon these humanoids will be left without a home. The Regina (queen) of Ardere has traveled to the closest inhabited planet called Earth in the Milky Way galaxy. Her only companion in this strange, water covered planet is her most loyal Garda (guard). Together they hope to find resources on Earth that can help restore the planet they call home.
The best part of Halloween for Jesse and I was getting to see the reactions that the costumes got from both children and adults. We remained in character the entire time that we were in the costumes. People loved that! We attended a Halloween event that was hosted by a local college and took a stroll through Walmart in costume on Halloween night. We felt like celebrities in our costumes because strangers kept asking us for pictures. Children were not very open to our characters at first. One little boy would not even look at the guard character at first but his mom eventually convinced him to give Jesse a high five. Priceless moment! Everyone enjoyed watching the guard as he walked with his weapon ready and the winged queen as she smiled and walked mysteriously. I was excited to tell people that the costumes were homemade. They were always amazed and many wanted to touch the armor, wings, and even my mask to see how they felt. The reactions from both kids and adults were perfect rewards for all of the hard work that went into making every piece. We both had the best time on Halloween. I can’t imagine our smiles being any bigger!
Constructing the Armor for the Guard
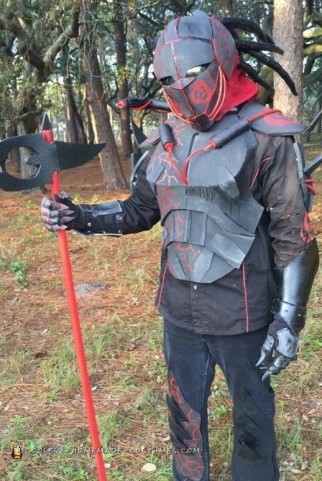
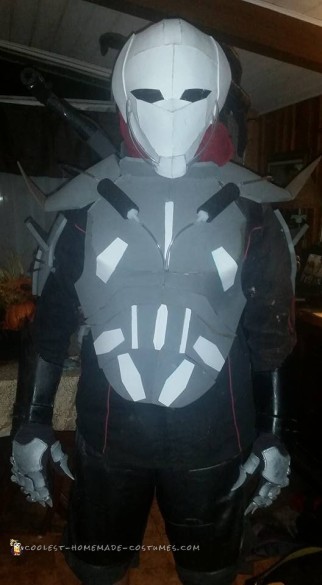
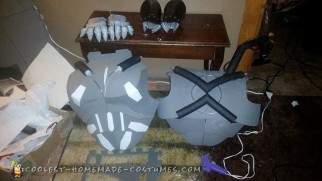
I was so excited about my concept and the costumes were fun to make even though they were very challenging. The armor for the guard character was made with supplies that can be purchased from the hardware store and the craft store. I started with an old catcher’s mask, dark denim jeans and a welding jacket that I found at goodwill and built the armor around them. I played around with different ideas until I found the right way to get the look I wanted. The armor was made out of foam matting from Lowes. I started building the armor by making stencils out of paper that fit together before I traced the design onto the foam mat and cut each piece out with a box cutter. The pieces were then shaped with a heat gun so that they fit together easily and formed to the body of the wearer. The same process was repeated for the back piece. After the chest and back pieces were completed, I used the two shoulder pieces to connect the back and chest. This created one “vest” that slips over the guards head and covers the entire torso. I also added straps on the sides of the armor that hold the “vest” tightly to the body.
The gauntlets (hands) were very tricky because I wanted them to move realistically but still be easy to wear. This required me to cut each finger piece, heat form it, and glue it onto black garden gloves individually. I overlapped the pieces as I worked my way up the fingers so that they moved like real, metal gauntlets when the wearer opens and closes their hands. The bracers (forearms) were made out of crafters foam the same way as the rest of the armor, by first using a stencil that I made from paper, then tracing the design to foam and finally cutting and gluing the pieces together.
The shin guards were made out of the same crafters foam as the helmet and the upper arm pieces were cut from the same foam matting as the chest and back. The battle ax weapon was a last minute addition. I made it out of pvc pipe, foam matting for the blade and spray paint to make it complete.
Construction of the Guard’s Helmet
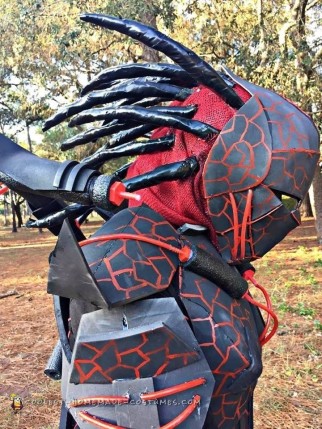
The helmet is made out of pieces of crafters foam that were cut and pieced together around the Catcher’s helmet like a puzzle. I used hot glue for all of the connections. After the entire front of the mask was covered with crafters foam, I covered the back with red burlap. The quills that stick out through the burlap are made from pipe insulation that was shaved down with a steak knife and wrapped tightly with electrical tape until each one was completely covered and curved. Once the structure of the helmet was complete, I added sun glass lenses to cover the eyes, and pieces of plastic tubing to complete the look.
Decorating the Armor and Helmet for the Guard
Once all of the construction for the guard was completed, I began to decorate! I used pipe insulation, crafters foam and plastic tubing that I painted red to add detail to all of the pieces of the armor. The plasma gun that extends over the shoulder was made from these materials as well. My boyfriend Jesse, who wears the guard costume, helped me to spray paint all of the pieces black. We then hand painted all of the red lava lines on the right side of the completed armor. The symbols on the shoulder and face of the guard are inspired by actual crop circles which may have been created by Arderians. Who knows! The last detail was the addition of LED lights in the chest tubes, plasma gun and beside the eyes to really make the costume come to life.
Paper-mache Construction and Decoration of the Queen’s Head
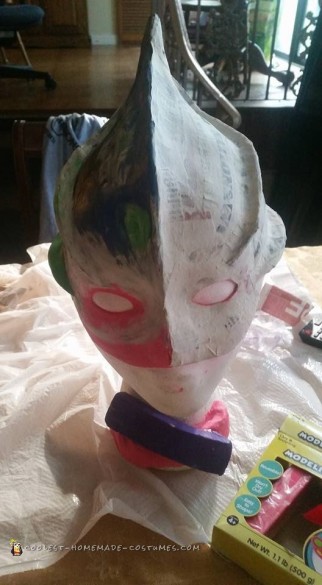
The queen costume construction included my first attempt at Paper Mache and took a lot of trial and error to get right. I began with a head form that I bought from the craft store, then I used oil based clay to create the shape of the alien head on the head form. To keep the Paper Mache from sticking to the clay, I covered the clay with tin foil. I used a simple recipe of flour and water to make the glue for the news-paper. I applied three layers to one side of the clay head, let it dry and removed it from the head form. I then repeated the process for the other side of the head. When both sides were done I joined them with Paper Mache. Once the whole thing was dry, I added some crafters foam around the bottom of the mask to make it longer (one of the errors I had to fix) before adding details. I cut coin sized circles out of crafters foam and glued them to the mask to look like the character has lava rocks on her face. I was then able to get creative with paint to complete the mask.
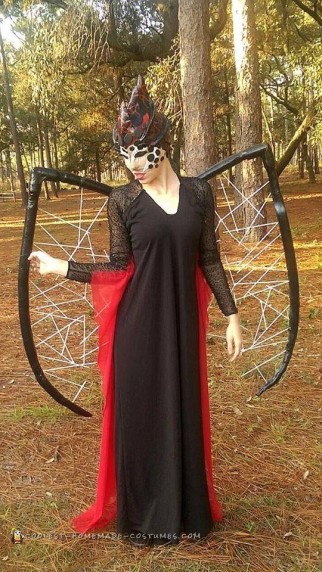
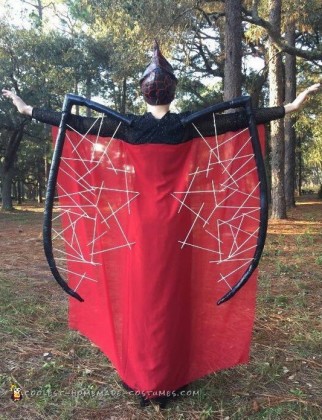
Wings and a Dress Fit for a Queen
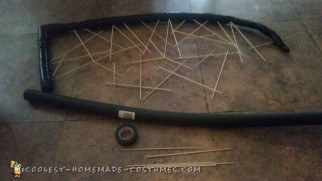
The wings were made just like the quills on the guard character. I shaved down pipe insulation, then used two pipe insulation elbow joints to make them curve before covering the wings with electrical tape. The mesh that makes up the middle of the wings is cooking skewers that I poked through the pipe insulation, glued to each other to form a mesh and painted white. I ran into a problem when I tried to figure out how to hold the wings onto my body. I ended up making a harness out of foam matting with straps that hold it onto my back like a back pack. I glued two wooden dowels onto the foam harness which stick out the back of my dress through holes. I simply slip the hollow pipe insulation wings over the dowels and they stay on. It’s that easy!
I bought the dress from goodwill and altered it to make it into a gown fit for a queen. I liked the beaded sleeves but I had to alter the neckline into a V-neck and add all of the red silky material in order to achieve the look I was going for. I didn’t have to do any sewing on the dress. I used hot glue to alter it and add the red material.
Finishing Touches on the Queen Character
the finishing touches to the queen were fake eyelashes that i glued to the mask and red lipstick on my actual lips since the mask part of the headpiece only covered the upper half of my face. the last challenge was getting all of my hair to fit under the head piece but a tight bun was a good solution to that problem. when i first put the completed costume on i instantly became the queen of Ardere. the costume was so easy to wear and the character was so much fun to become.


Related costumes:
 Clash of the Clans Family Homemade Costumes
 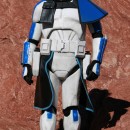 Coolest Homemade Captain Rex Costume for 10-Year-Old
  90+ Coolest Homemade Robot Costume Ideas
 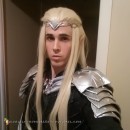 Thranduil Costume from “Battle of the Five Armies” Cosplay
 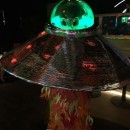 Awesome UFO Alien Costume that Lights Up!
  Spooky Homemade Costume – White Wendigo Forest Spirit
 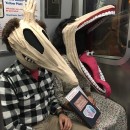 Awesome Beetlejuice Couple Costume: Resurrecting Adam and Barbara Maitland
 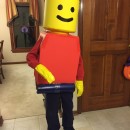 Cool Lego Minifig Costume