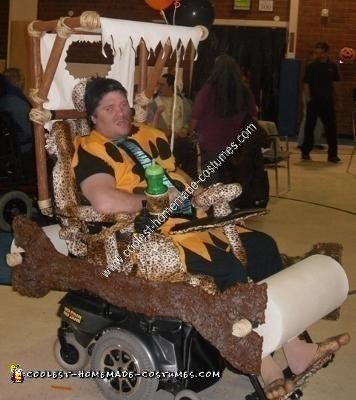
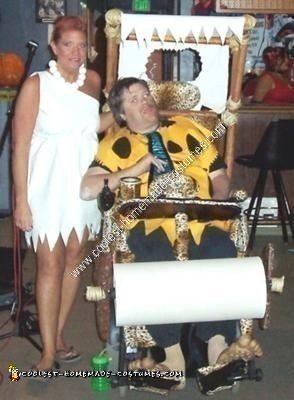
My adult son is in a wheelchair and every Halloween I make him a costume and I always try to incorporate his wheel chair into his costume. This year’s Homemade Fred Flintstone and Flintmobile Wheelchair Costume I think is the most cutest one of all. My sister’s and I made him into Flintstone sitting in the Flintstone car. We drew crowds everywhere we went and everyone wanted to get their picture taken with Fred. Plus they wanted to know how we made it, they would come up and feel it and try to figure out what we used. So here is how we made it.
1. TOP FRAME AND CANOPY: For the frame we used ½ in. PVC pipe and fittings covered with foam pipe insulation ( not the Styrofoam type but the black one that is more like rubber). We then painted a mustard yellow (craft paint) onto the insulation and let dry, then painted a medium brown (craft paint) over top and while wet used a tool , that leaves a wood pattern, over the wet paint to antique it and make it look like wood poles (everyone thought they were real). When dry we wrapped a thick twine in the corners and by all the fittings. Cut a piece of white canvas for the awning and attached it with Velcro.
2. SIDE RAILS: My sister freehand drew the shape to resemble the sides of the Flintstone car onto a thin board and cut it out. Painted the back of the board the same way we painted the top poles. When dry we took spray insulation foam and sprayed up and down the front of the board to give it the appearance of tree bark. When that was dry we took a segregated knife and shave off some of the shiny and round areas to give it a different texture in places and look more realistic. We then painted it with a medium spray paint and antiqued it with a lighter brown (craft paint) to give it definition. We found a place in the front (by his legs) and back of his chair where a piece of PVC could rest. We then cut four small blocks of wood and drilled a hole the diameter of the PVC pipe in the center of each block, to form a bracket to hold the PVC pipe. We glued and screwed the blocks into the inside of both ends of each side rail at the location of where the PVC pipe was so that the sides were even. Also to secure it even more we put an eye hook by each block and ran a bungee cord from side to side.
3. WHEELS AND AXLES: Cement forms cut to size and then painted them with stone spray paint , cut a disc, from a piece of the thin wood we used for the side rails, with a whole in the center to fit a piece of PVC pipe and pipe insulation and attached it to the forms with a staple gun. We then put the PVC pipe through the whole in center and added just enough pipe insulation to go into the wholes and keep the PVC secure. We then painted the insulation as we did the poles on the top and wrapped the ends with the twine and made a circle out of the twine to cap the ends and glued it all on with a glue gun. To secure the wheels so they would not fall off we used another smaller eye hook and attached it to the rail and ran a small bungee wrapped around axel and attached both ends of bungee to eye hook for each wheel.
4. DASHBOARD AND STEERING WHEEL: The dashboard we used the same thin board as before and freehand cut a shape, with a whole in center to fit the PVC with pipe insulation, then covered it with batting and vinyl. Steering wheel we used a WII steering wheel covered it with pipe insulation and then made a cover out of leopard material. We attached it by cutting the front PVC, that is attached to the side rails, in the center and using a PVC T- fitting.
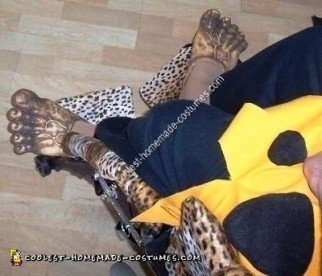
5. COSTUME & FINISHING TOUCHES: We found a piece of orange fabric at a thrift store., cut it to shape left open in the back so it was easy to get on and put about 4 inches of Velcro at top to keep it on. Found tie at thrift store and bought feet at Halloween store online. Boiled the feet to soften them as they were very stiff then painted them with brown craft paint and wiped off paint to antique them and make his feet look dirty then took twine and cut up rolled in paint let dry then glued to knuckles on feet to look like hair. Made covers out of leopard print material for all exposed parts of chair. For face took a cork burned it when cool rubbed it on his face then took a Kleenex to even it out and make it look like Fred’s 5O’clock shadow. Colored his hair black with Halloween hair spray.
6. WILMA: Used a soft white vinyl cut it to shape. Took Styrofoam balls and stringed them on a stretchy thread, Sprayed hair with pump hairspray tinted with red food coloring.
Hope this gives someone inspiration to try it we had fun making it and even more fun watching peoples reactions.


Related costumes:
 75+ Coolest Homemade Flintstones Costume Ideas
 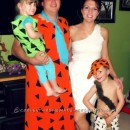 Handmade Flintstone Family Costumes
 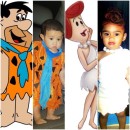 Wilma and Fred Flintstone Toddler Costumes
 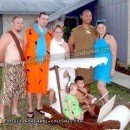 Coolest Homemade Flintstone’s and The Rubble’s Group Costume
 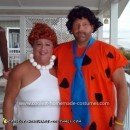 Coolest Fred and Wilma Flintstone Costume
 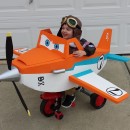 Disney Planes Dusty Crophopper Tricycle-mounted with Pilot Costume
  Authentic Frozen Family Costume – Elsa, Olaf, and Kristoff
 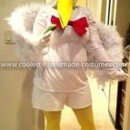 Coolest Vlasic Pickle Stork Costume
Love the way you made up the flintmobile and the two of you looks great! thx for your tips.
You are a great mom! That looks fantastic.
This is one of the most amazing costumes I’ve ever seen. Awesome job.