
I’ve entered a lot of costume contests over the years but I never won any big prizes. This is because, usually, someone shows up in a giant robot costume on stilts and takes it. Even if its just a store bought costume, if the guy is on stilts, he wins. After last year’s Halloween, I decided to go all out make the giant robot costume to end all giant robot costumes.
I realized ED-209 (from 1987’s Robocop) was a perfect pick. ED-209 is a cool looking but really campy robot; he is retro and not too trendy (I try to avoid trendy costumes). Next, it’s large but I could still achieve it’s actual size without relying on stilts for height. It is important to me that I can move comfortably in my costume and that is hard to do with stilts. However, the biggest reason is ED-209 has giant robotic chicken legs and that just makes me so happy.
All and all, took about 3 months to make and a few hundred dollars. I designed the pattern myself from various 3d models and the pepakura software. I highly recommend the pepakura software and EVA foam floor mats for use in any costume instead of traditional cardboard. I plan on spending a lot more time on this costume too, adding details and reinforcing for long term wear. I’d really like to do a 5K in it next spring.
I have a surprising range of motion, particularly in the legs. I can even bust a couple of real moves on the dance floor. (Moonwalking is surprisingly easy in this costume) I’m told it’s amazing, not that I can see myself while dancing.
While I did not specifically document the whole process, I am going to use the provided steps to give a quick run down of how I built it. Maybe you can get a few tips for your own costume building.
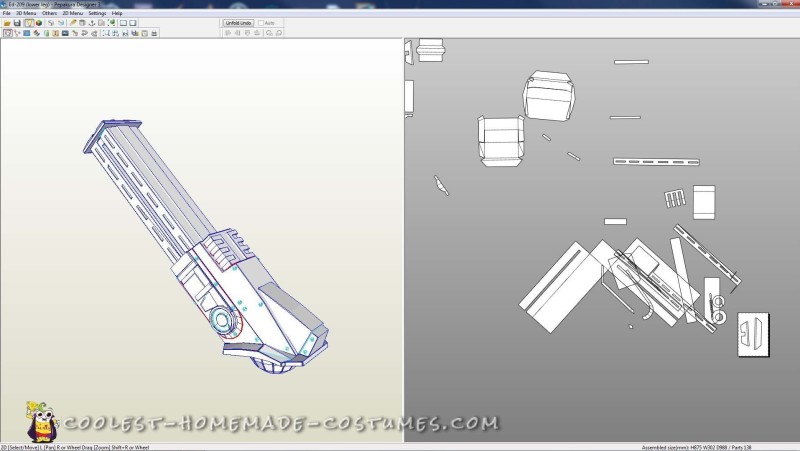
Turning the 3D Model Into a 2D Pattern
I designed the pattern from various 3d models of ED-209 I found online. I had to cut these models up into several smaller parts so they would be easier to render and understand. I then put them in the pepakura software to make 2D patterns. I took some time to clean up the patterns then printed them off. The larger blockier parts I had to measure with a ruler and scale up, so I did not have to tape together several sheets of paper.
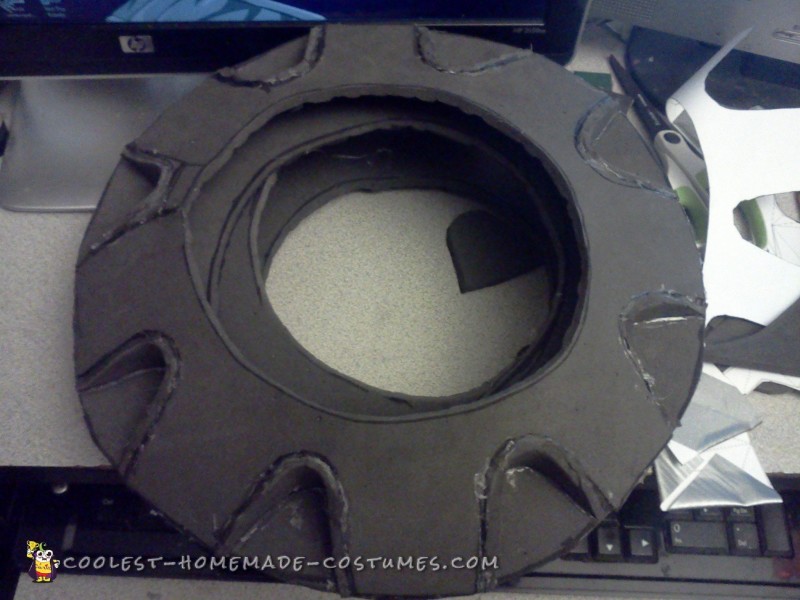
Assembling the Pattern From EVA Foam
My ED-209 stands approximately 7 and 1/2 feet tall and 7 1/2 feet wide. Everything had to be as light as possible because the weight really adds up on something this big. EVA foam is a great material and I recommend it for any costume as a substitute to cardboard. It handles hot glue better, is more flexible, and looks better after painting. This costume is made from floor mats, like the kind you would buy for a garage. (It is what people make those really good iron man costumes from).
This step was the most straight forward but also the most time consuming part. I spent hours cutting and gluing the parts together from the pattern. When that was done, coated it with a few layers of modge podge and spray paint to give it that nice metal look.
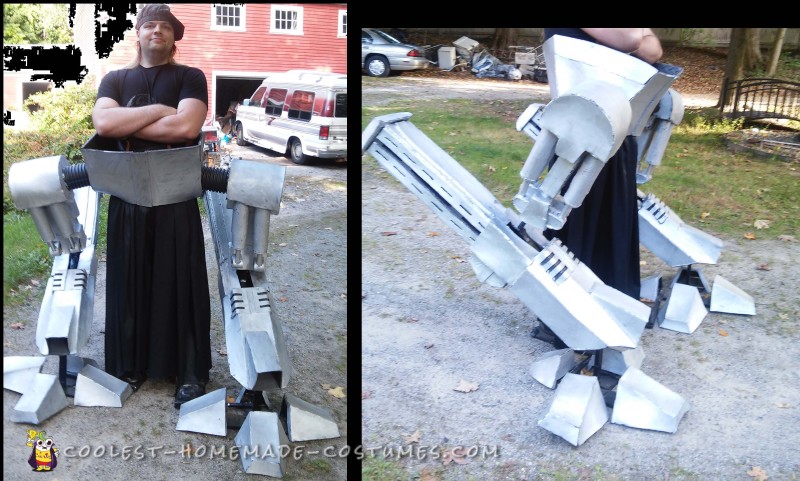
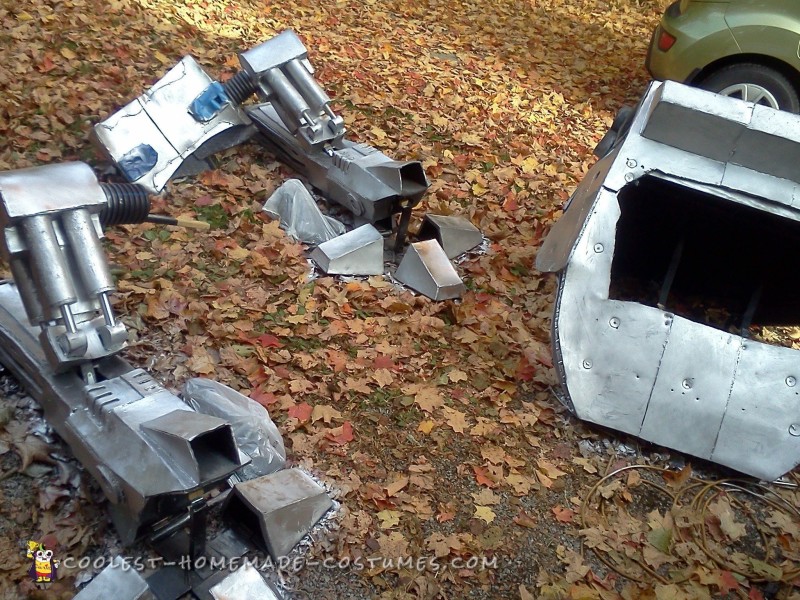
Constructing the Giant “Chicken” Legs
The giant digitigrade legs (aka “chicken legs”) stand to the sides of my actual legs in the middle and have full motion when I walk. They are connected from an old shoe to a wood cross with the toes on each side. The legs frame is just 3 wooden bars with 3 hinges on each leg (at the ankle, knee, and pelvis) with the top hinge attached to a another bar that acts at the waist. the legs are then held in the middle with a straps attached around my belly buttonto a weight belt I designed. (to make the legs back bending I just reversed the knee hinge.)
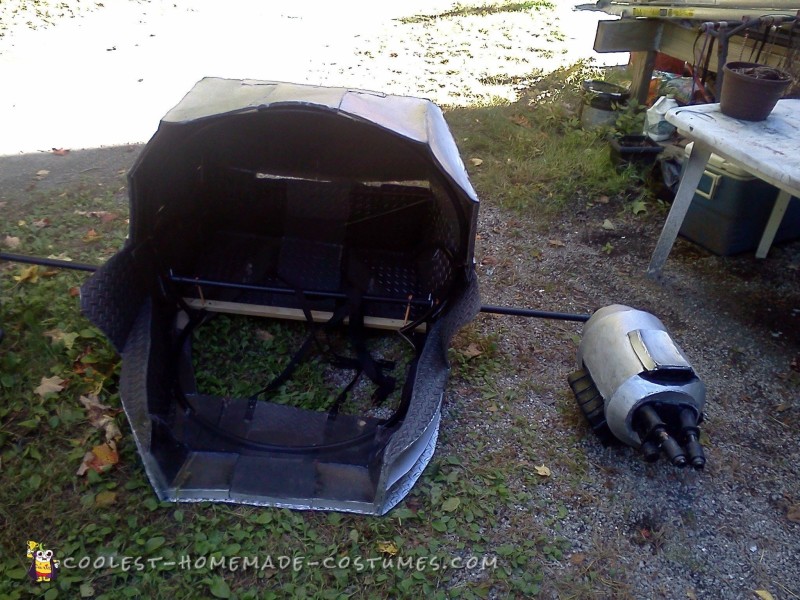
Reinforcing the Top
In some areas, foam alone was not going to do it. It’s simply not sturdy enough. The body was the trickiest part of the costume. It had to be light weight, but also large and hollow. The foam is too floppy for that so I had to reinforce the body. I came up with using pressed cardboard (aka old book covers) as it was lightweight, sturdy, and glues well to foam. I then screwed a few hoops made of piping to the inside.
Understand, if this was a life-size model, I would have just blocked in the inside with foam and problem solved. However since I was going to be in there it needed to be hollow.
Making it Modular
The costume is made to be taken apart so it can fit through doorway and down stairs (which ED-209 famously can’t handle). So each leg and arm is a separate piece as well as 3 pieces for the body. These are then reattached with some nuts and bolts. While moving the pieces is kind of a process, it only takes me 5 minutes to put it together. Once assembled, it only takes a minute or two to take on/off the costume.
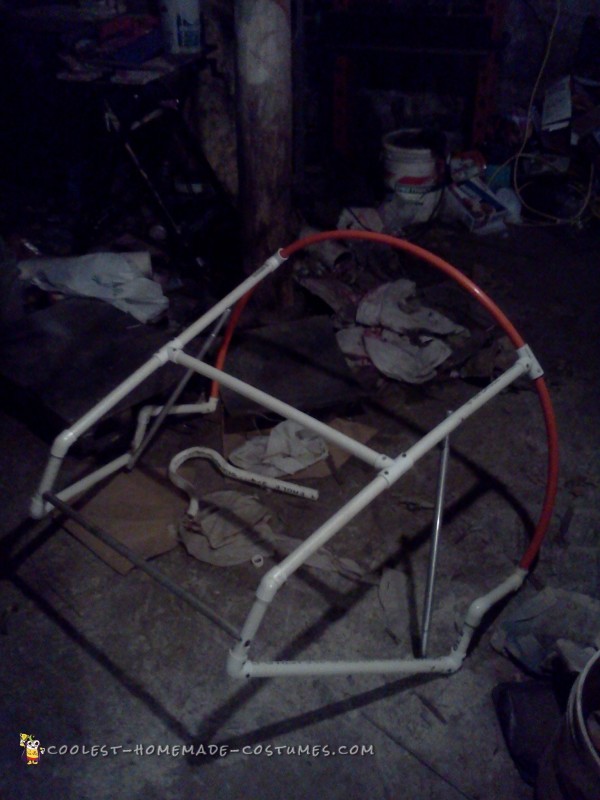
Making the Visor
Full discloser, I’m not the happiest with the visor. It’s too heavy and does not fit as well as I’d like. I plan to remake it using fiberglass or something in the future. However, for completion sake, here is how I did it:
1. I made the frame out of PVC pipe so it overlaps the foam.
2. I then made a cage out of a pile of old gutter guards connected with cable ties.
3. This was then covered by stereo fabric so I could see out but you could not see in.
It was not the best idea because every ounce counts on a costume this large. All that PVC pipe really adds up. So with the visor on, this costume is a strain. I could not wear it for more than about 20 minutes. However, without the visor, I could be in this for hours comfortably. Defiantly need to redesign it but then it needed to be ready for Halloween.

Related costumes:
 90+ Coolest Homemade Robot Costume Ideas
  Epic Alien Robot Costume
  Killer Candy Robot 3000 Costume
  Coolest Vintage Sci-Fi Robot Costume
 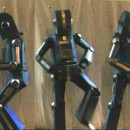 Awesome Articulated (Carboard!) Robot Costume with Tape Player
 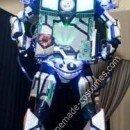 Coolest DIY Robot Halloween Costume
 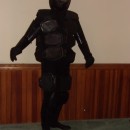 Cool DIY Robot Costume
  Cool Flashing and Blinking Homemade Robot Costume
Awesome!!
Awesome!!