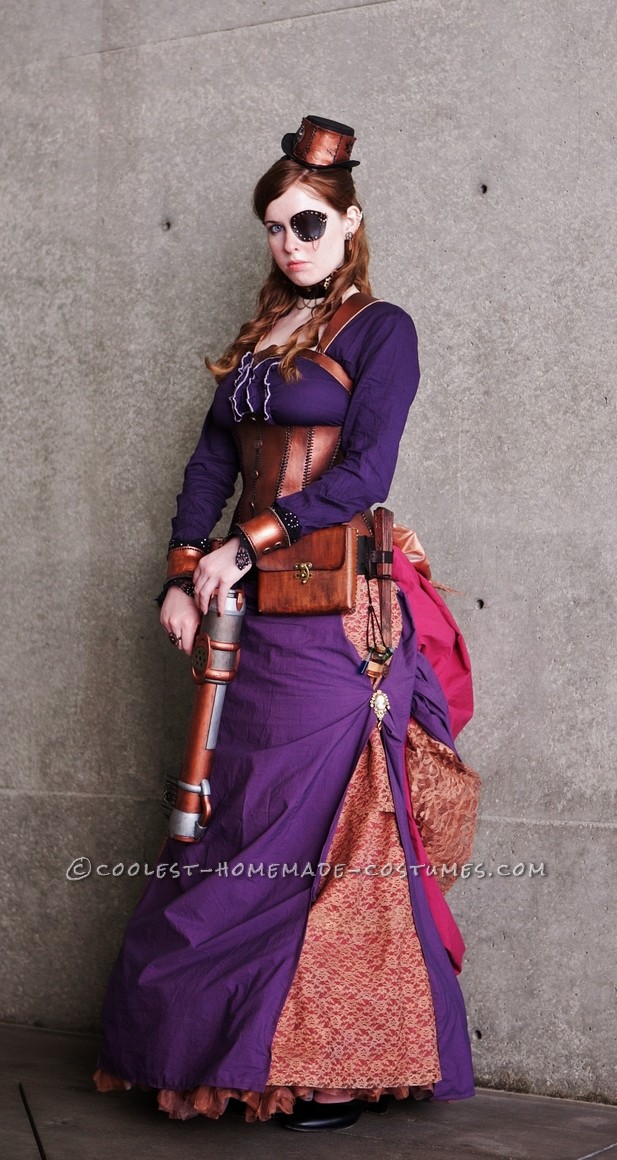
I love Steampunk and I wanted an original Steampunk Assassin Halloween Costume that would be elaborate, but fun to make. I have listed here every item and how it was made by order of completion.
Copper Spinning Gear ring:
- Description- A copper ring which has a cog that spins on top of a base gear.
- Materials- Tim Holtz cog, gear, brad, ring base, and Gorilla glue.
- How it was made- I took a cog and placed it on the center of the base gear. I placed a brad loosely between the holes of the gear and bent back the prongs of the brad so it is securely in place. Then, I glued the gear and brad to the top of a ring base.
Cost- About $5
Time- About 15 mins
Steampunk Fan:
- Description- A steampunk fan that was placed in the utility belt holster.
- Materials- Wooden fan, black paint, copper paint, Gorilla glue and gears.
- How it was made- I painted a wooden fan black. Once dry, I painted the fan lightly with copper to make it look antique. I cut gears in half and glued them to each fan panel.
Cost- About $10
Time- About an hour.
Mini Steampunk Top Hat
- Description- A copper steampunk top hat that clips onto my hair.
- Materials- Base top hat, tooling leather, black paint, copper paint, embellishments, artificial sinew, clips, grommets, ribbon and Gorilla glue.
- How it was made- I cut out a piece of tooling leather that would be the correct shape and size to fit almost around the entire hat. I wet the leather piece and let it dry while on the hat. I painted the leather black then lightly copper. I punched holes for the grommets to be placed into the leather. Then, I glued on different embellishments onto the leather. Ribbon was then tied between the grommets. The clips were sewn and glued to the bottom of the hat.
Cost- About $20
Time- About 2 hours.
Copper Leather Wrist Cuffs:
- Description- Leather wrist cuffs that tie around my wrists.
- Materials- Tooling leather, lace, artificial sinew, black paint, copper paint,
- How it was made- I cut out pieces of tooling leather that would be the correct shape and size to fit around my wrists. I wet the leather pieces and let it dry while wrapped around my wrist. I painted the leather black then lightly copper. I punched holes for the grommets to be placed into the leather. Then, I sewed lace to the top and bottom of the cuffs. Ribbon was then tied between the grommets.
Cost- About $20
Time- About 3 hours.
Copper Corset:
- Description- A copper corset that tightened by waist by 10cm.
- Materials- Tooling leather, artificial sinew, buttons, grommets, ribbon, black paint, copper paint.
- How it was made- I made the corset design and cut the pieces out of tooling leather. Each hole for where the piece needed to be sewn was hole punched. The leather was wetted and sewn together with sinew. It dried in the correct body shape. Grommets and buttons were placed into the corset. Then it was painted black then copper. Ribbon was then tied between the grommets.
Cost- About $85
Time- Over 25 hours.
Stuck in Time Choker:
- Description- A clockwork choker that ties at the back of the neck.
- Materials- Brown velvet, Tim Holtz brown ink, Tim Holtz clock face, clock hands, gears, chain, and Gorilla glue.
- How it was made- I cut a yard long piece of velvet and punched small holes for where I wanted to place the chain end in. I placed the chain carefully into each hole. Then, I lightly inked the clock face and clock hands to get an antiqued look. The hands were glued to the clock face. The gears and clock face were then glued to the velvet.
Cost- About $20
Time- About an hour.
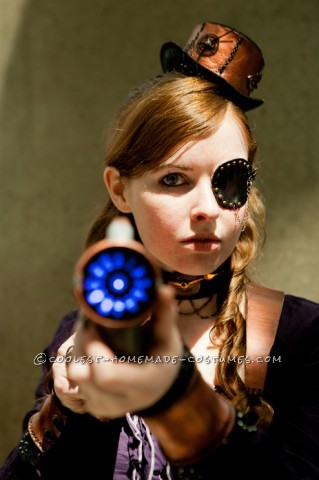
Steampunk Eye patch:
- Description- A custom eye patch that I stuck onto my face with liquid latex.
- Materials- Tooling leather, studs, Gorilla glue, chain, copper rose, and brown leather dye.
- How it was made- I cut out a piece of leather, wetted it, and pressed it to my eye until dry. Then, I dyed the leather. I glued on the studs around the eye patch and copper rose. The chain was then hooked into the rose and attached to the bottom of the eye patch.
Cost- About $10.
Time- About 2 hours.
Ray Gun:
- Description- A ray gun that lights up with a purple beam at the push of a button.
- Materials- Nerf gun, battery pack, batteries, button, wire, flash light, purple light gel, black paint, copper paint, silver paint, glue, brass paint and gears.
- How it was made- I took apart the gun and took off any stickers labeled “Nerf.” Then, I drilled a hole in the handle of the gun and place a button in it. I attached a wire the button which then attached to a battery pack. The inside of a flash light was placed into the front of the gun. The wire attached to the flash light. I screwed the gun back together and placed a purple gel into the front of the gun. The gun was painted black then different metallic colors. Gears were glued to the gun as well for decoration.
Cost- About $50.
Time- About 6 hours.
Ear Cuff:
- Description- A wire wrap ear cuff that is attacked by a chain to a gear earring.
- Materials- Copper wire, silver wire, gear, earring base, and chain.
- How it was made- I took a couple inches of copper wire and wrapped silver wire around it. Then, I shaped the wire into a cuff. I glued a gear to an earring base and attacked chain to it. The chain was then attached to the cuff.
Cost- About $10.
Time- About an hour.
Blouse:
- Description- A blouse that I had originally purchased and customized to work with my costume.
- Materials- White cotton blouse, thread, buttons, navy blue Rit Dye, and win Rit Dye.
- How it was made- I customized the blouse so that it would have a lower collar by cutting and sewing it into place. I removed all of the old buttons and replaced them with new black ones. I took an old pot and followed the directions so that the dye color would come out a deep purple. I dyed the blouse in the pot for an hour in hot water. I then rinsed the blouse out in warm water for another hour.
Cost- About $30.
Time- About 3 hours.
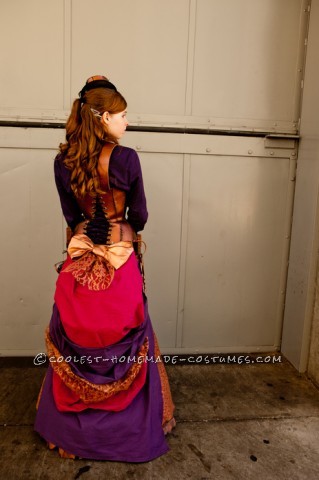
Bustle:
- Description- A bustle with a metal cage base and fabric outside.
- Materials- Plumber’s tape, black chord, artificial sinew, thread, lace, copper spray paint, muslin, Rit navy blue dye, and Rit wine dye.
- How it was made- I made a cage bustle by sewing together plumber’s tape. This was reinforced with double layers of the metal tape and black chord. The muslin was then dyed according to the Rit instructions in the deep purple and wine colors. I then sewed the edges of the fabric so it wouldn’t fray. The lace was spray painted with copper spray paint. I made a bow out of the fabric and also spray painted it. The fabrics were then bunched and sewn to the metal base. The bow was sewn on top of the bustle.
Cost- About $40.
Time- Over 8 hours.
Skirt:
- Description- A skirt that I based off of a Victorian dress that I saw in a painting.
- Materials- Muslin, Rit navy blue dye, Rit wine dye, thread, lace, copper spray paint, and an elastic waist band.
- How it was made- The muslin was dyed according to the Rit instructions in the deep purple and wine colors. I then sewed the edges of the fabric so it wouldn’t fray. The lace was spray painted with copper spray paint. The lace was layered and sew together to go on either side of the skirt. A wine layer of fabric was sewn all the way around the waist band. The copper lace was sewn on each side on top of that. The purple fabric was sewn on the front and back of the skirt. The purple fabric was then bunched on the sides of the skirt and sewn together.
Cost- About $20.
Time- Over 4 hours.
Leather Utility Belt:
- Description- A utility belt which includes pouches and a fan holster.
- Materials- Tooling leather, artificial sinew, grommets, ribbon, bag clasps, and brown leather dye.
- How it was made- I cut a strip of leather for the belt portion and dyed it brown. I place grommets into the ends of the leather strip. I cut out leather pieces for the pouch base and flap for two pouches. I then sewed the pieces together and sewed the clasps into the pouches. The complete pouches were then sewn into the belt. Ribbon was tied in between the grommets.
Cost- About $40
Time- Over 10 hours.
Total Time Spent on Costume: Over 66 hours.
Total Amount of Money Spent on Costume: Over $360.
Overall, this original Steampunk Assassin Halloween costume was hard work. I love how it came out and many people thought so too when I wore it early to a convention. I was proud of my work and it was a good feeling to get pleasant responses from peers and convention goers. I can’t wait to wear this costume again for Halloween.
Thank you for your consideration.

Related costumes:
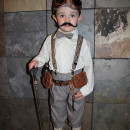 Victorian Explorer Steampunk Costume for a Toddler
 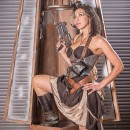 Sexy Steampunk Sheriff Costume
  90+ Coolest Homemade Robot Costume Ideas
  Coolest Family Costume Tales of a Steampunk Alien Invasion
  Steampunk Inspired Pumpkin Queen Costume
  Awesome DIY Cyborg Costume – Locutus of Borg ( MODDED v6.0 )
  Awesome UFO Alien Costume that Lights Up!
  Awesome Articulated (Carboard!) Robot Costume with Tape Player
Wow! Gorgeous! You are very talented and patient
Wow! Gorgeous! You are very talented and patient