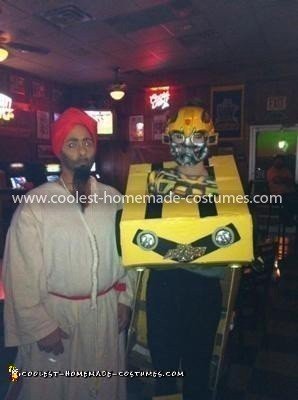
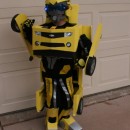
My boyfriend is totally in love with the Transformer movies, and so I decided this year I would make a homemade Bumblebee Transformer costume. A lot of people doubted that it would actually transform and look cool, but I did it. It took me a lot of cardboard, glue sticks, duct tape, and THE DOLLAR TREE!
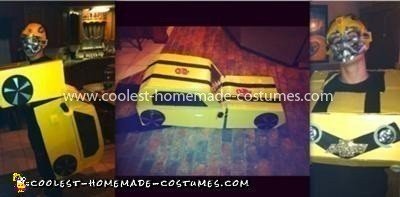
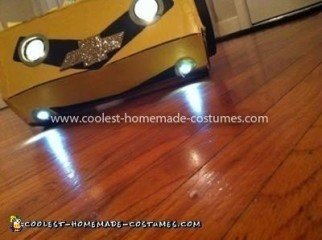
I started with the top of the car, and worked my way to the front, and lastly I did the doors (using the hard poster board). For the headlights I used flashlights, and smaller book lights. When standing up, it looks like a transformer, especially with the mask (that I did buy) and when you lay down flat on the ground it is a CAR!!! A CHEVY CAMARO! It looks a lot like one, I had to model it after the pictures on the internet.
The total cost was around 75 dollars, because of the cardboard slabs I had to buy, the posterboard for the flaps, the wheels were made of pans, glitter, glue, tape and mask. For the “windows” – I painted them black, but put a clear wrapping paper over it, to give it a sort of shine.
Everyone thought my Bumblebee Transformer Costume was the coolest thing ever, and I was so proud of it because it took a lot of hard work. It is a two piece costume, one is strapped to the back, and the other just comes over the head, where you can hold onto the flashlights for support.

Related costumes:
 Awesome Homemade Transforming Bumblebee Transformer Halloween Costume
  Coolest Bumblebee Transformer Costume
 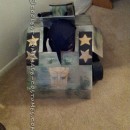 Coolest Homemade Transforming Tank Transformer Costume
 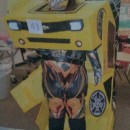 Cool Transforming Bumblebee Transformer Camaro Costume
 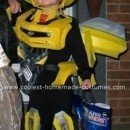 Coolest Bumblebee Transformer Halloween Costume
  Cool Lego Minifig Costume
 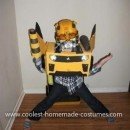 Coolest Bumblebee Transformer Homemade Costume
 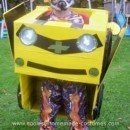 Homemade Bumblebee Transformer Costume Idea
wowwww..so awesome!!!!
I have no idea why it posted that it cost 75, I meant 25, lol.
4 flashlights-4$
4 pans-4$
Duct tape-$1
2 Poster boards-$2
Hot glue sticks-$2
Mask-$10
I lived at the dollar tree!!! So cheap!
If anyone wants step by step, I can provide!!
Well done. Can i have the instructions please.
thanks
M
I am amazed at the creativity, I am greatful for that. I would like to get a copy of you instructions…my 7 year old would be so excited
I dont really have any instructions for it, i took a box and made the top part of the car and cut a hole for my head and left the back open so i could transform and put holes for the flashlights
the back part is just cardboard formed like the back end of a car.. the back of it is strapped around my back and arms, like a booksack would be.. so when u lay down it connects.