His pants are square, his body is a sponge and his face has a grin that just won’t quit. For the squishiest, happiest homemade costumes, you must check out this awesome collection of SpongeBob costume ideas.
Create your homemade costume from cloth, cardboard or foam. Discover the different ways people here have designed and implemented their DIY costume visions. One innovative idea is to use actual sponges! Genius and so cool.
In addition, there are many choices to make. Such as, will the costume cover the wearer’s head or not. But most importantly is to make your homemade costume as comfortable as possible. Find the tips and tricks here to help make your best DIY costume ever.
So set your eyebrows to stunned and get crafting with the most amazing tutorials for SpongeBob SquarePants costumes. Which DIY costume design will you choose this Halloween?
Take a look at these cool homemade NAME costumes shared with us by costume enthusiasts from around the world. Along with the costumes here, you’ll also find loads of homemade costume ideas and DIY Halloween costume inspiration for your next costume project. Enjoy!
Latest SpongeBob Costumes
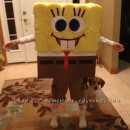
- Cool DIY SpongeBob SquarePants Costume for a Boy
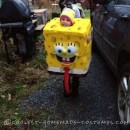
 My name is Connor and I am 4 years old. My costume is made from an Amazon box covered with … Read more
 - SpongeBob Costume
 When I was invited to a Cartoons and Comics themed party I could only think of one character I wanted … Read more
 - Coolest Homemade SpongeBob and Plankton Couple Costume
 When my daughter decided that we would dress up in Spongebob this year, I just couldn’t find the “perfect” Spongebob … Read more
 - Coolest DIY SpongeBob Halloween Costumes
 Our family Trick or Treats for the local Food Pantry and I hand make our costumes every year. My daughter loved … Read more
 - SpongeBob and Patrick Couple Costume
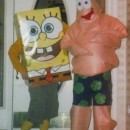 Spongebob was so easy to make. It started the a poster of spongebob’s face that I found at a toy … Read more
 - Homemade Spongebob Costume for a Boy
 My “little” as I refer to him, was obsessed with Sponge Bob and begged to be him for Halloween. The … Read more
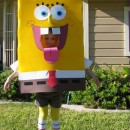
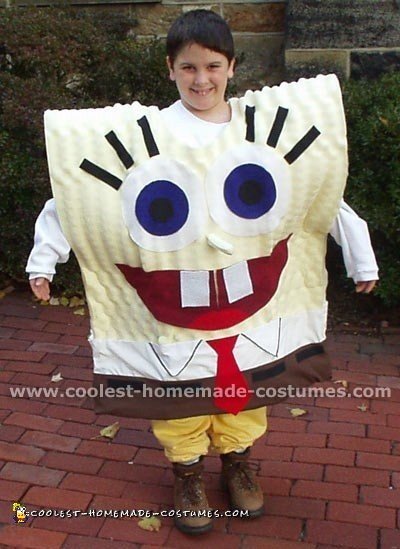
 - Coolest SpongeBob Costume For a 9 Year Old Boy
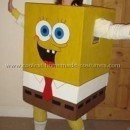
 This Is How We Made This Coolest SpongeBob Costume: To make this SpongeBob costume, we used a square box (cut … Read more
 - Cool DIY Spongebob Crew Group Costume
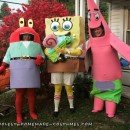
 My kids decided to be Sponge Bob characters this halloween, and since I am big into repurposing and making costumes … Read more
 - Mermaid Man and Barnacle Boy Couple Halloween Costume
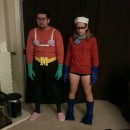 So, my boyfriend and I had been racking our brains for what to be this Halloween when two aging superheroes … Read more
 - Coolest Sandy Cheeks Costume from SpongeBob Squarepants
 For this costume we dressed our little girl in all white and added red and blue electrical tape to the … Read more
 - Homemade Spongebob Costume: People Thought SpongeBob was Part of the Show!
 My four-year-old son wanted to be Sponge Bob, and he told me he wanted to be him, not just wear … Read more
 - Cool Homemade SpongeBob and Gary to the Rescue Child Couple Costume
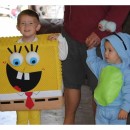 My boys (2 and 4 at the time) are the ultimate Spongebob fans, especially my oldest – Austin. He desperately … Read more

Featured SpongeBob Costumes
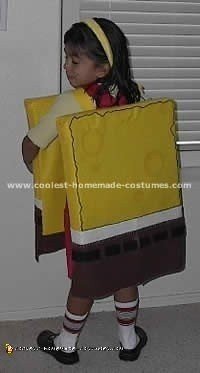
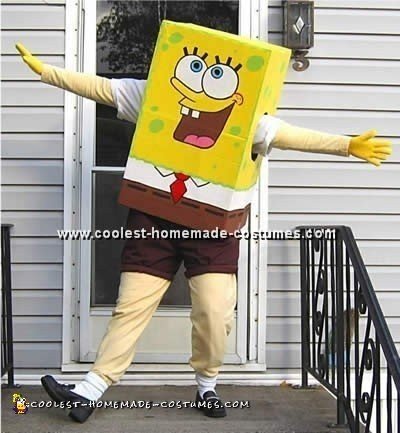
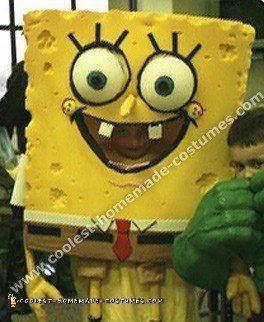
To make this Spongebob costume you will need four large sheets of yellow card, large thick cardboard box, plain white paper, PVA glue, assorted colors of foam, assorted colors of felt poster paints, markers, cellotape, scissors, brown shorts, a yellow T-shirt and long white football socks. Ever since I heard his squeaky bubble shoes I’ve always wanted to be SpongeBob for at least a day. And on Halloween Night I got the chance to become SpongeNiamh SquareBum.

Body
Acquire a huge Weetabix box from Dunnes Stores and four large sheets of yellow card from the craft shop. First try the box on for size and cut out holes in the sides for your arms as well as a rectangle in the top for your head and the in the bottom for your bottom.
Next cover the entire box in the yellow paper using PVA glue. Make sure you have a picture of Spongebob printed out from one of the many online and use that as your reference.
Eyes
Use the bottom of a saucepan for tracing two circles on white paper. These are for the eyes. Paint an A4 sheet of paper black and leave this to dry. When dry cut the paper into small black strips for the eyelashes and cellotape them onto the eyes (at the back). Cut out two eyebrows.
For the lovely blue irises use a small round object as a template and cut out two circles from this. Paint these blue and leave to dry. When they’re dry then stick them onto the SpongeBob eyes and then use black felt for the pupils.
Cheeks
The cheeks are just drawn on in red marker. For the mouth and teeth use white felt and pink foam for the tongue. The yellow spots on Spongey are just various size circles of yellow foam (there’s some on the back too).
Square Pants
The bottom half of the Sponge bob costume was painted on and the red tie and black stitches were painted beforehand and stuck on. Don’t forget to wear the long white socks – just draw on blue and red stripes at the tops of them with permanent marker. I decided that for my Spongebob I was going to have to forfeit having the infamous SquareBum. So I wore brown shorts that I had and I had a Spongebob T-shirt for underneath. This is also handy when you want to dance later on – take off the cardboard costume and viola you’re still a Sponge!
Points to note for this Sponge bob costume: 1. Make the armholes high up enough that you can drink properly! I had to use a straw all night to drink. 2. People will treat you like a celebrity as you walk down the street. Don’t let it get to your head! 3. I engaged in a kung-fu style fight with my brother punching Spongebob’s face – and the costume is still perfectly fine! If you get cardboard that’s thick enough then you too can participate in such hilarious antics. 4. It’s quite useful for getting through large crowds – use those square shoulders to push back hooligans and drunken people. 5. If you wear a Clockwork Orange style bowler hat you can slink into the costume on the tram and make it look like you’re really just a Sponge with legs.
Total Spent: $30
SpongeBob SquarePants!
Costume by Jennifer M., Dalton, GA
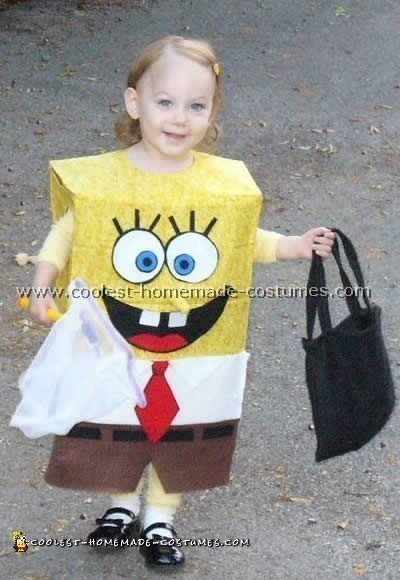
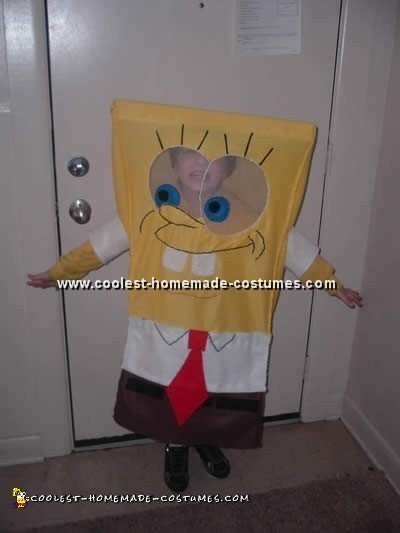
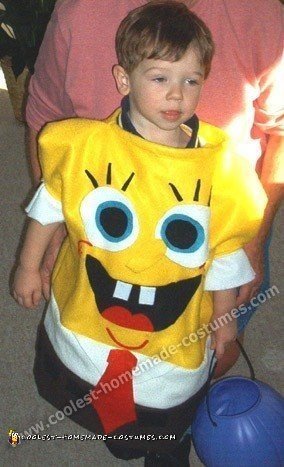
My two year old daughter loves SpongeBob. It seemed like a great idea to let her go in a SpongeBob costume for Halloween but I couldn’t find a costume in her size and one that wasn’t ridiculously priced. The best solution seemed to be to make our own. I did some internet research and found some great ideas on this site and then adapted them to what I had to work with in materials and skills.
Making the Costume
I started with a large brown paper bag which I got free from our local grocery. It held the square shape perfectly. I found the right shade of yellow fabric in the fabric dept. and bought enough to cover the entire bag. Then, I got some small squares of felt in every color I would need to make his shirt, pants, tie and face.
I cut the bag up the back so she could slip it on easily without pulling it over her head. I cut a small neck hole then cut arm holes. To cover the entire bag with the yellow fabric I used spray adhesive.
I cut the white and brown felt squares to the right size for shirt and pants then used spray adhesive to place them in the right place over the yellow fabric. I worked with the front sides and back of the bag as separate pieces and was just careful to line them up evenly. Then, I used hot glue along the edges for extra hold.
Making Spongebob’s Face
Next, I printed a picture of just his face blown up to the size I needed and used it as a guide and template for cutting each piece of felt to make his facial features and glued them into place. I used a small piece of the yellow fabric stuffed with cotton balls to make his nose. Black felt strips for his belt and eyelashes. I dressed my daughter in a yellow sweat suit and black shoes and she was ready. She carried a net like Spongebob’s jelly fishing net and my husband and I dressed as jellyfish by wearing gray shirts with belts and hats made from large bubble wrap.
My daughter loved her Spongebob costume, all and everyone was really impressed that it was homemade. Everyone said it was way cuter than the store bought ones!
Total Spent: $10
Absorbent and Yellow and Porous is He!
Costume by Suzanne D., Middletown
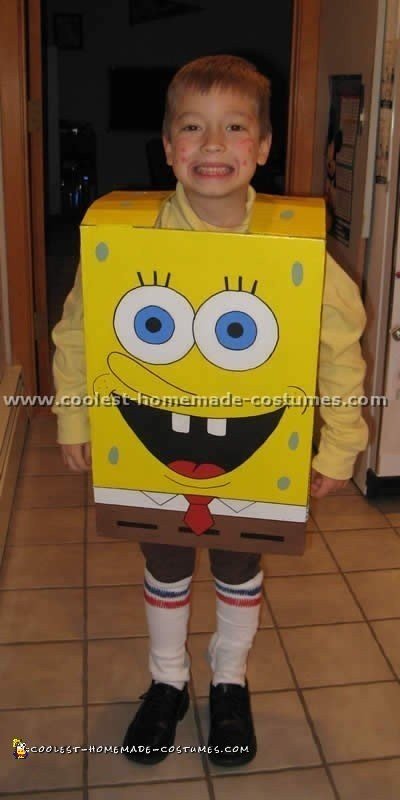
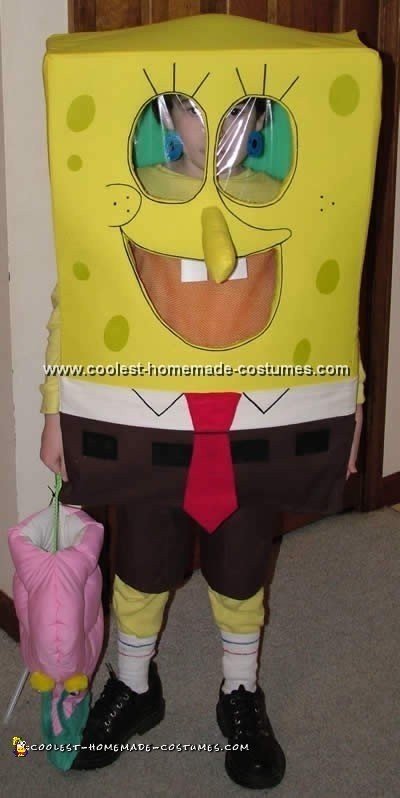
I made this SpongeBob costume for my six year old son. According to him it was the best costume ever! I got most of my ideas from this website – thanks to everyone for your creativity and detailed information! Since I can’t sew and have no artistic ability I thought the “cardboard box” concept would work best.
For safety and comfort I wanted my son’s head to be on the outside of the box. I knew I would never find a perfectly sized box therefore I made one by just cutting cardboard to size and taping it together. I used a very thin cardboard to make it light enough to carry.
Measuring SpongeBob
First, I measured across the shoulders to give enough coverage without restricting his arms. Then, I measured from the top of his shoulders to a location past his waist where I thought SpongeBob’s shorts would be (read more about this mistake at the end). I left a large enough opening on the sides to allow his arms to move easily and a large enough opening for his neck. Although this opening was okay for his neck it turned out to be too small to get his head into. So I left one side of the top untapped. This acted as a flap that I could have open when getting the costume on and off and then closed when he was wearing it (by retaping it).
I used a straight edge a utility knife and packing tape to cut and tape the box. I then “drew” SpongeBob on the box with a pencil. As I said before I am not artistic at all. I used one of my son’s SpongeBob’s pictures and determined that I needed to multiply each measurement on the picture by five to fit proportionately to the box (with a bit of a fudge factor sometimes). I was able to use a straight edge for most things and bowl lids for the eyes. The challenge was the nose and mouth. I just marked points relative to the picture and then free-handed in between each mark.
Painting SpongeBob
I used acrylic paints which provided good coverage without making the cardboard wet (which would have caused puckering). Luckily, I already had indoor acrylic paint for the yellow and white. All of the other colors I bought at a craft store (1 oz. bottles on sale for 50 cents each). The craft store paints did a better job of adhering to the packing tape. The indoor paints needed extra coats to cover the tape well.
I used a combination of art brushes and sponge brushes. They both did a great job, the art brushes worked best for the fine lines. The yellow paint required two coats. Since the yellow paint would cover up the pencil lines I needed a way to see the lines after the painting was done. I was concerned that I wouldn’t be able to duplicate the free-hand lines I had worked so hard to create. I tried different methods but I think the best approach (which I wish I had used the whole time) is to go over the pencil lines with a black Sharpie before painting. It shows through the yellow enough so you can go over it again after the paint dries.
Sharpie Details
After all of the painting was complete I went over all of the lines with the black Sharpie. The paint is much smoother than the cardboard so the marker slides a little. I found that using the Sharpie free-hand made the lines look more cartoon-like than if I had used a straight edge. I was happier with the cartoonish look (SpongeBob after all is a cartoon).
For the clothing, I bought a yellow long sleeve turtleneck shirt, brown dance pants and black dress shoes at Goodwill. I painted a pair of dad’s tube socks with red and blue paint free-hand. The paint adhered very well and even held up in the wash.
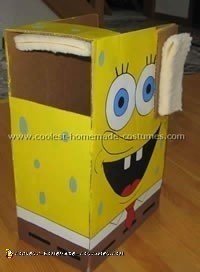
Wearing SpongeBob
When my son tried on the SpongeBob costume he complained about his shoulders and the box seemed to slide a little making it look crooked. I cut some sheepskin pet bedding, folded it over for thickness attached it to the box via Velcro and used double-sided tape between the fold to keep it together. My son said it was very comfortable.
In hindsight I would make one major change – I would make the box shorter. It came down past his crotch which made it very difficult to climb stairs. I had to lift the box up and hold his hand so he wouldn’t fall. The low length also forced him to take small steps which wore him out quickly on Halloween night. All in all my son had a great time.
Total Spent: $11
SpongeBob SquarePants!
Costume by Michelle J., Gilbert, AZ
This SpongeBob costume was too easy to make! Purchase two foam squares, the pre-cut foam used for cushion squares. I covered them in yellow felt approximately two yards was purchased. The edges I hand stitched with a blanket stitch for neatness but you can machine sew or staple. The face is comprised of pieces of stiff felt cut out from a pattern I made. Just look at the character and take the basic shapes and colors.
The sponge looking accents were made with a yellow and orange marker (almost dried out works best) shaded in to give depth. Same with the inside of the mouth use your kid’s old markers and gently fill in those areas. The Pants: cut strips of white felt for the top of the shirt and triangles for the collar do the same for the tie belt loops and a larger piece for the brown shorts. I just let that part hang free. Again I used a blanket stitch to put this all on the main foam piece; it adds a nice home-made touch!
Attach the front and back fully covered foam squares with steps at the shoulders. Make this as sturdy as you can and bring safety pins, this was more challenging. Boy socks, black shoes and a few freckles and you’re done. It took a weekend to make this SpongeBob costume. The hand stitching was the most time consuming but I think worth the time.
Total Spent: $75
If Nautical Nonsense…
Costume by Jennifer F., White Pine, TN
My son wanted a Spongebob costume that he could see thru instead or wearing like a shirt. So I planned it all out.
To start with, I took a box top (20″x8″x2″) and sewed a beanie cap in the middle for support. I made a frame out of balsa wood. I draped yellow bulk craft felt over the frame and sewed the sides together by hand using a blanket stitch.
Then, I added 6″ strips of white and brown felt for the shirt and pants. All of the detail work was hand stitched. It took me approximetely 8-10 hours to make. He absolutely loved it!
Total Spent: $25
…Be Something you Wish…
Costume by Crystal G., South Vienna, OH
My kids like to ask me to make things you can’t find in the store or even better. My youngest loves Sponge Bob. He collects the DVD’s and he wants me to paint his room with Sponge Bob and friends!!!! So of course he also wanted a Spongebob costume.
Putting SpongeBob Together
Buy foam from a fabric store and make a square. Glue together front back and two sides (leave bottom open) and reinforce with a few stitches. Take yellow fabric and make covering. Pull over foam. Measure across foam, square side to side, to make shirt and pants. Sew white strips to the brown strips and then close seam to make one loop.
Measure a piece of brown fabric for the bottom (to make square pants). Cut two holes for legs. Take left over brown fabric make a quick pair of shorts use a pattern or trace a pair of shorts of the person you’re making them for. Trace face in pencil then go over with paint marker.
Cut arm holes, mouth and eye holes carefully, not to trim away the extra yellow fabric. Use extra yellow fabric to cover holes by pulling inside of the Spongebob costume and using hot glue to stick to foam. (Make sure to cut extra foam in triangles like a pizza so you can pull it inside) For extras….I made a Gary trick or treat bag to carry his candy used red and blue paint markers to put stripes on his socks and covered the eye holes with vinyl and drew on it using the paint markers as well.
Total Spent: $45
SpongeBob Costume!
Costume by Brandie G., Merritt
I came up with the idea of making a Spongebob costume because my mom is a huge fan. I thought it would be fun to make her a costume rather then buy one.
It took 2 weeks to make and we made Spongebob himself out of ripple foam that is to be put on top of a mattress. We sewed most of it and the rest we used a hot glue gun to make things stick. Nothing else worked.
Inside we used Velcro to hold up the straps that sat on my mom’s shoulders. This made it possible for her to walk around and still have her hands free. This was a huge hit for all the kids around our town. They actually believed that this was the real sponge bob!
Total Spent: $60
Then Drop on the Deck…
Costume by Rose G., Attleboro, MA
For this Spongebob costume I cut two arm holes in a big box then painted the whole box with poster paints. I went to a used clothes store and bought brown shorts, a yellow long sleeve shirt, yellow gloves, a white button front shirt and yellow sweatpants. I had the black shoes and white socks.
Total Spent: $20

Costume by Tim W., Las Vegas, NV
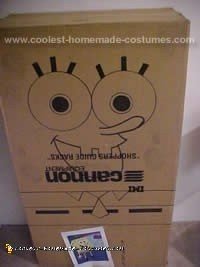
The secret to this Spongebob Costume is finding the right size box. I managed to find this box at a local retail store. The stock clerk happily agreed to give it to me for free. The box must be rectangular and proportionate to the person who will be wearing it.
I printed out some pictures from the Internet for a guide. Next I drew the lines for the image I would be painting on it.
I used a sharpie and a straight edge and managed to utilize a dinner plate to draw the eyes.
Next I cut out the mouth area and arm holes and did a trial fit to make sure everything was right.
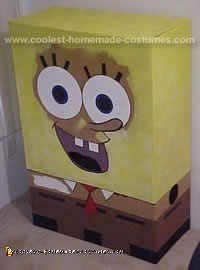
Painting SpongeBob
I purchased several yellow, brown, white, red, blue and green non toxic craft paints (About 99 cents a tube). For painting, I used a small roller to cover most of the area and brushed the rest by hand. I worked on this project after work each night for a total of about 5 hours.
The Accessories
Besides the paint, we purchased some yellow tights, yellow long sleeve shirt, yellow gloves, a pair of brown shorts, and we had the black shoes already. Most of these items were found used at a nearby charitable thrift shop.
Paying attention to detail I painted the stripes on a pair of old tube socks using tape to get the stripes straight.
To make the costume as comfortable as possible I made two shoulder straps that would reduce the strain of the weight of the box on the upper shoulder area. This took a little adjusting to get it right but proved to be a great help.
I attached the straps to the front and rear of the box using some small short screws, washers and nuts.
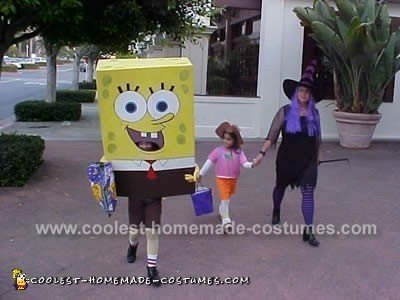
For a Pre-Halloween test run we took the Spongebob costume to a local strip mall that was passing out treats in each of the various stores and hosting a costume contest. When all was completed my daughter was delighted but a little overwhelmed as she instantly achieved celebrity like status with the younger kids and several adults as well. I was a little disappointed when our costume did not even Place in the contest and was beat by several store-bought costumes, but seeing the way people’s faces lit up throughout our walk at the mall was priceless.
Total Spent: $30
…and flop like a fish!
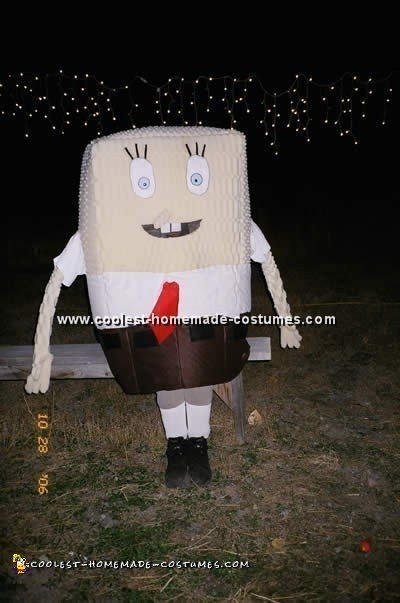
Costume by Tim L., Cresaptown, MD
Our Son Cody, 8 years old at the time (2002), was and still is a big big Spongebob Squarepants fan. The only thing is, he was too big for the normal kid Spongebob costume. So we made our own Spongebob costume. My wife came up with the ideas and I helped make it work.
Supplies Needed for this SpongeBob Costume
One twin size ‘egg carton mattress pad’ Yellow in color, two pieces of bright red adhesive felt, four pieces of dark red adhesive felt, two yards brown material, two yards white material, four pieces of white adhesive felt, two pieces of blue adhesive felt, four pieces of black adhesive felt, one large needle, white thread, brown thread, 2-3 packages of Velcro strips (adhesive if available), scissors, hot glue gun, and tacky glue.
First fold the mattress pad in half and cut out a hole for the child’s head.
For the Eyes
Then cut out 2 circles for the eyes. Use large bowls to trace around, pretty much use up the whole piece of felt. Make 2 smaller circles for the Blue part of the eye. Make 2 even smaller circles for the black pupils. For the eyelashes, use 2-3 inches of the black felt.
For the Shirt and Pants
Measure the white material for the ‘shirt’ at the bottom of the Spongebob costume. Measure the brown material for the pants at the very bottom of the spongebob costume. Use the large needle and thread and sew the pants and shirt to the mattress pad, if needed, one may use the hot glue in spots to secure the material or the tacky glue (use Tacky glue or hot glue gun, whichever works the best).
For the Tie, Mouth and Nose
If the self-adhesive felt is unavailable, the tacky glue will work just fine for the assembly of the eyes, and the eyelashes, and the tie. The tie is made from the bright red felt. The mouth is made from dark red felt. You can also take a small piece of the mattress pad and carve a nose out of it (you can use a piece from the hole you cut out for the neck). Hot glue holds the nose in place, but be careful to glue it on LAST.
Sew/Hot glue the Velcro strips on the sides to help keep it together; one may also use strips of material and tie together on the sides if the Velcro is not strong enough. There will be leftover white material, from the shirt, so you can use that for the strips. Make sure that you leave enough room for the child to stick his/her arms out of the Spongebob costume.
For the Collar
The collar for his shirt is just 2 triangles cut out and tacky glued to the ‘shirt’ and then outlined with strips of black felt. Cut out white rectangles for the teeth. Put eyes, eyelashes, mouth, teeth, and tie on. Glue on the nose, stick your arms out the sides and go trick or treating!!
Yellow sweatpants and a white sweatshirt were also used with the Spongebob costume.
SpongeBob Squarepants!
Costume by Molly P., Lakeview, MI

For this Spongebob costume I got a piece of upholstery foam, cut it in two pieces (one for the front and one for the back) then cut about 6″ off the bottom of the foam to put in between the two sections for arm holes and for the top of the head of the Spongebob costume.
I spray painted all the foam with yellow spray paint. I then sewed the three sidepieces to the front and back piece with yellow embroidery floss. In order for it to look like a sponge, I pulled big chunks out of the foam (pliers work better than fingers!).
SpongeBob’s Pants
I got tan felt to make the Spongebob costume pants. I cut out the rest cut from colored foam and then glued it on. The arms and legs were long pieces of foam that I sewed yellow felt around tightly. The Spongebob costume hands are made out of yellow workman’s gloves stuffed and sewn to the arms.
SpongeBob’s Socks
The socks were actual tube socks that I painted stripes on, then used a ball of yarn and plastic film canister to make the shape of his shoes and wrapped them with electrical tape. I pulled out large eyeholes and cut a large Styrofoam ball in half and glued them into the eyeholes.
The rest of the Spongebob costume is colored foam glued in place. Teeth are white foam pinned into top of mouth. The nose is another piece of yellow felt sewn around long strip of foam and sewn into place. It was a great Spongebob costume! Holy Barnacles!
Total Spent: $45
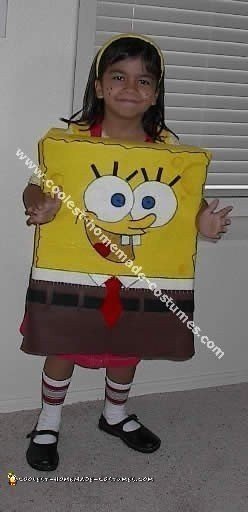
Cutest SpongeBob Costume
Costume by Lin P., Flint, Michigan
My reason for making this homemade Spongebob costume is that my son really wanted to be SpongeBob and we couldn’t find a SpongeBob costume he liked for under $20.
This is entirely made of craft felt. I used the bulk felt for the main body of the costume so all I had to do was sew sides and it made a pillow case shape.
I used a couple pieces of white and dark brown each cut lengthwise and sewed on the bottom of the yellow “pillowcase”.
For the neck tie, I cut red felt and the cut more white in the shape of a folded down collar. These were hand stitched on but could be done by a machine as well.
The black for the mouth was cut and sewed on as well as the strips of white felt for sleeves.
All of the smaller cut out pieces for the tongue, nose, eye pieces, eye lashes, chin, belt sections, and cheeks of the Spongebob costume were glued on with fabric glue.
To make the neck sturdy and not rip, I doubled a strip of yellow felt and stitched it around cut for neck; this way it would not rip if pulled on and off. Total Spent: $5
Related costumes:
Coolest 90+ Homemade SpongeBob Costumes 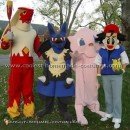 65+ Coolest Homemade Pokemon Costume Ideas
 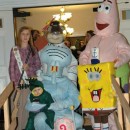 Coolest Homemade Spongebob and the Gang Group Costume Homemade Spongebob Costume: People Thought SpongeBob was Part of the Show!
 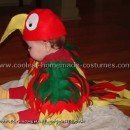 12 Coolest Homemade Parrot Costume Ideas
  Coolest Spongebob Halloween Costume
  Coolest Homemade Pirate Costume Ideas
  Top 10 Lists – Coolest DIY Halloween Costume Collections
Your comment has been sent successfully.