This Sassy Samus Costume from Super Metroid costume took me a bit of time to complete, but turned out well for the time I had. I love video games, and I always loved the look of Samus. I was excited to do this!
First I gathered what I would need. I studied pictures of Samus from the internet, printed some out, and brought them with me when I looked for supplies. I had a very small budget so I couldn’t get anything too expensive. I also had a small time frame in order for it to be ready for a Halloween party.
I went to only 3 places.
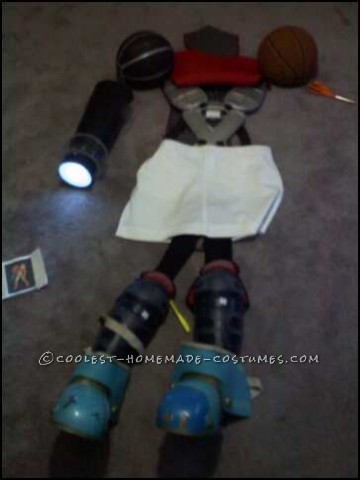
I went to the thrift store for 2 old basketballs, part of an old leafblower tube part, plastic looking toy boots, a longsleeve black shirts, long sleeve tight leggings, and a pair of water proof snow gloves.
I went to a resale sports shop for a bike helmet, a hockey helmet visor, a sports vest of some kind, wrist guards, and knee/leg gaurds
Lastly I went to a hardware store for spray paint (yellow, red, navy, and orange), and finally 2 of those small led “click” lights you can stick on walls etc..,
The rest I had on hand… hot glue, yellow tight shorts, yellow tank top, lots of clear plastic from old containers, string, some red fabric, and two 2liter empty pop bottles.
I layed out all of my materials and things I had bought on the floor and went over in my head what I would have do to all of it to make it work.
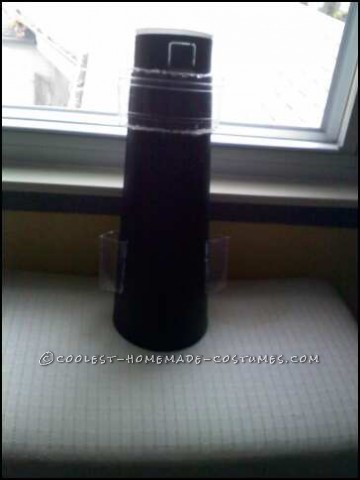
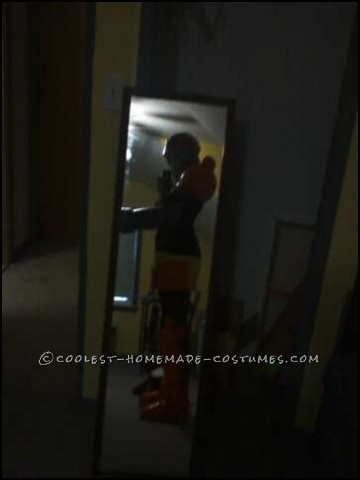
For the hand/arm gun I used the leaf blower tube. I took pieces of plastic from recyclable food containers and cut them into shapes the give the gun a more closer look to the real one. I glued them on. I used a cottage cheese container for the end of the gun where I took one of the click lights, and glued it in the bottom of the container. I placed the container with the light into the gun, and glued it in place.
I then took a piece of clear plastic and cut it to the same size as the circle on the container, I frosted it by sanding it slightly. I glued only half of that on to the end of the gun and container so I could lift it a little to click the light on and off as needed. After all that was done, I finally spray painted the whole gun navy blue avoiding the end where the light was. To keep the gun on my arm, I simply used a rubber band on the inside that was connected to the inside walls of the blower tube that I could grasp and hold on to. It was very tight and easy to use, also comfortable to hold on to.
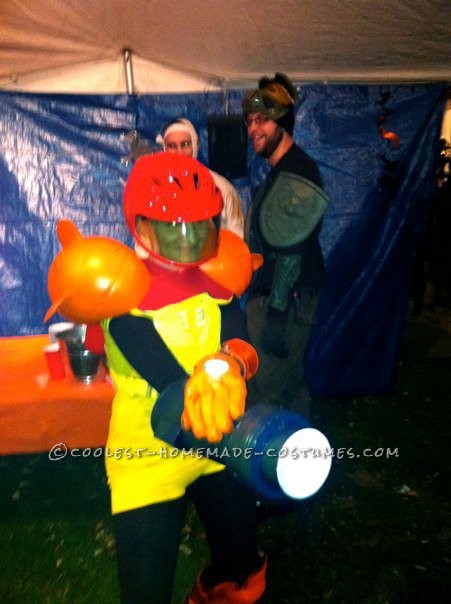
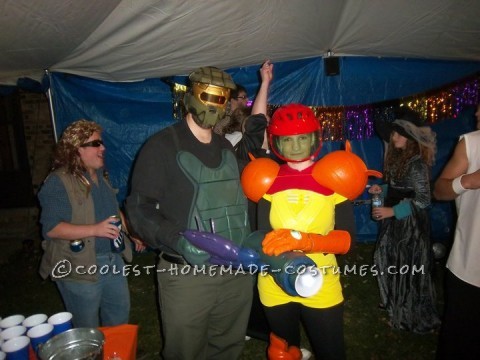
For the helmet I used a bike helmet, and then screwed on to it the hockey shield mask. I then spray painted the whole thing red. For the shield part I wanted it to be “green looking” so I cut a mountain dew bottle and used the green plastic from it for the shield mask, and just glued it on.
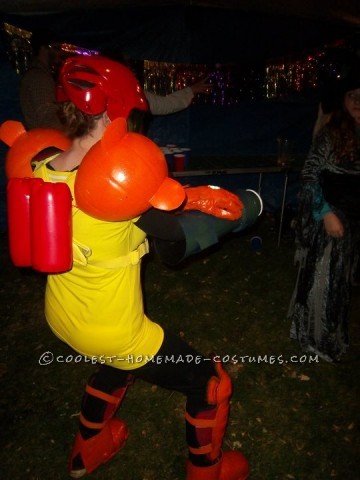
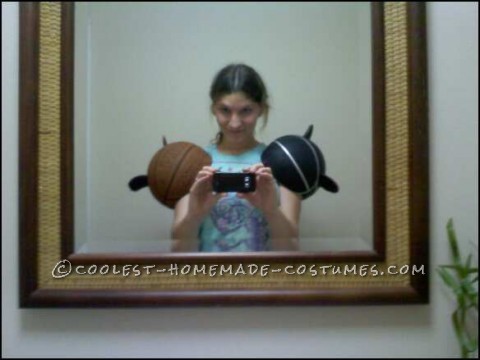
For the shoulder armor I went off an idea I had seen used before, though I didn’t follow it exactly. I used two old basketballs. I cut a large piece out of each basketball so that they would rest comfortably on my shoulders. The pieces that I had cut out I used for the little flap looking things on the shoulder armor, I just glued them on. Then I spray painted both shoulder armor pieces a bright orange. I used a string on front and back of my body to hold the balls together and to keep them from falling off of me. This was by far the hardest part of the whole process because cutting the balls to get the right shape for the shoulders was very tricky, also gluing on the flaps was hard because I wanted them to be in the same place on each ball, and it was hard to tell if they were at times.
For the glove on the left hand I just used a pair of old snow type winter gloves. I cut a hole in the top of the glove, and placed my light neatly inside, then I glued the light to the glove. The light is flat on the bottle so it was not uncomfortable at all to wear it. I then spray painted it orange avoiding the light
For the jetpack type thing on the back, I just used two 2liters, cut the top sections off, spray painted them, and then glued them on to the back of the sports/football vest I was wearing.
For everything else, the vest, the knee/leg guards, the wrist/arm guard, and plastic toy boots I just spray painted them all, and put them on. The same for the clothes underneath..however the red piece of fabric around my neck and collarbone area I had to cut, shape, and glue to get the right look.
The hardest part was spray painting everything, because some things needed two coats, and it seemed like it was taking forever. Also just the messiness of the spray paint sort of got to me after awhile. The helmet was a little tough, I am not the strongest person and screwing the shield on to it took a little bit of work.
The gun was by far the best, most fun part. I loved doing it, and I chased my husband around the house pretending like I was shooting him, hahahaha.
The funniest part of the whole thing was that less than two weeks later after I wore this costume and finished making it I found out I was pregnant, about 6 weeks a long or so. The whole time I was making it I kept getting really sick, and tired and I just chalked it up to all of the spray painting. I totally freaked out that all of the fumes from the spray paint would harm the baby! But she came out perfectly fine. haha. It was a very happy Halloween that year.

Related costumes:
 Coolest Homemade Samus Aran from Metroid Costume
  Awesome Woman’s Super Mario Piranha Flower Costume
 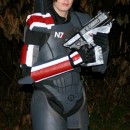 Epic Female Commander Shepard Costume from Mass Effect
  13-Year Old Creates Bonnie Costume On Her Own
  Coolest Homemade Midna Helmet Costume From The Legend of Zelda
  Coolest Homemade Yellow Toad Child Costume Idea
  Cool Homemade World of Warcraft Costume
  Sexy Link-Costume from The Legend of Zelda
Your comment has been sent successfully.