Who doesn’t like beer and making cool stuff out of recycled medium? For no real reason, I have been saving bottle caps since college. Halloween has always been my favorite holiday and I love the challenge of creating a unique and in-depth costume. Why not us this as justification of two bad habits (drinking, and hoarding)? Like many of the costumes I’ve read about on this site, I had no idea what I was in for, or how to even approach such a task.
I need to start by thanking my awesome girlfriend, Candi for her help, tolerance, and enabling my drinking. I also have to thank my friends and family for graciously drinking copious amounts of beer and donating the caps. The costume took roughly 280 hours and spanned almost three months. It was well worth the effort, though. I live in a great beer town, Richmond, Virginia. The reactions I got in local breweries, bars, and on the street were priceless; from children thinking I was some sort of shiny superhero to their parents scrutinizing the costume for their favorite beer. I even had people volunteer to help drink for the next costume. One thing I learned (other than I have too much free time) is how versatile bottle caps are as an artistic medium. Since making this costume several years ago, I have built various other things out of caps (which I have continued to collect). There are pictures on my website, rvacapworks.com and on Facebook at RVA Capworks.
I encourage anyone to make their own version of a bottle cap costume. Please feel free ask any questions that come up. Good luck! There are answers to some FAQs at the end.
Legs and arms
My original idea was to sew the caps into preexisting clothing. After looking around on-line and toying with some ideas, I realized this concept wasn’t unique and wouldn’t produce the look I envisioned. It would be much more inventive to forego the undergarments and attach the caps directly to one another. Fastening together coarse, rigid pieces of metal in a manner that would allow adequate mobility and comfort would require plenty of trial and error.
First I drilled four equally spaced holes around the perimeter of the caps and strung to one-another with sewing thread. It failed the aesthetic test, but proved marginally functional, which confirmed this concept could work. The second iteration involved drilling two holes in the top of the cap and cutting a small loop into the crown. This eliminated all negative space between the caps and created a chain maile look. After constructing five rows of a forearm section, it became apparent that string was not the way to go. I tried fishing line, but it didn’t have enough elasticity, and sewing elastic, which lacked durability. Finally, I settled on 1 mm Stretch Magic, which is used to make bracelets.
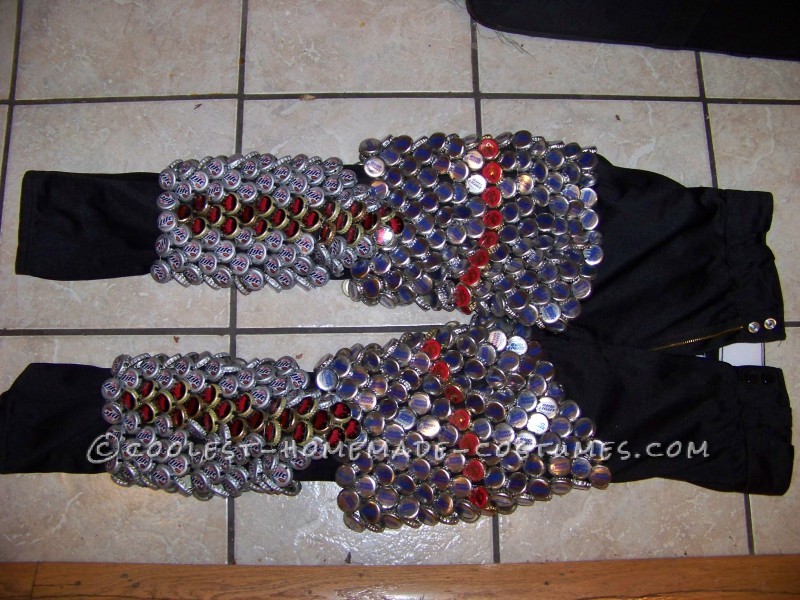
Initially, I clamped a jig to my drill press to make the holes in the caps. The process was laborious, messy, and required reaming out the holes after drilling. After some digging I found on-line a hand held sheet metal punch. The device accurately and efficiently punctured the caps, which really streamlined the process. I used special configurations of holes on certain caps in order to taper the sections to fit my body. As I completed and tested entire sections, I realized the costume was difficult to put on and painful to wear and move around in. I found some black baseball pants (Bud Light) and an UnderArmor shirt (Budweiser) to wear underneath, easing the comfort issue. I sewed the top three rows of each section into the clothing to prevent them from sliding down my limbs as I moved. This also made the costume much easier to put on and take off. After weeks of trial and error I finally had the arms and legs complete!
Boots and Midsection/skirt
I bought some rubber boots and marked the location for every hole by measuring how much space would be required horizontally between caps (Bud Select) and vertically between rows. Punching them out wasn’t a big deal, but sewing the caps in got more laborious the further down the boot I went. I ended up using Shoe Goo for the last two rows (Corona) on the sole.
The midsection (Yuenling), around my abdomen area, also used the arms/legs technique. To cover the area of pants between the top of the thighs and bottom of the midsection, I created a skirt similar to what you would see on Samurai armor. It was composed of five flaps (Bud Light) also constructed using a similar method as with the arms and legs. The only difference being that I used 30# fishing line since they wouldn’t require elasticity. I attached the flaps to the bottom of the midsection using 1.8mm Stretch Magic, since this row would hold their entire weight.

Chest
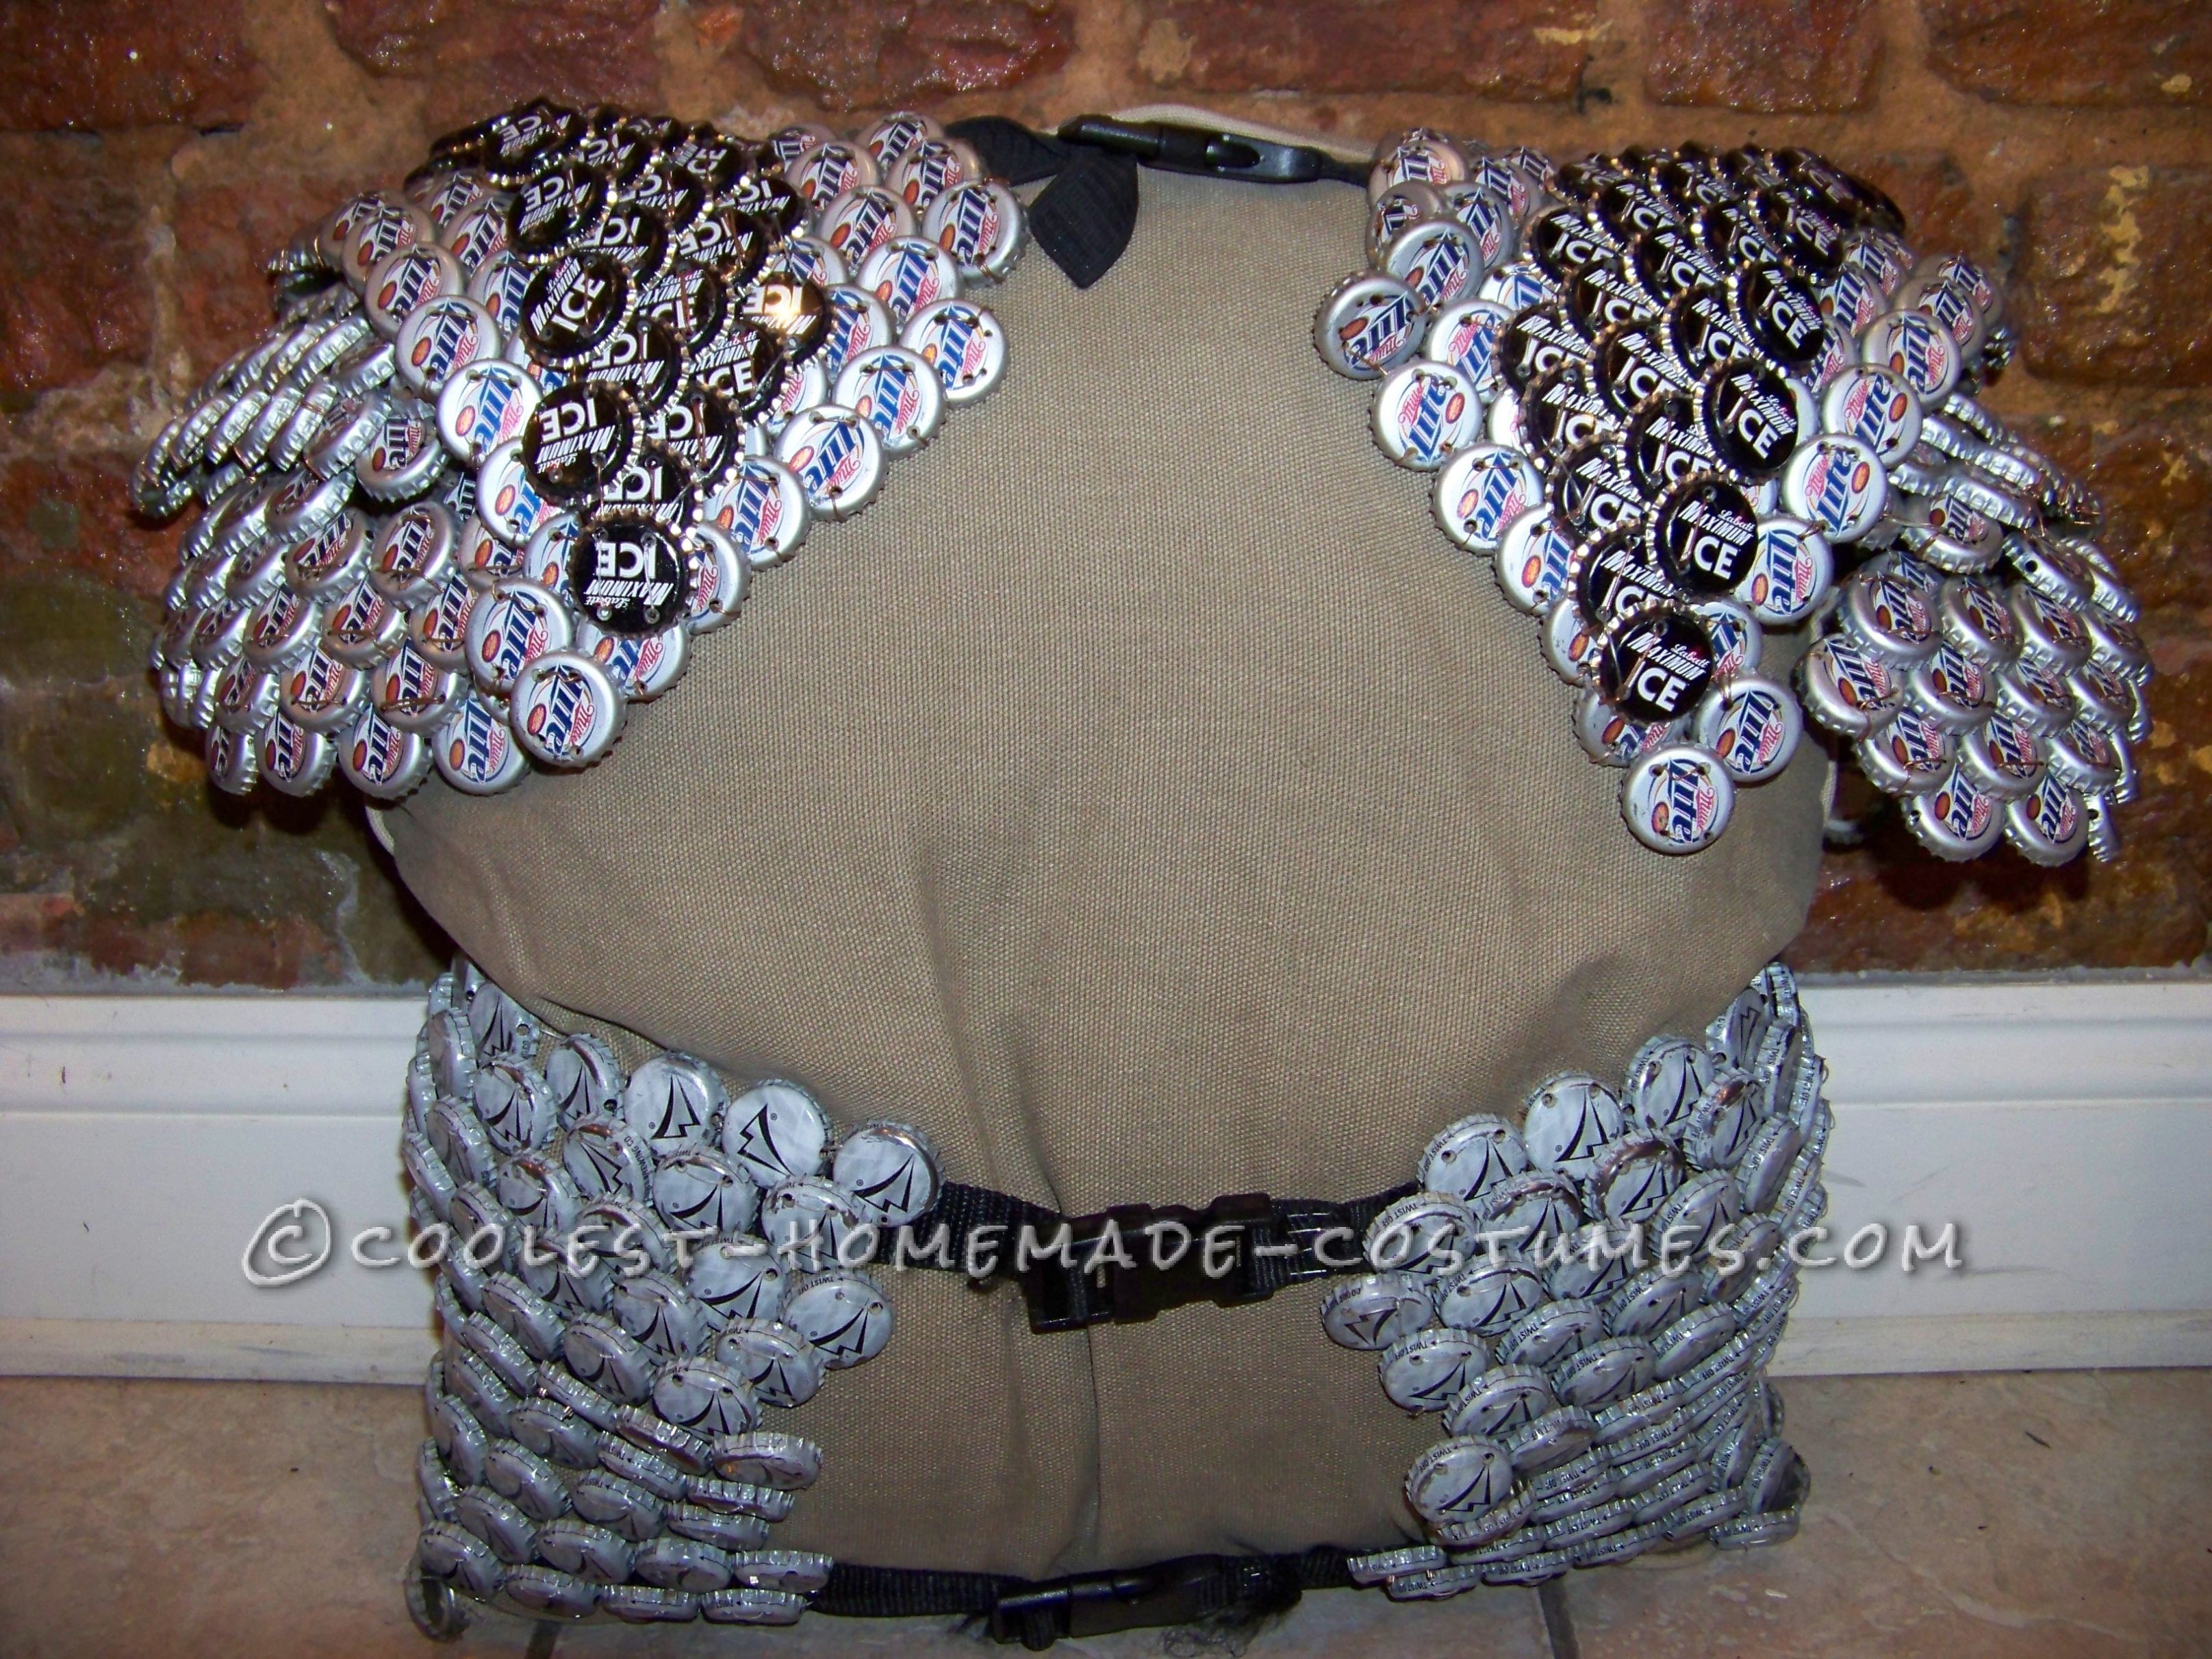
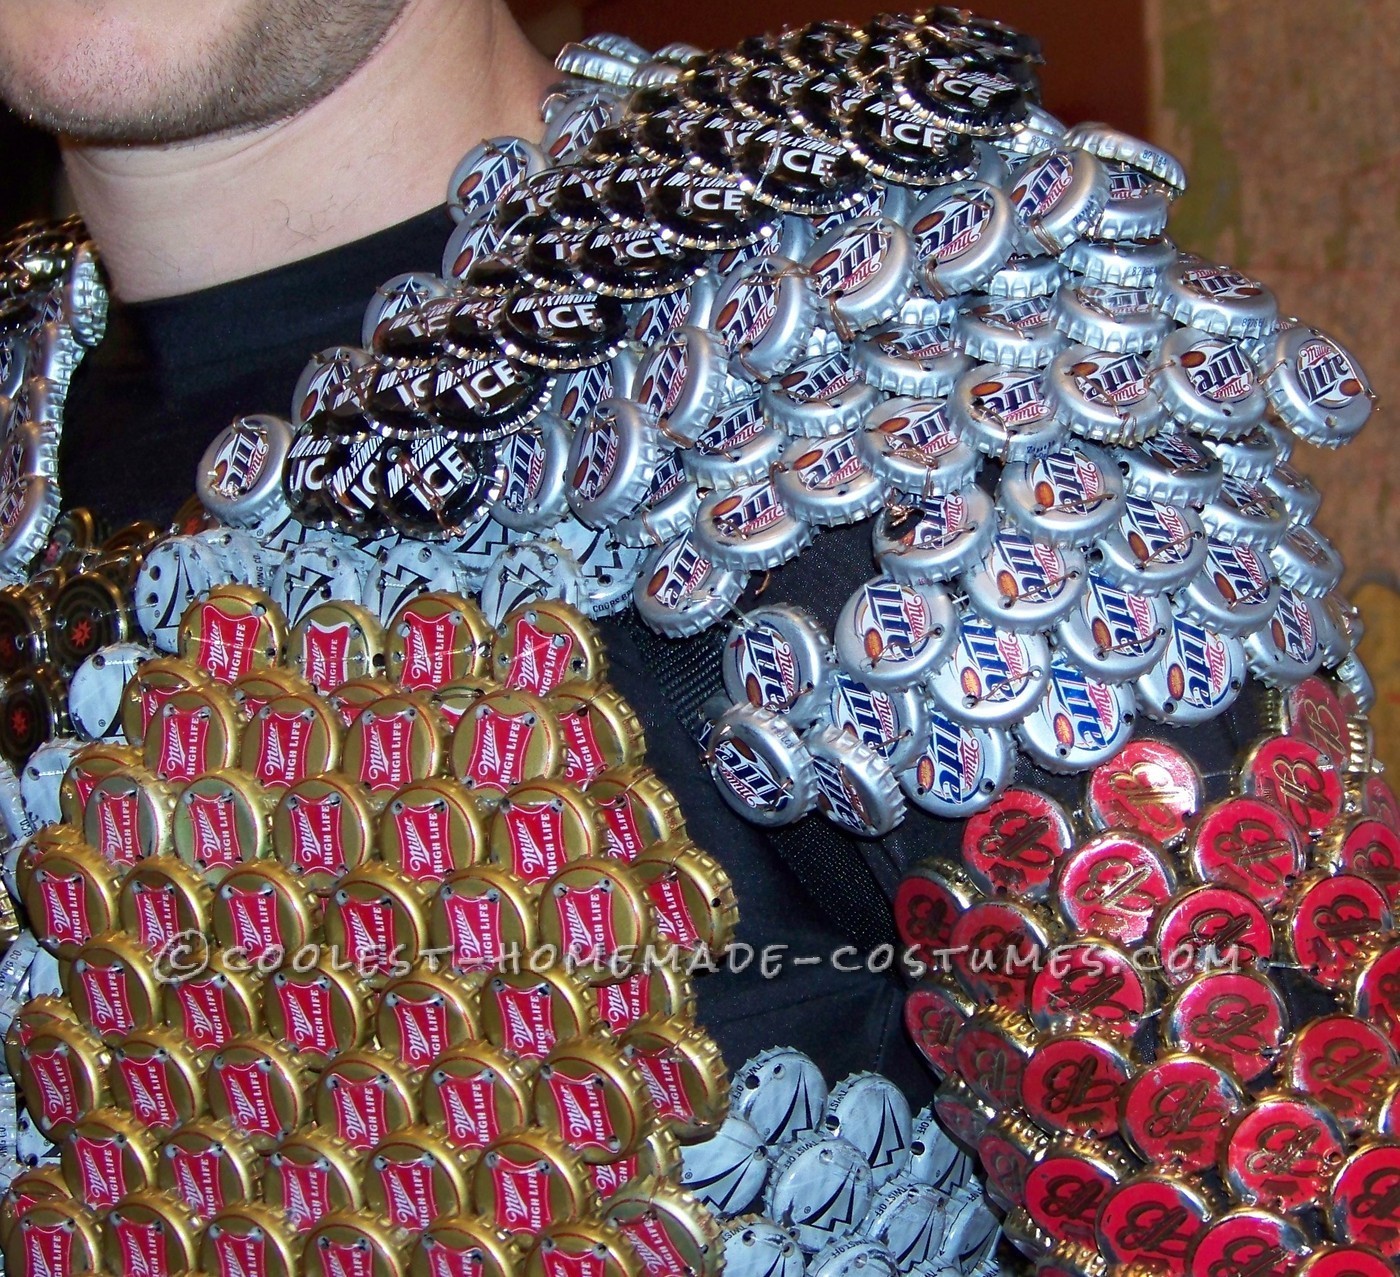
The chest needed depth so not to appear as a single flat section. I began with the breastplates (Highlife), which were built two layers/caps thick. I made another layer below the breastplates (Coors) that followed the contours of my ribs. Once fully assembled, this section was too heavy for Stretch Magic, so I went with fishing line. The single most difficult part of the costume was the shoulders. They had to be rigid enough to hold the shape of my body, which ruled out elastic or fishing line. 18 gage copper wire proved to be the best option after I experimented with several types of wire. There was a ton of trial and error leading up to the successful shoulder assembly. Each shoulder was composed of three separate pieces (Maximum Ice and Miller Lite), fastened together at a front and a rear pivot point. The finished product partially articulated and gave my arms almost complete range of movement. The shoulders were attached to the breastplates with Stretch Magic and held to one another behind my neck with nylon straps and a parachute buckle.
I elected not to permanently fasten the midsection to the chest section, which would have resulted in a single upper body piece. This allowed me to comfortably twist my upper body and bend my back. I sewed two elastic bands into the midsection and three nylon straps into the chest section; one at the ribs, one at the breastplates, and one at the top of the shoulders. Parachute buckles connected one end of the strap to the other, securing the upper half of the costume around my body. This made it more agile, comfortable and easier to put on.
Cape
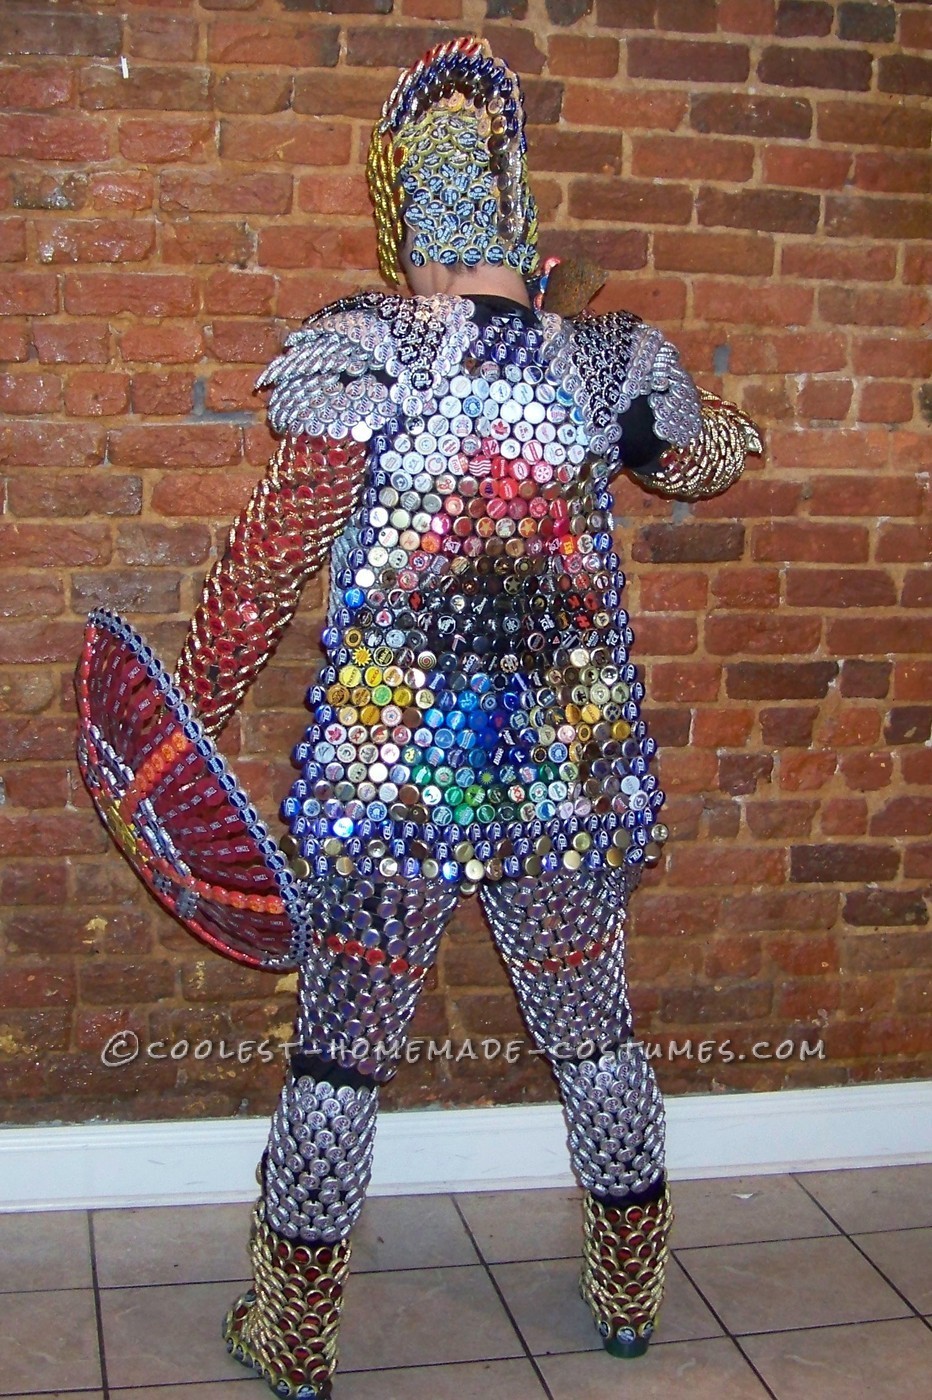
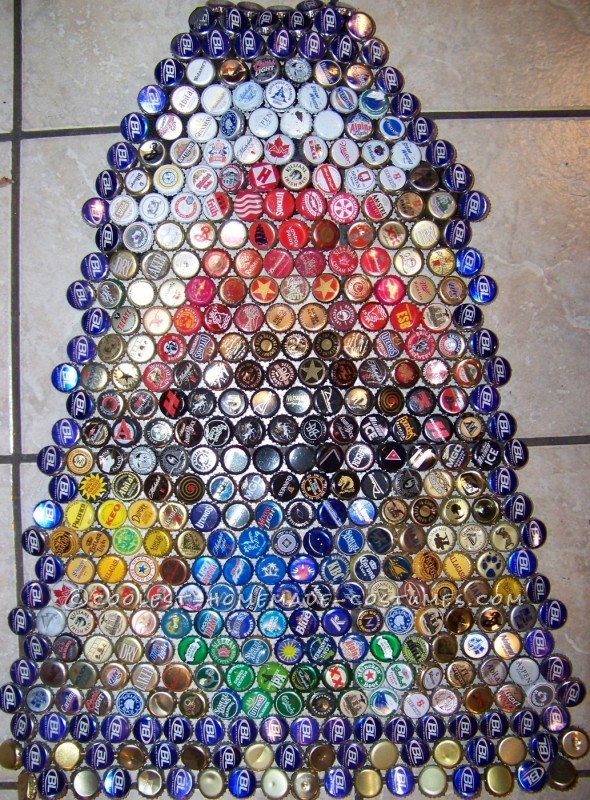
Once I determined the rough dimensions of the cape (the number of rows and caps per row) it was not difficult to make, just tedious. The cape didn’t need any elasticity, so fishing line was the logical choice. Once the cape was complete, it was evident that it had to be its own separate section. There was no way to fasten it to the shoulders and still be able to get the chest section on. I made a harness by sewing two nylon straps vertically into the top of the cape. The bottom of the straps came under by armpits and buckled to the other end, which came over my shoulders. This kept the cape firmly attached to my back. As well as being an integral part of the costume, the cape hid the gaps in the mid and chest sections where they strapped together in back. Up to this point, I made each unique section out of the same bottle cap. Since they required so many caps, I had to use macrobrews, which I had the most of. By not going with a set color scheme on the cape, I was able to fit in plenty of my favorite craft beers.

Helmet
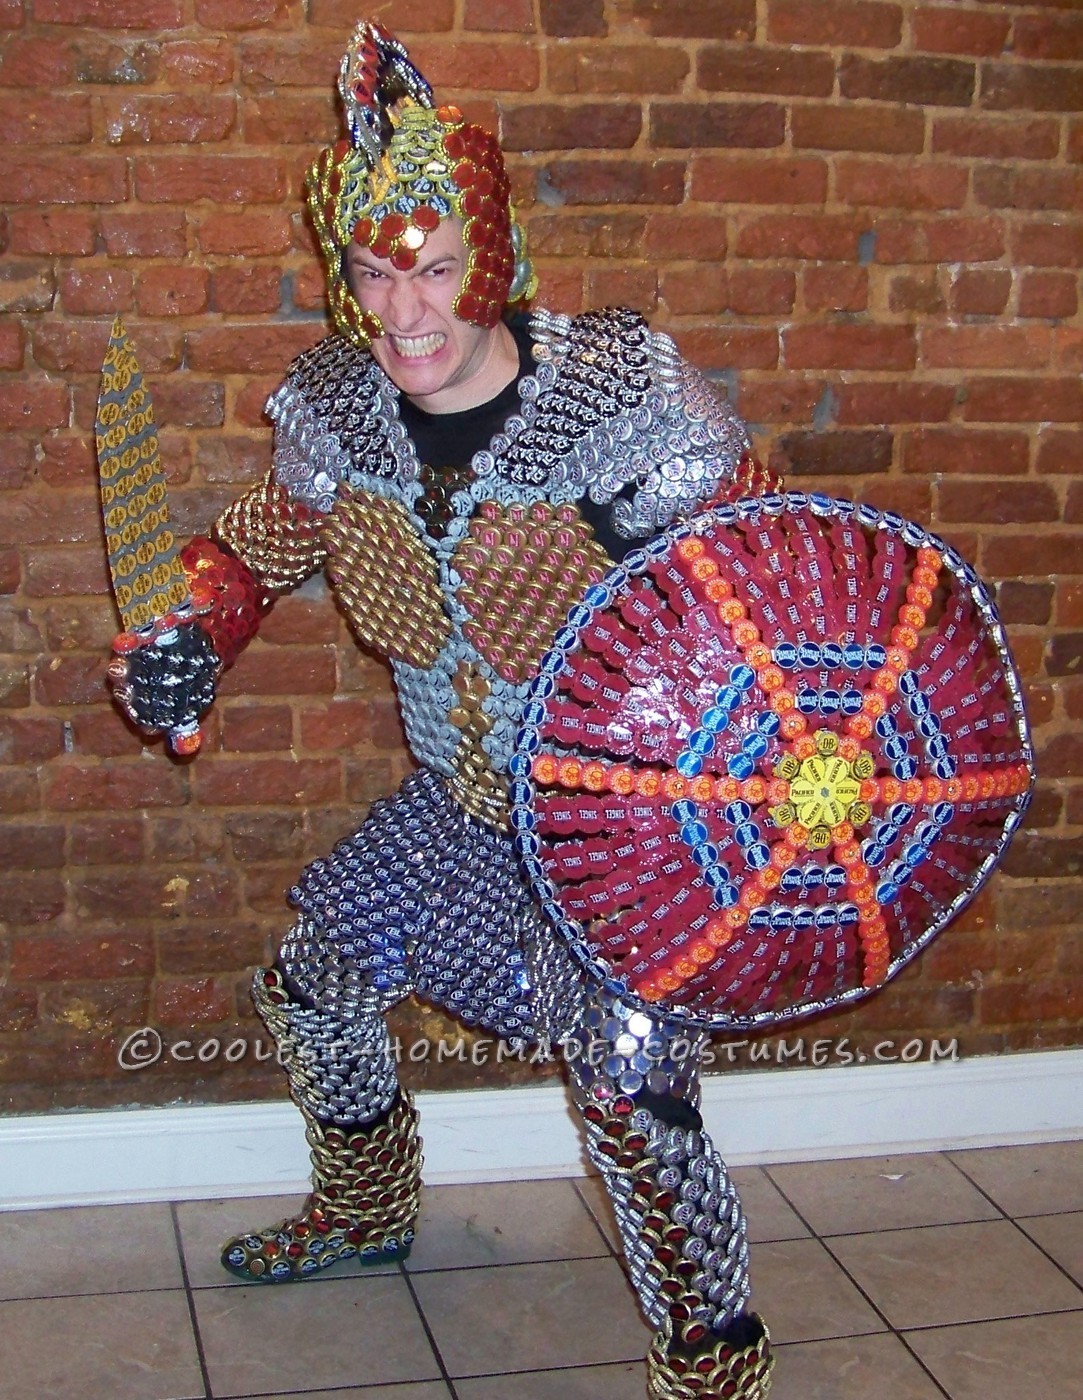
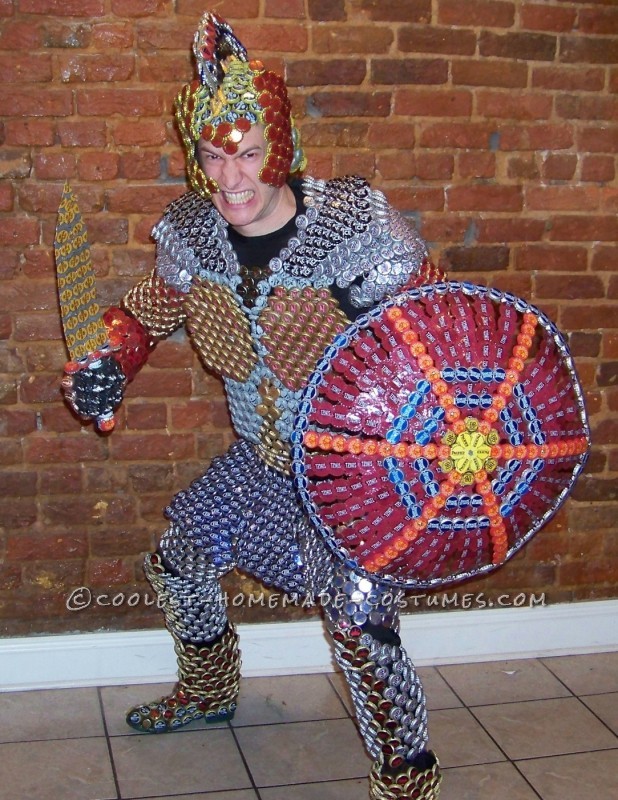
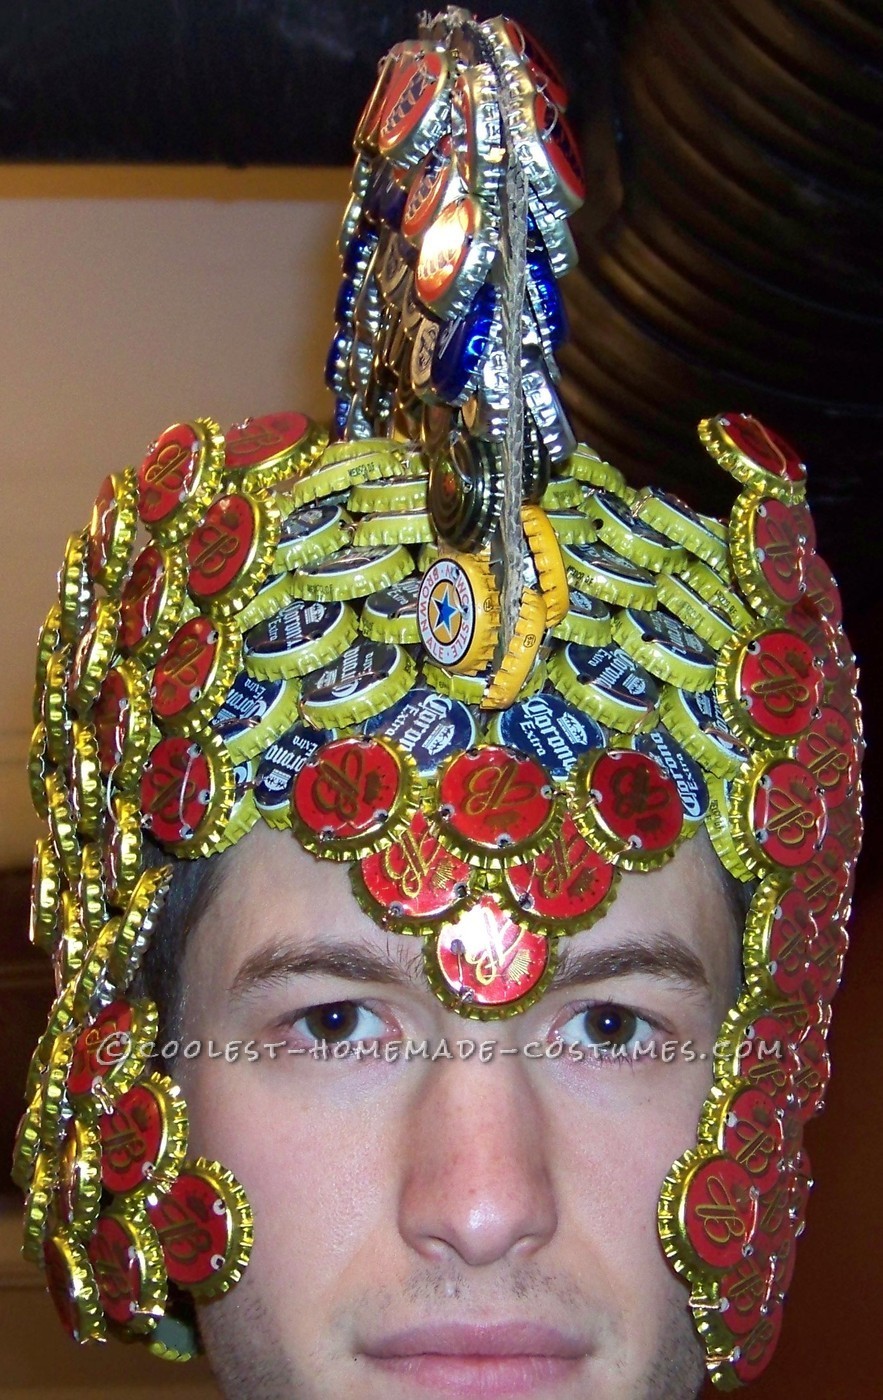
I believe the focal point of the costume was the helmet. For the base (Corona), I started with a single cap, punched four holes and used copper wire to connect four more caps. I put on my head in front of a mirror to determine where the next set of caps should be and where to punch the holes. This process was repeated dozens of times, sometimes only adding a single cap and resulted in a perfectly fit helmet. I played around with various cap configurations for the earflaps and brow (Budweiser), until I got something I liked. The crest was built with a cardboard support, using the same method as the boots. I used a lot of fishing line to attach everything to the base.


Gloves and Weapons and FAQs
The gloves started as a pair of regular rubber ones. I cut and manipulated caps (Legends) for each section of the fingers in a way that allowed a decent degree of dexterity. Each cap is individually sewn in. The back of the hands (Dogfish Head) were made the same way as the boots.
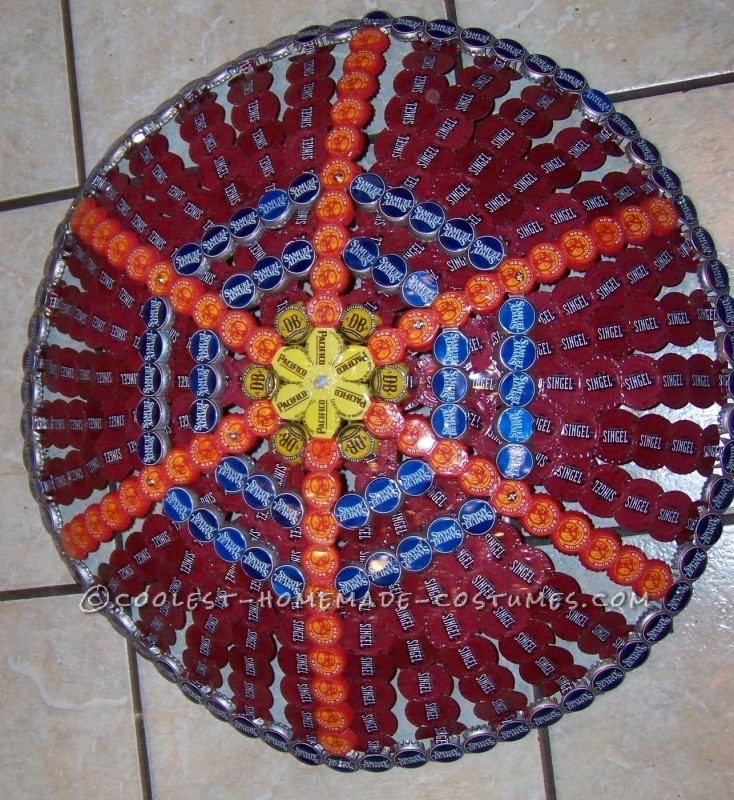
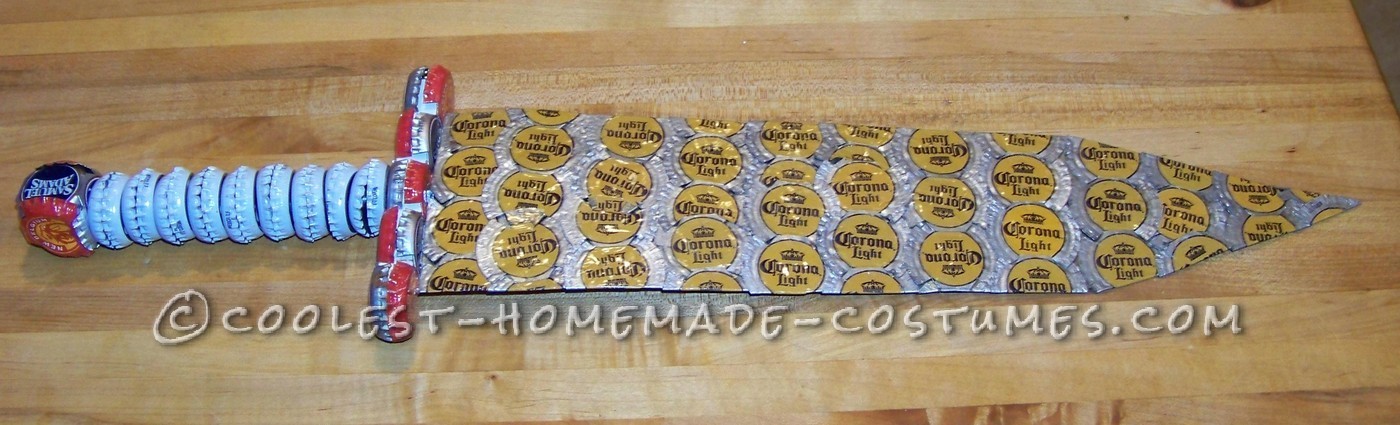
What good set of armor is complete without weapons? The sword and shield were the final additions. There’s a threaded rod holding the sword handle together. It bolts to a strip of wood in the guard. The blade (Corona) has a piece of sheet metal under the caps. It’s fastened into a slit in the wood. All of these substrates are hidden by the caps. The blade caps were crimped to each other forming a loop. Nine of these were placed around the sheet metal then pressed down, keeping them in place. For the shield, I started by making a six-cap hexagon (Pacifico) for the center. I then attached a strip of caps (New Belgium) to each corner of the hexagon. I made a circle of caps (Sam Adams) for the perimeter that connected the six strips. I filled out the rest of the shield with strips of flattened caps (Hardywood) that attached to the outer ring and inner hexagon. The caps in all components of the shield are crimped together using a technique I came up with. No glue or fasteners was required. There are aluminum bars under the radial strips that give the shield rigidity.
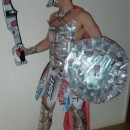
Getting into the costume required the help of my girlfriend. The shirt and pants (with leg and arm sections attached) went on first. Then came the boots, followed by the midsection, chest, and finally the cape. The gloves and helmet went on last. My girlfriend had to lift the cape so that the back of the chest section could fit underneath and the buckles could be connected. The whole dressing process took about ten minutes.
Cost: $165 supplies/clothing (not including beer) $75 for tools
Weight 16.5 lbs
Can I go to the bathroom #1 only
Number of caps 3284; Consisting of 81 breweries and 62 types of beer
And the single best statistic:
330 Gallons of beer consumed to make this costume possible!


Related costumes:
 Awesome Coors Light Spartan Knight Costume Made of Boxes and Cans!
 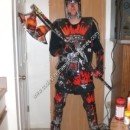 Coolest Homemade Beer Knight Halloween Costume
 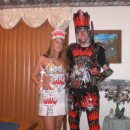 Beer Knight and Princess Made Only of Bud Select Boxes!
  Cool Homemade Lighthouse Costume With Rotating Beacon
  My Homemade Beer Can Wench Costume
 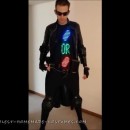 Homemade Self-Taught Matrix Costume: Neo, The One
  Coolest Teacher with Her Desk Costume
  Viking and Dragon Love Couple Costume
Your comment has been sent successfully.