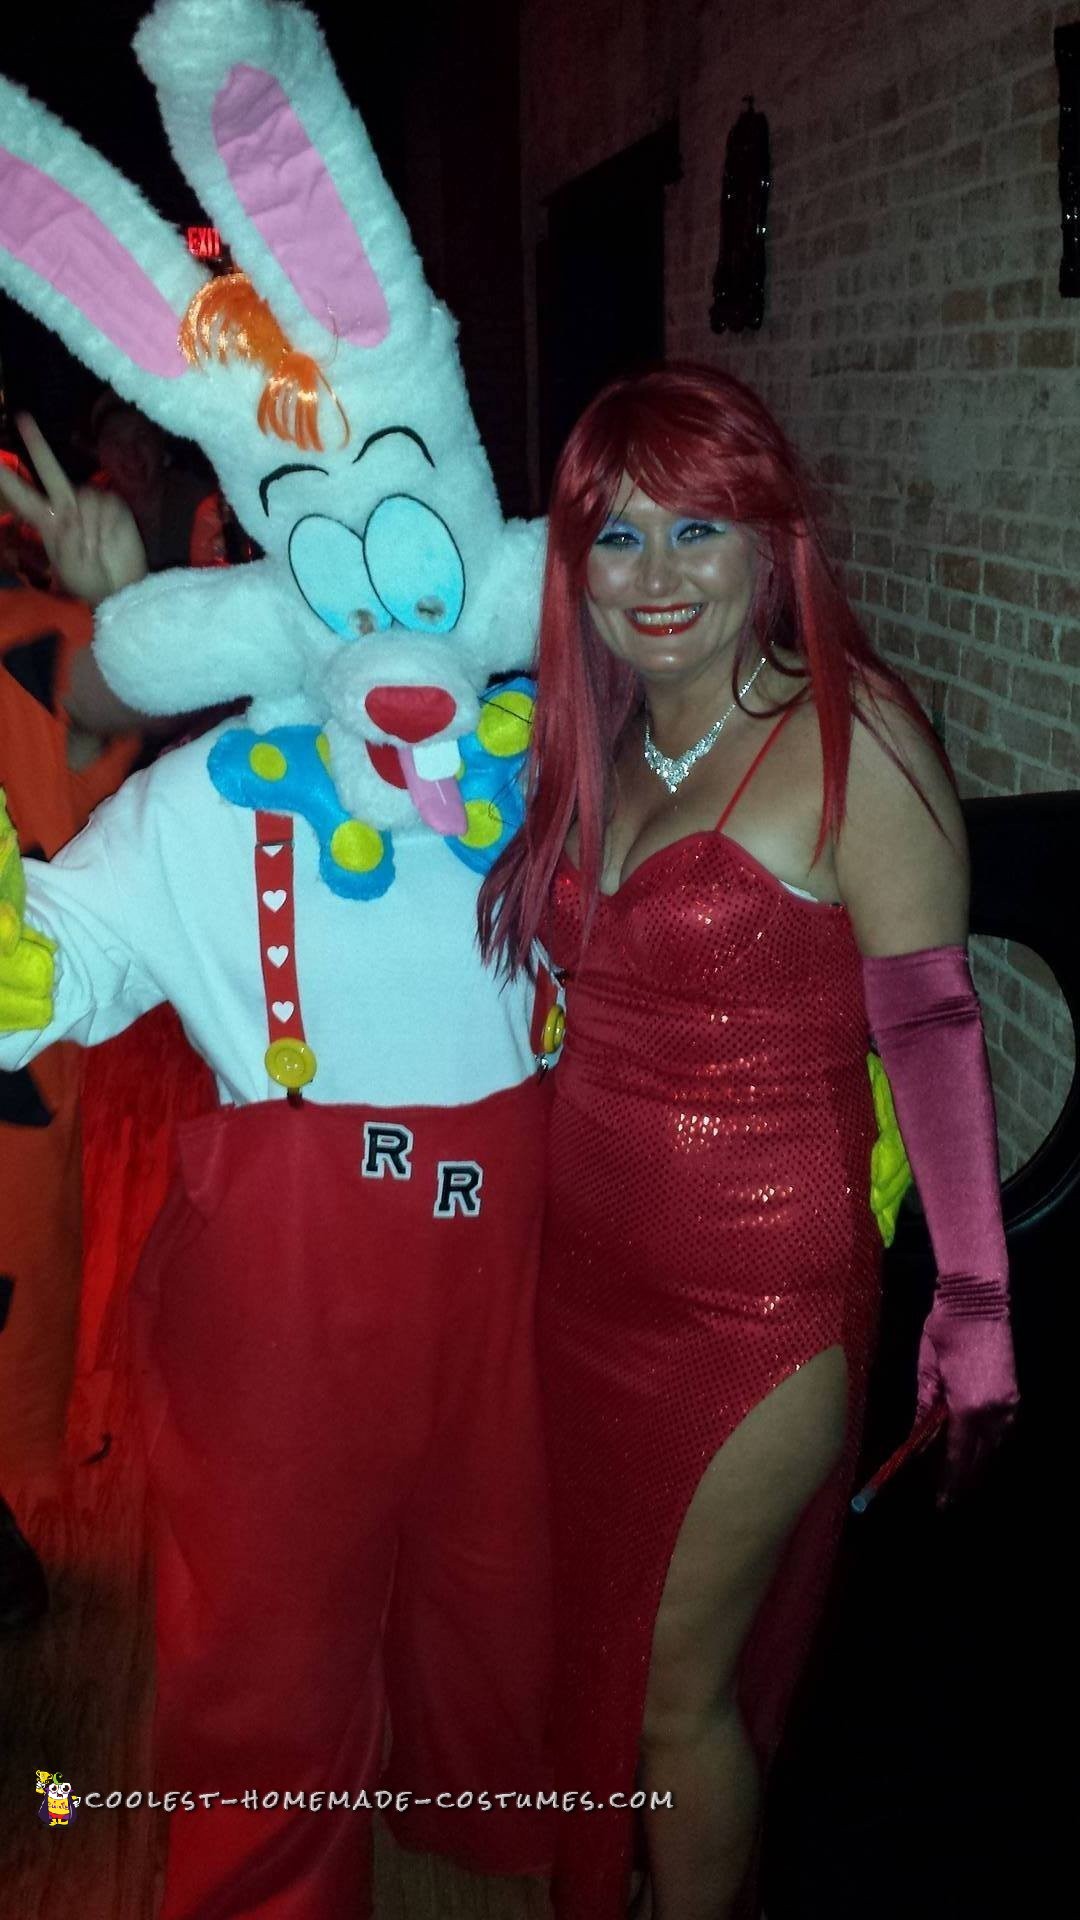
Halloween was very special for us this year, mainly because it was both our first times going to a costume party as a couple. It did not take long to figure out what we were going to be because our Facebook names are Jezzica Rabbitt and Roger Rabbitt (unique spelling included). People in the community know and refer to us by those names, so it is a big standing joke!
Our life resembles the movie characters in the way that she is a gorgeous, cute, classy, and unique woman and I am a clumsy, goofy, lovelorn and infatuated funny bunny! After a brief search of costumes online, we were unimpressed with quality, originality, and most of all…price! So, we decided to take matters into our own “paws” and hopped to it to design our own versions of the classic characters.
With some help from various websites and a much-needed viewing of the“Who Framed” movie, we were ready to begin. I am lucky to have been touched with creativity and an artistic hand and my girl (Cindy) is an awesome amateur “seamstress.” Or “sewist” as I called her, but was quickly corrected with the proper terminology. The entire process took about two days…and we started on October 29th. Nothing like waiting until the last minute, huh? I’m all for preparation, but spontaneity sometimes brings the best ideas and results.
So, here is our breakdown of our Jessica and Roger Rabbit costumes. Jessica’s costume was mostly store-bought items put together since it would take forever to hand make a sequin dress. Most of the supplies were purchased at Jo-Anne Fabrics. A few yards of different colored felts, some white faux-fur, some polyester stuffing/filling, a mini glue gun, and some odds and ends listed below was all we needed. Not to mention a lot of patience to work with your significant other! Because we knew Roger would be the most difficult and time-consuming costume, that was the one we started first. Let’s start from the bottom up.
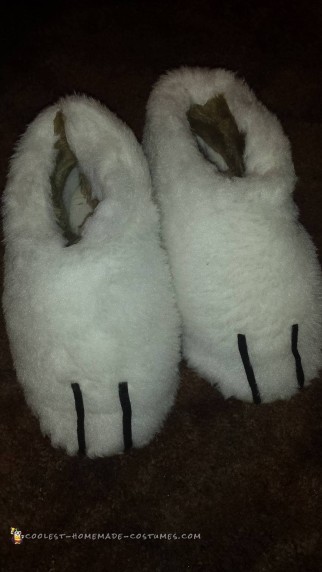
Rogers Feet:
Believe it or not, the feet were fairly simple to complete. I went to a Goodwill store on a mission to find the perfect big, white, fluffy, furry slippers they used to sell at any department store. Of course, when you are looking for something, you usually will never find it! So I had to resort to Option B. (B for “Bunny” feet.) I found these ugly boot style slippers, but they were brown. The up-side was they were a size 11. (I wear a 9) But this made the appearance that I had big ol’ floppy feet. We used some white Faux Fur to cover the slippers. She sewed the majority of the fur, and I used a hot glue gun to touch up and secure the loose pieces. I took three black strips of felt for each foot and glued them to the top for the toe lines. Voila! Perfect Roger Rabbit feet. The best part? They only cost $2.99!
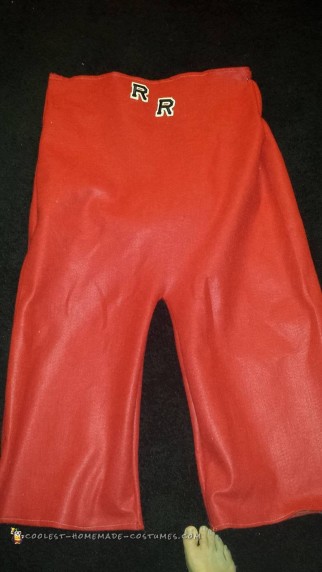
Roger’s Pants:
Because my girl is such a quick-thinking, talented woman, (brownie points) designing the pants were not as hard as I expected. I bought 2 yards of simple, inexpensive red felt from Jo-Anne Fabrics. We doubled the felt and laid it on the ground. I laid on top of it and she traced the outline of my body. While cutting the outline, I made sure to leave extra room for sewing and hemming. I wanted the overall part to lay right about the “boob line.” It took some trial and error, trying on and taking off, but once we found the right fit, she sewed the sides up making sure to make it narrower toward the top to give it the cartoon pant belled out shape. After that, she flipped them inside out to hide the seams.
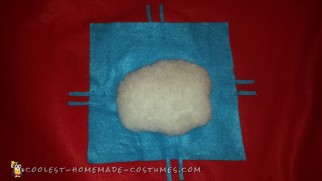
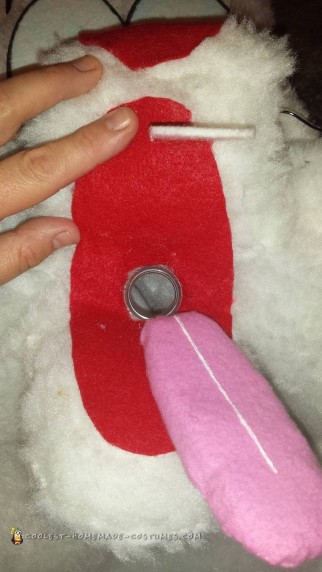
While I was in a Halloween City store, I saw these red suspenders with white hears all over them. They screamed Roger Rabbit! So I opted out of making homemade suspenders and chose these for originality. I found these giant yellow buttons at Jo-Anne as well and they were perfect! A little hot glue to the front of the suspenders (right above the silver clip that attaches them to the pants) and that’s all it took to make my unique Roger Rabbit pants! wait! All rabbits have a tail, right? Before we did the tail, I cut out a nice-sized square of blue felt and glued it to the pants. While I was doing this, my “Jessica” was making the tail out of some of the white fur. She made a simple circle shape and sewed it just enough while leaving enough to stuff for shape. My bunny tail was done!
I glued it on the centre of the square. The last step was putting the little stitch lines on the patch. I used blue felt strips (same color as patch-different lengths) and glued two on each part of the square. (see pictures) I had a last minute idea for a little added originality. I remembered a red sequinned heart that I gave my girl for our anniversary. It was about the size of a softball maybe. (but flat) I took some white paper and a red crayon and wrote “Jessica” on it. I adorned it with hearts of all sizes and made sure to make it look like a little kid wrote it, backwards letters included! I didn’t want to forget the XOXO like the love letter in the movie. Glued it to the heart and pinned the heart right onto the suspenders (right over my heart, of course) and it looked great! Definitely one of my favorite lil’ details.
You will notice two capitol “R’s” on the front of the pants. We all know what those stand for. I actually had those laying around the house and thought it would be pretty cool to use them. You can stitch them on if you have the time, but a little hot glue does the job as well.
Roger’s Shirt, Gloves and Bowtie:
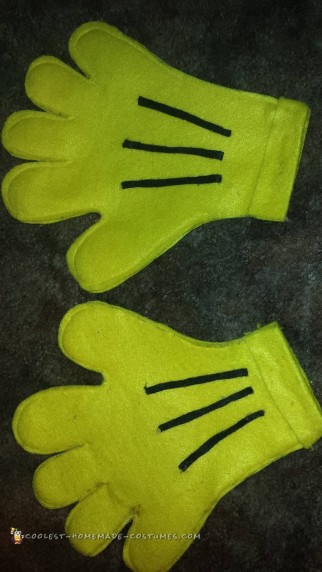
The shirt was by far the easiest item of all! I work at a screen printing and embroidery shop so I wore a plain white crew style sweatshirt. That’s all folks! Wait, that’s the wrong “wabbit.” Gloves were very difficult to do either. Used 4 yellow felt sheets (2 at a time). I laid them down and traced my hand shape. While I cut them out, I left extra room to make sure they had that goofy big cartoon hand look. My girl used a sewing machine to sew them together. I cut the wrist longer and made a flap by rolling it up and using hot glue to fasten it. Three black strips on each glove glued down made the detail and that’s it. You cannot go wrong by using your own hand as a stencil, this way you know they will always fit.
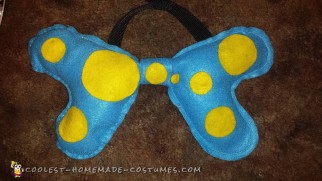
The bowtie was made with 2 sheets of blue felt. I traced my desired bow shape (the bigger the better, I say!) After I cut it out, she stitched the two bow pieces together and stuffed them. I cut out a thick strip of blue for the center knot of the bow. I wrapped it around and around several times and then glued the two bow pieces together. Add a couple extra stitches for added reinforcement. The yellow dots on the bow were hand cut from yellow felt. I made them all different sizes and glued them on the bow. For the strap to hold the bow around my neck, I used a piece of a dog leash that fastened with velcro. I sized it around my neck, cut a strip of it, and glued it to the inside of the bow. Pretty nifty, huh? It’s best to use something that you don’t have to pull over your mask or have it permanently attached the head or your shirt. It’s just easier that way.
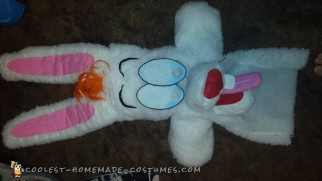
Roger’s Head:
Well, this was the most time-consuming part of my costume. Creativity is a must when trying to design a 3-D head from 2-Dimensional items. This is where my girl’s talents as a seamstress really come into play. We laid the white faux fur on the ground (fur side down) and I laid my head on it. She traced the outline of my head and neck to get the general sizing. I took a pen and sketched an outline of my desired rabbit head shape (without the ears but with the cheeks) I left a lot of extra room for stuffing.
The stuffing is what gives you the shape you need. I double the material and cut the shape I traced. Don’t forget to cut a slit up the back to allow for easy application onto your head. She then stitched the head, leaving enough room for me to try it on. This may take a few tries to get just right, but don’t give up! Once all the stitching was complete, she flipped it inside out to hide the seams. stuff, stuff and stuff. I was so amazed to see how perfect her creation was! I made my head very large because I wanted my costume to really stick out. And it did, because once I had the ears on I was slapping people in the face and head all night long. That wasn’t the kind of attention I was going for, but I sure got it!
Ears:
I made the ears out of craft foam. Try to get a light color like white or cream, not green or blue like I did. You can see right through the fur lining. I just laid the foam down, traced my ear shapes, cut them out, and covered them with the fur fabric. I needed flexibility for my ears so I could move them all around. Plus, it gave them more stability. I put some of the jewellery wire weaved in and out of the foam, then she stitched the fabric closed and attached them to the top of the head. Don’t forget the pink accents on the inner ears. I just used some pink fabric and glued it on.
Facial Details:
Eyes:
I lined up my eye level and made two small markings on the inside of the mask. I used a simple razor knife to cut two small circles to use as eye holes. I recommend making them big enough to see because I did not and I had a bit of a struggle trying to see. I used some very hard and thick felt material for the cartoon eyes. I used the bottom of an antique oval glass bowl to trace my oval eye shapes. It was a perfect fit! I cut the eyes and lined them up over the eye holes, making sure the cartoon pupils cover my eye circles. Before gluing them on, I took a black permanent marker and outlined the oval eyes for added effect. Because the white on white fur would blend in too much, I used some light blue pastel chalks to shade the white of the eyes. Don’t cover all of the white, just kind of shadow it. I glued the eyes on, cut out black felt eyebrows to desired shape and glued those on and the eye part was complete.
Nose:
The nose was made by cutting out the desired oval shape (you want it to stick out like a snout for added 3D effect) out of the fur. She stitched it together and stuffed it with the filling. Once it was stuffed, she sewed it to the mask. It was topped off with a small piece of red felt to make the tip of the rabbit nose. The whiskers were made of a medium gauge jewelry wire from Jo-Anne’s. I took three long pieces and poked them through the nose until they were fairly even on both sides. This held them in place much better than any other method I attempted. Now this is where it gets a little complicated. I made sure my breathing hole was cut in between the space where the nose and the mouth were stitched onto the mask. I will explain that in the section below with MOUTH instructions. Make sure to line the inner parts of the mouth and nose with a piece of red felt, cutting a hole around the mouth piece of the water bottle.
Mouth:
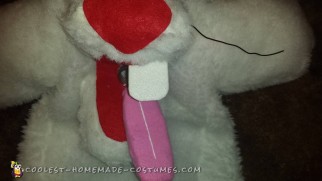
The mouth was made the same way we designed the nose. We cut a piece of fur with the desired shape of the mouth, stitched it together, stuffed it, and sewed it to the mask. It is very important that you leave a good sized space in between the nose and the mouth in order to have enough room for your breathing “apparatus.” I kept the same measurements I used the line up my face with the front of the mask. I took a water bottle and cut it about an inch and a half from the mouth piece. I cut a hole a little smaller than that of the mouth piece and placed it into the hole with the mouth piece facing out. I glued the entire piece into the fabric of the mask. I had to line the cut marks with masking tape so I had a nice smooth fit and didnt end up with a jagged ring around my mouth! I was actually impressed with how well it worked out. Don’t forget about the red felt liner on the top side of the mouth. I made a goofy looking tongue because hey! It’s Roger Rabbit. I used some craft foam and cut out a tongue shape, then covered it with pink felt and glued it to the mouth. I chose to let my tongue hang sideways, but you can place it however you like. Some white paint for the line down the center and it was finished. Don’t forget the tooth, because I almost did! I took a piece of white felt board about 1/4″ thick and cut a tooth square. I cut a slit in the underside of the nose (make sure it is a little smaller than the tooth so you get a nice tight fit.) Then glue, glue and glue! You can paint a small line to show the tooth separation mark, but it is not necessary.
Roger’s Signature Hair:
What’s a rabbit without his bright orange tuft of hair?!?! I was stumped for awhile trying to figure out the best way to make his hair. I must have combed several stores looking for the perfect hair. Then I found it! It was attached to the top of a Halloween themed plastic headband with those little springy things that bob back and forth. I was laughing to myself when I saw them, but the hair part was exactly what I was searching for. Thankfully, they were only 99 cents because I had to buy 4 of them. The hair piece detached so I just took all 4 pieces and connected them together and glued the whole little guy right in between the ears.
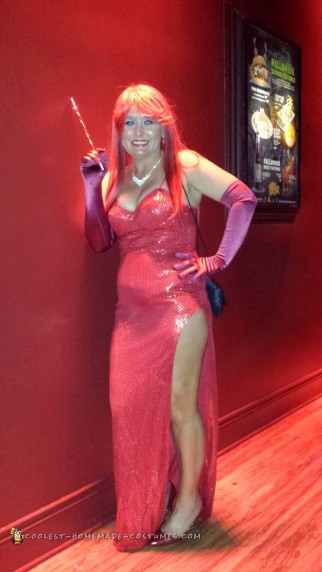
Now that the Roger costume was complete, it was time to find me a Jessica. Well, I already had one, but we needed to get her looking right. Her costume did not take as much time because most of it was store-bought. The dress was purchase online from a Halloween website. It was just your standard red sequin starlet dress with the slit up the side. Her gloves were not an easy find. We actually found them last minute walking through the mall. There was a Prom and Evening Gown Shop that happened to have one pair left. They informed us that we were their first paying customer as it was their grand opening.
We had free cider and doughnuts, the best part of that sale! We got lucky and found these great red and silver heels at the same Goodwill store that I found my big ol’ slippers at. We bought one of those reddish-orange colored wigs from Halloween city, but when she put it on, we both looked at each other and was like, “no way!” It was not put together well, and she was intent on looking ‘cute,’ not trashy. We ended up spending a little more than we originally wanted to by going to a professional wig shop and getting a very nice realistic looking wig..made of real hair. But it was so much better. For added accessories, I bought her a long cigarette holder from Party City, which just happened to have a red sequin overlay.
I knew Jessica Rabbit’s make-up is what really gives her the “look” so I found this tutorial on YouTube on how to do perfect make-up. And boy oh boy, did it look just like the cartoon Jessica. Well, we tried it and it was an epic failure. We did not have the proper expensive make-ups or the skills of a professional make-up artist, which these women were. So, she ended up doing the signature purple eyeshadow and juicy bright red lips. She applied fake black eyelashes and bright red nails. When we put it all together, she looked amazing! And yes, she looked as sexy as she probably felt that night. It’s not everyday a woman can get dressed up and show off all her assets and get away with it!
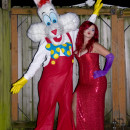
And there it was, a gorgeous Jessica and entire Roger Rabbit costume, hand made. We were extremely pleased and proud of ourselves. We were a big hit too! Literally, a big hit. A drunk man who had been flirting with my girl came out of nowhere and hit me right in the face and yelled some vulgarities about roger rabbit. Apparently, he was mad he didn’t get the girl. At least he didn’t drop a safe on my head! Oh, Jessica. Lol.
Many people asked to take pictures with us and the compliments were a steady flow of positivity. It was a great night all together and definitely a memory to share. The best part is knowing we can share our experience with others, and helping other first-timers out there enjoy the fun in creating something that will always remain an interesting conversation piece! I hope you all can create the memories that we did!

Related costumes:
 Realistic Handmade Jessica and Roger Rabbit Costumes
  Best Home Made Roger Rabbit Halloween Costume
 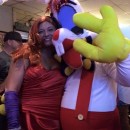 Crazy Roger and Jessica Rabbit Couple Costume
 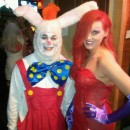 Who Framed Roger Rabbit Couple Halloween Costume
  Coolest Homemade Mystique Halloween Costume
 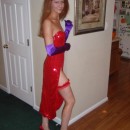 Homemade Jessica from Roger Rabbit Costume
 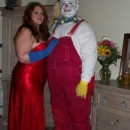 Coolest Jessica and Roger Rabbit Couple Costume
 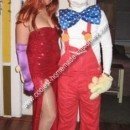 Coolest Homemade Jessica Rabbit and Roger Rabbit Couple Costume