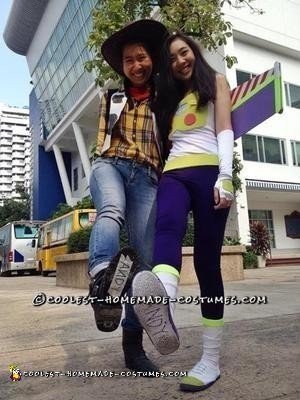
These costumes were for our senior dress-up week, the theme of the day was Twin Day. We chose to go as matching partners instead of dressing identically.
Woody’s costume:
– Blue jeans
– Yellow plaid shirt
– Cowboy hat
– Cowboy boots
– Sheriff’s badge
– Vest
– Red bandanna
We made the vest out of canvas and painted it white, and then painted on the black spots for the cow-leather look.
Couldn’t find a red bandanna so we just cut up one of my old red tshirts.
Buzz’s costume:
– Purple leggings/tights
– White socks
– White shoes
– White tank top/t-shirt
– Elbow length white gloves
For the shirt, I went with a tank top because it’s pretty hot right now where we live (37 degrees celcius).
The front panel is made from green foam, sewed onto the shirt. The red button and all the details on it are also made from foam, glued on with double sided tape.
The bottom edge of the tank (green strip) is also foam, sewed on.
The gloves are elbow-length princess gloves (super comfortable!). I cut the fingers off and sewed the edges so they wouldn’t fray… so I could easily use my touch screen phone. Green duct tape wouldn’t stick to the back of my gloves so I cut green foam and sewed them on the back of the hand.
Shoes are plain white shoes that I got for a pretty low price. I painted the tip with green paint and the bottom edge with purple paint. I plan on re-painting them in a color more wearable and wearing them again :)
I had knee socks which looked ridiculous so I just folded them down and ran green duct tape around the edge (which stayed on for the whole day).
Buzz’s jetpack/wings:
– Cardboard
– Green foam
– Aluminium foil
– Duct tape in red, black, white, purple and green
– Elastic
I found a reference picture of the wings and it took me under 2 hours to complete these.
I started by making the jetpack. I cut cardboard out in a trapezoid shape (see image) and completely covered the front with white duct tape (this is so much easier than painting). Then I cut out triangles from green foam and attached to the white board with double sided tape. The detail (purple and black pieces) is duct tape that I cut.
The silver engine attached to the bottom of the jetpack is again cardboard (cut according to shape in image) covered in aluminium foil. It’s stuck to the back of the jetpack with duct tape. The detail is black and red duct tape that I cut into small squares.
The wings are a slanted rectangular shape. Cut two identical pieces out of cardboard. I used red and white duct tape for the stripes, purple duct tape for the bottom half, and green duct tape for the line in the middle. Do the same for the other wing, but mirrored (stripes slant to the opposite side). Repeat the same design for the other side of both wings (people will see the front and back of the wings).
For the edge of the wings I cut out 4 cylinderical shapes of the same size. I covered each one with 3/4 green tape and 1/4 white tape. I attached two on each wing (front and back) with double sided tape (white part is on top).
I used a small screwdriver to punch 4 holes in the jetpack for armbands. I strung elastic through two holes and tied knots to keep them from slipping through to create two arm bands.

Related costumes:
 Cool DIY Female Buzz Lightyear Costume
  65+ Coolest Homemade Pokemon Costume Ideas
  65+ Coolest Homemade SpongeBob Costume Ideas
 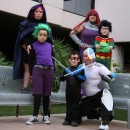 Coolest Halloween Teen Titans Group Costume
 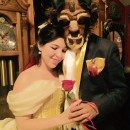 Tale as Old as Time – Beauty and the Beast Couple Costume
 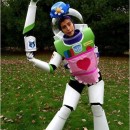 Coolest Homemade Mrs. Nesbitt/Buzz Lightyear Costume
 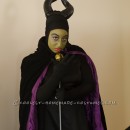 Homemade Maleficent The Magnificent Costume
  Charizard Halloween Costume for a Boy
Your comment has been sent successfully.