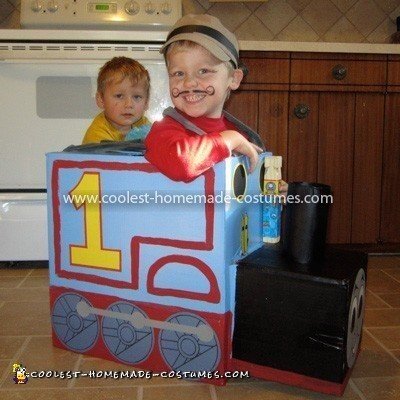
This Homemade Thomas The Train Costume took me about 3 hours to make plus drying time for the paint.
Please remember to consider how heavy this costume will end up being in the end. My son is 4 years old and he had no problem wearing this costume. It ended up weighing approximately 2 pounds (basically just the weight of the two boxes).
One problem I never foreseen was him being able to get up and down big steps. Which ended up being okay because we went out as a family and were able to just lift him up to the landing.
Materials Needed:
Large rectangular box approximate dimensions- 19″H x 19″L x 12″W
Smaller square box approximate dimensions- 10″H x 10″L x 10″W
Two sided carpet tape or double sided foam adhesive strips
Large paint brush
Small paint brush
“Thomas” Blue paint
Bright red paint
Card stock or other thick craft paper – red, blue, gray, white, yellow, black
Bristle board for the chimney
Red and black sharpie markers
Ice cream lids, margarine lids, various other circles for tracing around
Pencil
Ruler
Scissors
Box Cutter or bread knife
Bread clip (if needed)
Durable scrap material (denim/ old jeans work well)
First I started out with two sturdy boxes. One was a bread maker box and the other a small square box. I folded in the box flaps on the smaller box and taped it shut, the large box I taped the flaps open so the box was open on one end. After that I secured both of the boxes together using two sided carpet tape and Tyvek tuck tape.
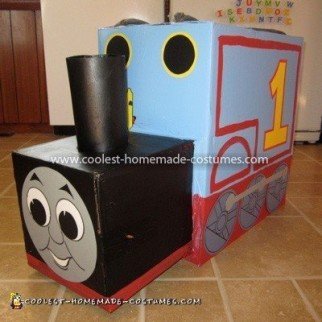
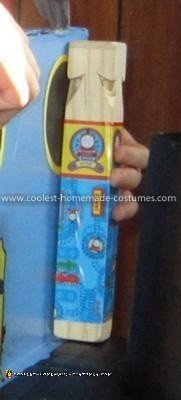
Once secured I rolled up a piece of bristle board and taped it to the top of the smaller box in the center. We had a wooden train whistle and the chimney stack worked out to be the holder for it. I also cut a hole big enough for my kid to stand inside comfortably with a jacket or sweater on (about 10″ in diameter, be sure not to cut the hole right to the edges or it will compromise the sturdiness of the box).
Then we painted two coats of paint. While waiting for it to dry I cut out circles for the wheels, buffers & face etc. and made the 1’s for the sides. To make the 1’s I used a ruler and cut it out then took a red sharpie marker and lined the outside of the 1’s in red.
Once the blue and black dried I painted the bottom part of the box red to just above the top of the wheels. At that time a also painted the red lines on the sides (I thought after I could have just used red “electrical” tape but it was too late). I kept the lines simple and basic because I didn’t want it to look too busy and time was a factor.
When all the paint finished drying I attached all the shapes and cut slits to pull the material through. I made “washers” with ice cream pail lids and tied knots in the end of the material so they wouldn’t pull through the box.
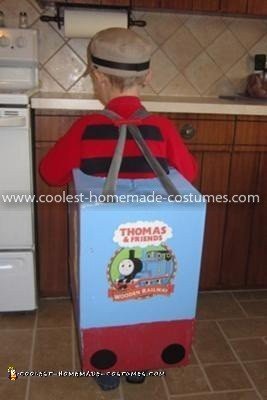
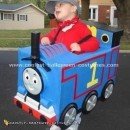
To finish off the “look” my son wore a red sweater and jeans with dress shoes and a small beaked hat with a construction paper band around the top. We also painted on a fancy mustache to go with the theme. Once he or she is in her costume, use the bread bag clip to tighten the straps and stop the train from falling forward. Using a bread clip made it easy and safe for the child to get in and out of the costume without much fuss.
I really recommend finding a train whistle to go with the costume. It brings a whole new element of joy for your child, the parents and the candy giver to enjoy.
Seeing my child light up when he saw the final Thomas costume done was SOOO worth it. He never cared much for Halloween and now he’s excited to find something to be for next year!
Enjoy!!

Related costumes:
 65+ Coolest Homemade Thomas the Train Halloween Costume Ideas
 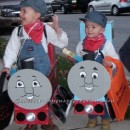 My Boys in Thomas and James Trains Homemade Halloween Costumes
 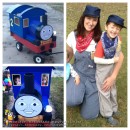 Edward the Blue Engine Train Costume
 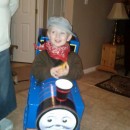 Best Thomas the Train Toddler Costume
 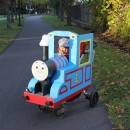 Original Kids Thomas the Tank Engine Homemade Halloween Costume
 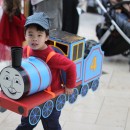 Thomas and Friends Train Child Costume – Using Recycled Household Items
 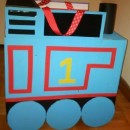 Cool Homemade Thomas The Tank Engine Costume
 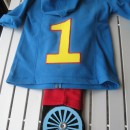 Easy Thomas the Tank Engine Toddler Costume
Your comment has been sent successfully.