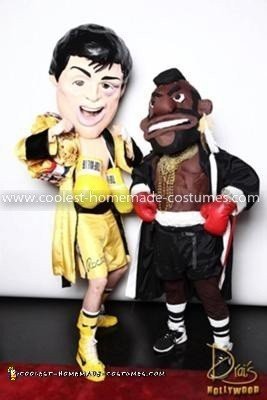
As huge Rocky fans, my buddy and I decided to create costumes modeled after the Rocky III movie starring Sylvester Stallone and Mr. T.
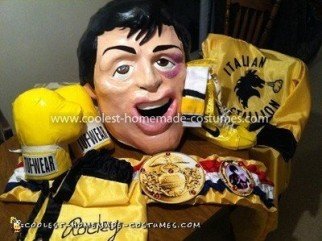
We gathered a ton of pictures to get the Rocky and Mr. T Couple Costume as close as possible to the real movie. The costumes were all made from scratch and included: boxing gloves, robes, championship belt, papier mache masks, “Nike” boxing shoes, shorts, socks and muscle shirt.
How We Made Our Costumes (specifically the Rocky character) –
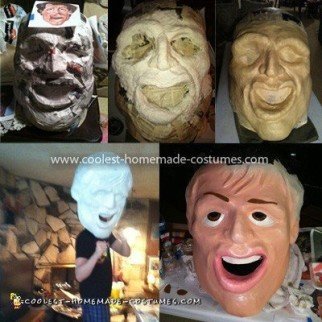
[The head (Papier Mache):]
1. Used a beachball to use as the base of the head. Inflated it and covered it with paper mache (corn starch and water and newspaper).
2. Paper dried and hardened and then was able to add more layers to make it stronger.
3. Once layering was done, I deflated the beachball and removed it, leaving me with a hollow paper ball.
4. Added nose and chin with same process of adding paper and layers and lots of tape.
5. Created a paper clay made from toilet paper, oil, plaster, and glue to model the face a little more realistically including the nose and eyebrow area. This began to get heavy so I had to cover the plaster completely with tape and then papier mache over it with newspaper. I added maybe 4 layers of papier mache and then let it dry.
This section then was removed from the top of the tape as a whole which was very easy to do since the shiny side of the tape created a nice release agent. I then cut out the heavy part of the face that had all the paper clay and repositioned this new lighter paper mache section where the heavier part used to be and taped it down securely.
I then continued to papier mache over this new section to create a new strong bond between the old part of the head and the new one. Hope that makes sense.
6. After all the papier mache was done, I sanded down all the high spots and tried to smooth down the head as much as possible by covering it in about 4 layers of homemade gesso.
7. Painted the face with an airbrush using acrylic liquid paint. Painted on the details by brush also using acrylic paint.
8. Sealed the head with a spray on sealer to protect the paint.
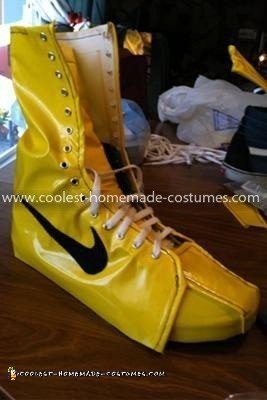
[The shoes:]
1. Bought some shiny vinyl fabric and created individual shoes pieces modeled from a high top pair of Vans I had laying around. I sewed the edges with black thread to give it that professional look.
2. Created all the holes necessary for the laces and hot glued some eyelets into each of them.
3. Taped down the individual pieces onto the real shoe and laced them up.
4. Added the Nike logo using felt and hot glue.
[The robe and shorts:]
1. Bought some silky gold and black material and cut it out using my bath robe and some old shorts as a template.
2. Sewed everything together and created a hood to add to the robe.
3. Cut out each individual letter spelling out “ITALIAN STALLION” along with the horse logo to hot glue on the back of the robe.
4. Used fabric paint to write “Rocky” in cursive on the shorts.
[The socks:]
1. Bought some long football socks in plain white.
2. Taped off the top area into three sections and used yellow and black fabric paint to brush on accordingly.
[The boxing gloves:]
1. Made the basic shapes from newspaper and tape and hot glued fabric on top of them.
2. Printed out a label from paper with the “TUF-WEAR” logo on them and glued it onto felt. I stitched the edges so that it would look as if I actually stitched them onto the gloves. Hot glued the labels onto the back of the gloves.
[The championship belt:]
1. Used four different colors for the belt including red, blue, white and gold. I sewed them together and then crunched them up to create that pleated look (not sure if that’s what it’s called).
2. Found some good images of the actual belt, printed them out and glued them onto foam board. Attached these gold pieces to the belt.
3. Bought some velcro pieces and sewed them onto the belt so I could wear and remove it with ease when needed.
[The muscles:]
1. Cut fabric into what resembled a long sleeve shirt.
2 Cut out foam pieces and used a glue stick to position them in their appropriate area on the shirt.
3. Cut out another piece of fabric to place on top of these foam pieces and then sewed around each individual piece creating a distinction between each muscle (i.e. the abs and chest).
The entire process took about two months. It was a lot of fun and we got lots of love from Rocky fans young and old. Hope you guys like it! :)

Related costumes:
 Child’s Rocky Balboa Costume
 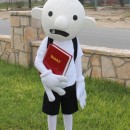 Coolest Homemade Costume Idea: Diary of a Wimpy Kid Costume
 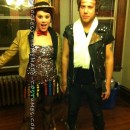 Coolest Rocky Horror Columbia and Eddie Couple Costume
  Awesome Beetlejuice Couple Costume: Resurrecting Adam and Barbara Maitland
 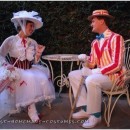 The Coolest Ever Homemade Mary Poppins and Bert Couple Costume
  Awesome Homemade Titanic Couple Costume
  Top 7 Movie Character Costumes Tom Hanks Needs for Halloween
  Despicable Star Wars: Return of the Minions Group Costume
Your comment has been sent successfully.