Once upon a time, there was this seemingly innocent website called Pinterest. Now, if you were to casually peruse aforementioned website, you would find some of the most amazing ideas you have ever seen. These amazing ideas will be followed my seemingly overly simple instructions to make the amazing creation that has piqued your interest. Words of warning : Don’t be fooled. Nothing is as simple as it seems. This is my story of Halloween 2014.
On September 20th, I asked my four-year-old son what he wanted to be for Halloween. Yep, mistake #1. After listening to him spout out everything that his little mind could conjure, I told him to sit with me and that we would look at Pinterest for some cool costume ideas. Yep, mistake #2. After looking at a few ideas, he found the one he loved. A porcupine. Yep, I said a porcupine! I looked at the seemingly simply DIY instructions and thought “Hey, I can do that!” I announced to my son that he was going to be a porcupine for Halloween. Yep, you guessed it, mistake #3. See, Pinterest has this way of making outrageously difficult things like knitting a snuggie for your seven foot friend or making your own cheese seem as simple as blowing up a balloon. I took the bait. Hook, line and cute little stinker.
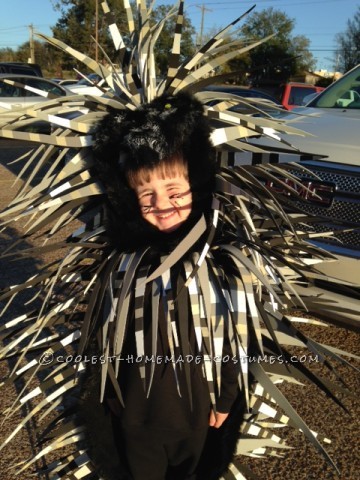
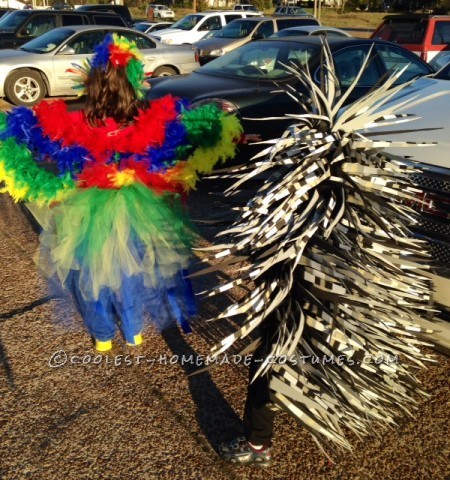
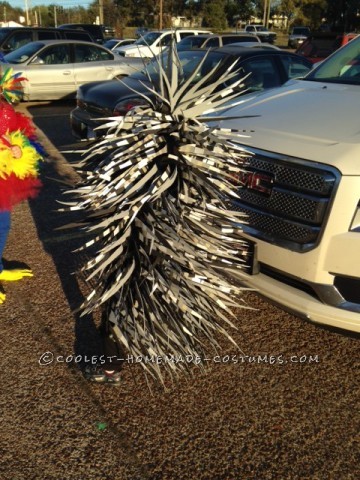
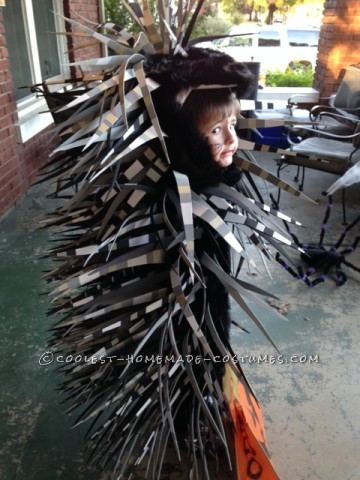
Having just moved to a new town a mere month ago, I did not take into consideration that the nearest craft store was one and a half hours away. I headed out to that craft store with my list of items needed to make the most adorable porcupine costume. I got everything on my list and left feeling accomplished! Still riding my accomplishment high, I sat down at the kitchen table with my yards of fur, craft foam, duct tape, paper tape, Styrofoam pieces for the head, and my trusty glue gun. After gluing the heart shaped foam on the dome shaped foam, I had the initial shape for the porcupine head. I glued the fur around the head, letting some fur drape down to cover the neck. Next came the craft foam. 10 large sheets of grey and black craft foam. I took white duct tape and off white paper tape and made stripes across each sheet, and then proceeded to cut tall, skinny pieces of foam into porcupine quills. This took forever. With cramps in my fingers, I finally completed all quills in two days. I then began the tedious process of hot gluing each of these quills to the fur of the headpiece. This took a few more days. After finally completing the headpiece, I felt awesome, I did it! Well, part of it. I called my son in to try it on his head. The looks I got from my family quickly deflated my earlier sense of accomplishment. “Look, he looks like he’s an Indian Chief with a headdress!” What? Well, I had come too far to give up now. So, I gave myself a few days to rest, all the while steering my children clear of all costume aisles at all stores.
During the porcupine rest period, my eight-year-old daughter had gotten on Pinterest herself and picked out a DIY parrot costume. Ugh, really. Well, I was making her brother’s costume, so I could NOT deny a simple parrot costume for my daughter. After reading the parrot instructions, I was grateful that all items needed to make my daughter into a parrot could be found at either the fabric store or Wal-Mart. Score! Yes, daughter, you can be a parrot for Halloween!
October 20th: “Mom! I wanna see my porcupine costume!” Um, oops. Guess I better finish that. All that was left was the full-length fur cape that needed to be filled with quills, simple. So, I fired up my glue gun and began hot gluing quills on to the fur. Countless hours and days and multiple curse works and burned fingers later, I glued my last quill on the fur cape. Whew! The only problem was that the cape wasn’t even half-way filled with quills. What! Upon further examination of the DIY instructions that I quit using weeks ago, I realized that the supplies were based on covering a two-year-old with quills, not an unusually tall four-year-old. So, yep, another 3 hour round trip for craft foam. Eight more sheets of $0.89 craft foam. Three hour trip. After starting the quill process all over again, my husband even took pity on me and decided to help. I no longer was picky about the shape of the quills. We worked all night and finally got the remainder cut out. Now only an entire Sunday of hot gluing and expletives over burned fingers was all I needed to complete the cape. Porcupine costume complete.
Countdown to Halloween. Five days until Halloween and one porcupine costume down. One parrot costume remaining.
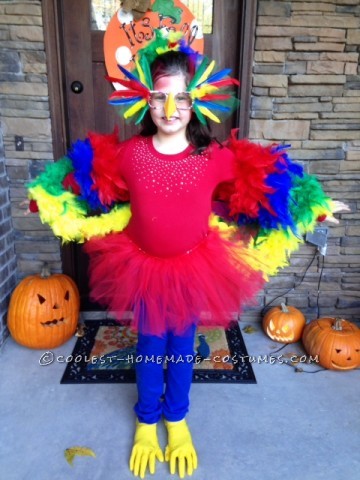
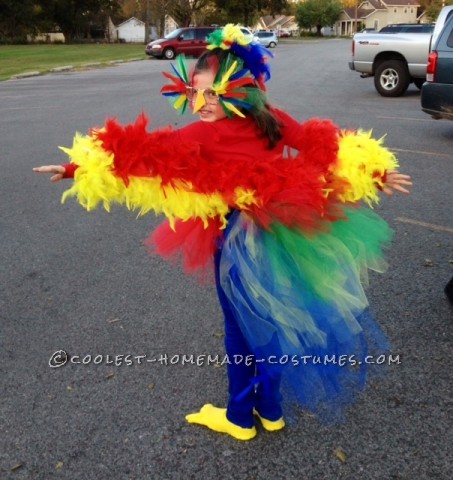
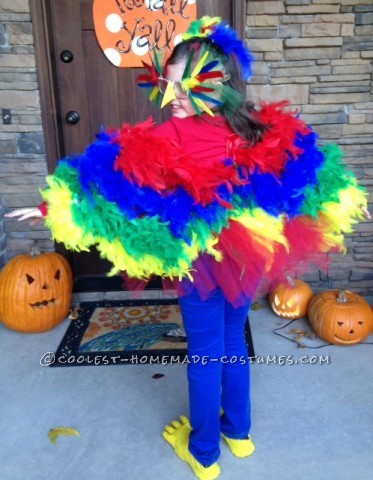
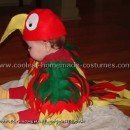
After all of the trouble of the porcupine, the parrot was a piece of cake. Pinterest cake, but cake nonetheless. A red shirt, royal blue pants, and clear lens glasses started the look. I hot glued feathers and an orange beak out of card stock onto the glasses. Headpiece done. I made a red, no-sew tutu on elastic, and then made another long tutu on ribbon to be tied on the back with alternating colors and lengths to make the “tail feathers.” Now, according to my daughter, parrots “must have red, royal blue, yellow AND green feathers.” However, our local stores only had red and yellow feather boas. I finally wised up and was able to order a royal blue and green feather boa online with one-day shipping. Oh, yeah, not trekking three hours for feathers. To complete the parrot look, I bought large yellow rubber gloves, stuffed the fingers with paper towels, and stretched them over her tennis shoes. Parrot costume complete and two days to spare!
So, on Halloween, getting the parrot put together went like this. Get dressed in the red shirt and blue pants. Pull on the red, short elastic tutu. Tie on the long multi-colored tutu. Put on the glasses with feathers and beak, stretch on the yellow glove feet, and use multiple safety pins to pin on the feather boas. The feather boas were pinned around her arms, and then stretched and pinned to the top of her tutu. When her arms were stretched out (which was apparently way too much work for her tired arms) it would look like multi-colored wings! I also trimmed a few pieces off the feather boa and hot glued them onto a barrette to be worn in her hair. Voila! A parrot was born. In a relatively short time compared to the porcupine.
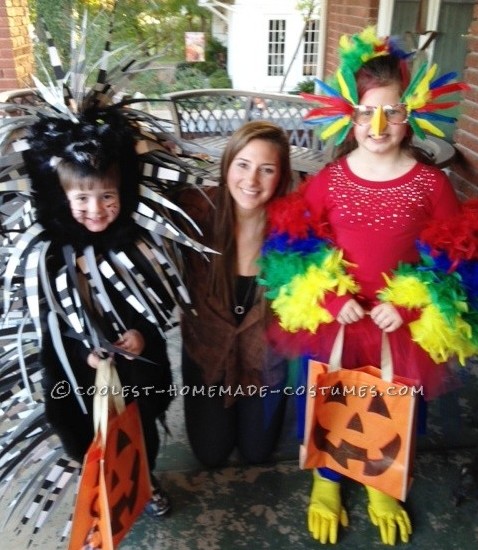
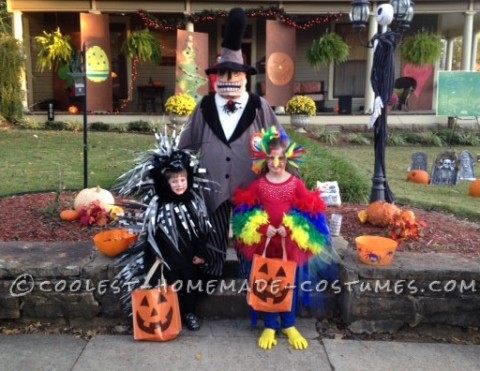
Halloween night 2014. Our first Halloween in a new town, and I think the parrot and porcupine were a hit. Both the tail feathers for the parrot and cape and head piece for the porcupine had to travel in the trunk of the car until we reached our destination. All was assembled and the “OOOOs and AAAHHs” commenced. Walking down main street got them quite a few comments and multiple home owners asked to take their pictures. The parrot was strutting and the porcupine was scaring people with his “spikey things.” Kids and adults alike were constantly complementing both costumes, and quite a few people would reach out and touch the porcupine’s quills as he was walking away. They had a great time, and I’m still getting compliments. Which is great, because I don’t know if I’ll ever attempt another Pinterest costume as long as I live. However, the only thing I would change is buying extra craft foam. Seeing how happy and excited my parrot and porcupine were was worth all the time, effort and glue burns. Happy Halloween 2014!


Related costumes:
 12 Coolest Homemade Parrot Costume Ideas
 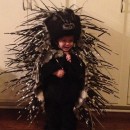 Homemade Prickly Toddler Porcupine Costume for a Girl
 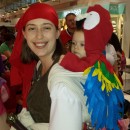 Babywearing Pirate and Parrot Costume
 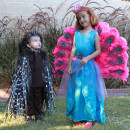 Barbie The Island Princess Doll Costume and a Prickly Porcupine Costume
  Perky Parrot Nation, Unique Parrots in Extravagant Costumes
  Cutest Homemade Porcupine Costume for a Little Boy
 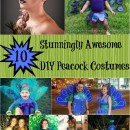 Top 10 Stunning Homemade Peacock Costumes to Inspire Your DIY Costumes
 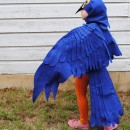 Coolest Blue Macaw Parrot Costume
Your comment has been sent successfully.