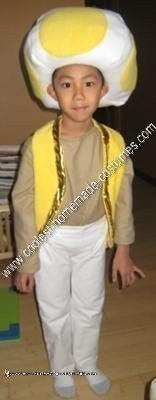
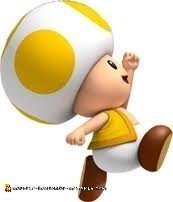
My son is a fan of the Super Mario games. One of his favorite characters is Toad, and his favorite color is yellow, so you can only imagine his excitement when he saw yellow Toads in Super Mario Galaxy. In 2010, he wanted to be a “Yellow Toad” (see Picture 2). There are regular Toad costumes for sale, but I don’t like the way they look, and there was no way to modify it. So I was made this homemade Yellow Toad child costume idea from scratch.
I figured the vest wouldn’t be too difficult. I found a tutorial on YouTube on how to make the vest. There was going to be a shirt because Toads look like they only wear a vest on top, and the pants wouldn’t be pretty straight forward. The hat had me concerned. I could make patterns for the shirt and pants based on his current clothes. The vest pattern could be based on a sleeveless shirt. There was no pattern for the hat. I spent a lot of time thinking of how to make the hat.
I started with the vest. This tutorial on YouTube gave me a pretty good idea on how to start:
I created the pattern out of newspaper. I purposefully made it larger than the shirt so it would fit over the costume. I used small binder clips to put the paper vest together and then tried it on my son. I’ve learned that this ‘fitting’ is a good idea when making your own pattern. I had to make some adjustments to the pattern so it would fit. Even though I became close friends with my seam ripper, the vest came together pretty well. The gold trim was a little tricky because there is a metal wire on both sides of the ribbon, and it doesn’t stretch. I ended up pleating where necessary. I wasn’t going to put the gold trim on the back of the neck, but once I figured out the pleating trick, I put in several pleats and the trim really stands out. The rest of the vest went together just like the tutorial.
With the confidence of the vest under my belt, I figured I would tackle the hat. Did I mention that I spent a lot of time thinking about the hat? So I searched the internet for all sorts of patterns, and I found nothing. I ended up with a four piece ball pattern… vs a six piece. I figured the four piece would be easier to sew the yellow dots on, and it would be less sewing. It wasn’t going to be as round, but I was running out of time, and I didn’t know how much longer the hat was going to take. I cut out a pattern based on how big I wanted the diameter of the hat to be. The ball pattern is based on circumference so I converted the diameter to radius and the circumference using simple geometry. I modified the pattern at one end so it would sew into a cylinder with a circumference of my son’s head. I cut out the four panels and the five yellow dots. I sewed a yellow dot onto each of my white hat pieces, and then I sewed the ‘ball’ together. The last yellow dot was sewn on top.
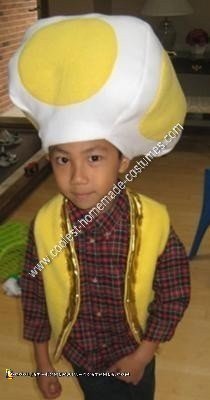
Then I had to figure out how to stuff the hat. I figured that batting wouldn’t hold its shape enough. I used a plastic bag filled with air to get an idea of the shape, and that’s when I noticed that it looked more like a chef’s hat with a ball on top instead of a Toad hat.
I ended up taking the top yellow dot off, and sewing a bigger seam across the top to flatten the hat. That gave made it look less like a ball. When I was happy with that, I sewed the yellow dot back on. An air filled bag confirmed that the shape was better, but it wasn’t going to work as my stuffing. I tried filling a plastic bag with foaming insulation because it is very light when dry, and I figured I could cut out the hole for his head to the right shape, and it would give it some structure. That didn’t work out. The foam expanded as expected, but only the stuff exposed to air hardened. The rest of the insulation stayed wet and eventually deflated. I ended up using batting because it was stiffer than air, but the hat just looked floppy. I safety pinned the inside of the hat (where his head would go) so I could get in to make adjustments later. Picture 3 shows how the hat looks more like a chef’s hat than a Toad hat.
The shirt and pants were put together very quickly as they were simple compared to the hat. I made them a little bigger so he could wear the costume by itself or with another layer underneath so he could go trick or treating without a jacket if the weather was cold.
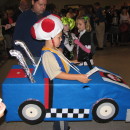
We had a trick or treating event on Thursday, so the hat was going the way it was. If worn properly, it looked ok, but most of the time it was too floppy. That night I had a revelation. I needed the core of the hat to be stiff like a top hat. So I took an empty cereal box and formed it into a cylinder. I made relief cuts in the top flaps to get a flat surface on top, and then I stapled the overlapping flaps so it would hold it’s shape. I measured the approximate height of the hat and taped duct tape around the cylinder at that level. Then I made relief cuts from the bottom of the box up to the duct tape. I pushed the batting aside, and stuck the cylinder in the middle of the hat. I folded in the ‘ribbons’ up against the outside of the hat. Then I safety pinned the inside together, and now we had a real Toad hat. It fit better, held it’s shape, and it was cooler because there was a chimney of air around the top of his head instead of batting. Picture 4 shows the back of the costume.
It was pretty grueling at times, and I spent a lot of time on it, but my son likes it so much that he wears it around the house even after Halloween is over. That makes it all worth making the Coolest Homemade Yellow Toad Costume.


Related costumes:
 Cool Mario Bros. Toad Racing Kart Costume
 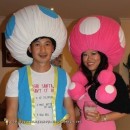 Awesome and Easy Toad and Toadette Costume
 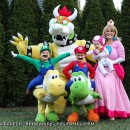 Awesome Homemade Mario Family Costume – Bowser, Mario, Luigi, Toad, and Princess Peach
  Coolest Homemade Mario, Luigi, Toad and Princess Daisy Group Costume
  Coolest Homemade Mario, Peach and Toad Family Costume
  Authentic Frozen Family Costume – Elsa, Olaf, and Kristoff
 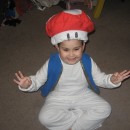 Original Mario Brother’s Toad Costume
Your comment has been sent successfully.