“Everything is AWESOME – Everything is cool when you’re part of a team!” Right? :)
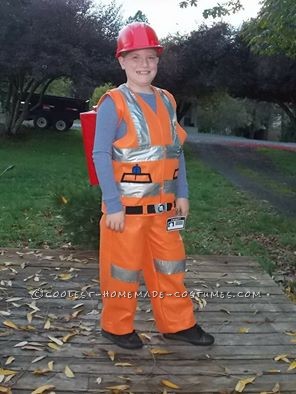
Well, here it comes, Halloween. Once again, my son LOVES to come up with a costume that I usually have to make. This year, he wanted to be Emett from The Lego Movie. I have to say, by looking only at pictures of Emett online I came up with a pretty good costume, that received many compliments!
I started my journey by trying the easy route, finding a safety orange colored sweat suit that I could alter. Nope. None to be found anywhere!
Next thought was to go buy a construction outfit at a outdoor apparel type store. Nope. There’s NO way I was going to lay down about $50 for a costume. That wouldn’t even include the accessories I might have to add to it.
My last resort was to figure out how to sew it. I can’t read patterns well, but I learn easy by watching. I decided to see if there were any YouTube videos that showed how to make simple elastic waist pants and a vest. I knew the additions I could figure out easily by eye, but I had no clue how to make some pants and a vest to fit my son. Luckily, I came across a video of both where you lay down some pants (I used some of his sweat pants) and a vest (Luckily he was recently in a wedding, so we had a vest here) on the fabric and cut a few inches outside of it. Voila! There you have it. Simple enough!
Off to the Fabric store. Felt it was! No need for anything fancier for a costume, plus it’d be decently warm over the blue long johns I planned for him to wear under it. Safety Orange and $2.99 a yard that day, yippee! I bought three yards to be on the safe side. Then I browsed for something that looked like reflective tape. Boom! There is was. Fake leather. On sale for $3.99 a yd! I bought a yard. A little bit of black Felt I also needed, 1/4 of a yard will do. I left paying under $18.00 total. Double YIPPEE! (In the end I didn’t need nearly this much. Oops! Better to have too much, than too less though!)
I started with the pants. I laid them down on the fabric as the YouTube video showed. They went along without a hitch. I “eyeballed” the silver leather strips for the knees. (As I noted later with the vest, I had to hand sew these on). I had elastic in my sewing drawer, so that was “free” at the moment.
Then the vest. I laid it out and followed the instructions on YouTube as before. Again, it was smooth sailing.
I then measured strips of the leather and “eyeballed” them as before and pinned them to the fabric. I quickly found out that sewing them on the sewing machine made the leather “scrunch up”. Darn it. I ended up having to hand sew them on, but I did a simple larger stitch, as most costumes are. Now I again “eyeballed” the black felt, and measured the strips, cut them and pinned them. I decided that since they were so narrow, I’d use fabric glue to make sure they didn’t move. I also “eyeballed” the blue pen in the pocket and the belt, and did the same with the glue. After drying, I hand sewed large stitches into these too. I had some Velcro in my sewing drawer and hooks, so decided to use these. A bit of Velcro made the fake belt attach across the vest, and then I used two hooks to close the vest up.
Lucky for me, my sister works at a second hand store. A few week earlier I asked her to keep her eye out for a hard hat. It didn’t matter what color, as I would spray paint it red as I needed. That day she had me come to her house to get it. Free to me! It was yellow. No big deal. We bought a can of red spray paint for $2.50 on sale. Perfect! We went home and spray painted it over the course of a few days. Shiny!
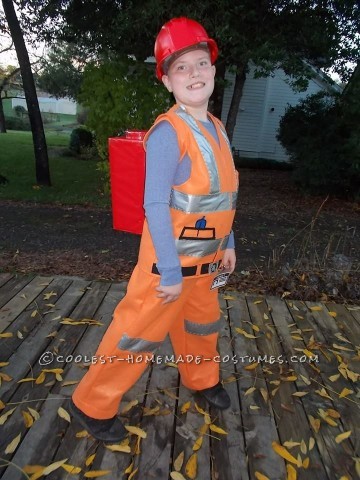
On to make the “Piece of Resistance”, the big red Lego on his back. I got a box that I thought was shaped rectangular. It was a bit big, but I knew I’d have to cut and tape it into shape. That’s what I did. Lots of masking tape and shaping a Lego “bump” on the top. I did that by tracing around a glass and layering about 4-5 circles on top of each other. I was going to spray paint it, but decided I’d wrap it in red wrapping paper I already had here. I made four slits, and decided to use more orange felt to make straps.
I measured my son to see where the Piece of Resistance would sit on his back, and marked the orange felt. Like a backpack was my thought. I kept the bottom of the box off, so I could loop the straps in. I sewed them closed. After that, I closed up the bottom with lots of masking tape again! Then I wrapped it, by just cutting pieces of wrapping paper, and fitting it all around. I used lots of clear scotch tape for the outside. Voila! Done.
I found an “Emett” name-tag you could print online. I printed it out, and put it inside a baseball card sleeve. Then we clipped it onto the bottom of his vest, as Emett’s is.
He put on his long johns, and his costume over it. The hat went on, then the Piece of Resistance. No special shoes were needed, so he got to wear his regular black tennis shoes. Perfect for walking!
I decided not to go the route of making and big “lego man head” for him, or “lego claws”, because I know how uncomfortable kids get in their costumes. Especially my child. I knew a big bulky cardboard Styrofoam type costume wouldn’t last long! I offered to paint his face and hands yellow, but he didn’t want that. Another thought for another kiddo. All in all, there was no question who he was! He was complimented all night long, and people were impressed very much so with his costume. He was a happy, comfortable, warm kid and so was I. I was the happy part anyways. :)

Related costumes:
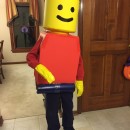 Cool Lego Minifig Costume
  Prize winning DIY Lego People Costumes
  Coolest Emmett Lego Minifigure Costume
 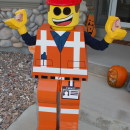 Everything is AWESOME about this Emmet Costume
  Coolest Homemade Lego Emmet Costume
 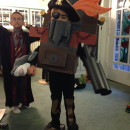 Awesome Lego Metalbeard Costume
  Awesome Lego Movie Emmet Costume for a Child
 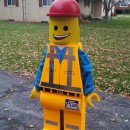 Homemade Emmet Costume – Star of The Lego Movie
Your comment has been sent successfully.