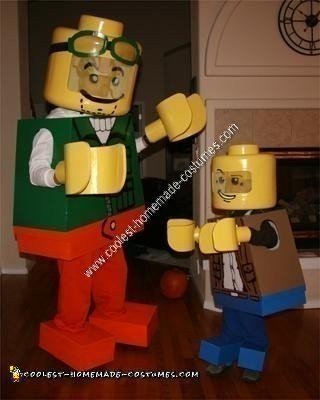
So ‘round about August of this year, my 5 year old son declared he wanted to be Clutch Powers for Halloween. For those not in the know, Clutch is the Indiana Jones-esque main character from the somewhat new Lego animated feature DVD. So a Lego minifig costume, cool idea I thought. Since we usually do family costumes, I decided to be Bernie von Beam, the Lego engineer in the movie (why should my son get to have all the fun). It was appropriate, since I’m an engineer. I would be the designer and primary builder, my son would be the test pilot- good luck kid!
So I set out on a web search for Homemade Clutch and Bernie Lego Men Father and Son Halloween Costumes. First to see if there were any commercial Lego minifig costumes out there (not to buy, but to get some ideas) – nada, and then to see what homemade costumes had been done. Turns out there are a decent number of folks who have done homemade Lego costumes, last years winners on this website included. We should all join the HLMCBA (Homemade Lego Minifig Costume Builders Association).
Taking a heavy cue from those that went before (never reinvent the wheel) I started to work. Luckily it was still August, ‘cause I needed the time. Now since this was for my 5 year old who would be trying to run around gathering candy, I had some key requirements to hit, namely visibility and mobility. If he’s too confined, can’t see, and can’t move, he just won’t wear it. I could spend 40hrs building this stuff just to have it sit next to the front step on Halloween. From what I saw on the web, first to go was the legs. Blocky, bulky Lego legs just weren’t made for humans to wear; especially little humans. Besides, I figured the head, the hands, and the torso (in that order) were the most important to be recognizable as a Lego minifig. I did do blocky Lego feet to finish the costume from below, but more on that later. Second, small eye openings or looking through the mouth wouldn’t cut it. So I decided to go with a big face opening covered by window screen, painted yellow so it kept the basic round head effect intact. Third, and only after an iteration or two, the head had to be able to move. Most stuff on the web had the head attached to the torso, just like a real Lego minifig. I started this way, but quickly realized this means you could only look forward, which is really confining, especially when you are wearing a big blocky torso.
I started off like most, gathering Lego minifig dimensions, some from websites, some I had to measure myself, and made an electronic drawing I could scale. I used Microsoft Visio, could have used 3D CAD, but 2D was fine for this. I then scaled the drawing up, first to my son’s height, and then to mine. Now I had the design and I could print out the templates to cut out all the pieces.
Materials:
Foam board:
Most of the costume was made out of panels of foam board or foam core. Foam board consists of rigid foam sandwiched between two heavy paper layers. It’s available at arts and crafts stores, although you might need to go to the framing department to get the big 40” x 60” sheets. Comes in several thicknesses, I used 3/16” mostly and ½” for the hands. Foam board is a bit pricey (especially compared to free cardboard boxes), but it is much more stable to work and you don’t have to mess with covering it with poster board to get a clean look. Plus you can do some cool things with it. By cutting though one layer of paper and the foam, leaving the other paper layer in tact, you can make nice hinges and sturdy corners. You can also make many closely spaced parallel cuts to bend the board in a curve. Foam board also paint nicely, just protect the foam inner – see PVA below.
Pink foam:
I used rigid pink foam insulation where I needed to cut and sand shapes, namely the big radius corners on the top and bottom of the head and the stud on the top (gotta have the stud on top). Available at home improvement stores, it comes in 2’ x 8’ sheets, 2” thick, and can be cut and sanded smooth pretty easily.
Poster board:
Mostly used for spray templates, but also used for the hands.
Glue:
Holding everything together is construction adhesive. I used the stuff that comes in caulking tubes, but is made especially for foam and wood paneling so it didn’t eat my foam. Works great, water clean up, and really strong. Normally I would use hot glue for stuff like this, but the hot glue burns are nasty.
PVA:
Poly vinyl acetate (ooooh, it’s just Elmers white glue) watered down and brushed on in a couple coats to protect all the foam from the spray paint. Otherwise the spray paint eats the foam – ugly. Got this tidbit from the model train folks who build scenery.
Spray paint:
Normal VOC based spray paint, lots of it, many colors. Tried to find the H20 brand water based spray paint to avoid having to protect the foam with PVA, but couldn’t find it in enough colors.
The pieces:
Head.
As I mentioned, used pink foam and foam board to create the head, and window screen for the face opening. The heads were a little bulky and somewhat heavy, so I needed to put in something to attach comfortably to the head. For mine, I used my old expired bike helmet (yes, they do expire) attached with Velcro to a foam structure inside the head. You can probably see it faintly in the pic. For my son, he’s too young to have an expired helmet, so I made a head pocket out of sheets of foam board and lined it with thick felt. Despite how big and bulky they were (my head was 19” in diameter) they were surprisingly easy to wear, see out of, and move around in. They were, however, tough to eat candy in – not such a bad thing. The only thing I couldn’t figure out how to do was Clutch’s hair. The dude has thick flowing black plastic hair – no ideas. So if my son is going to be bald, so will I. Probably looks more like a Lego anyway without the hair.
Torso:
All foam board construction with Velcro adjustable shoulder straps. Fit my son’s on one big 40”x 60” sheet, mine took a few more. My torso got to be a little bigger than expected – had to go sideways through doorways. It’s tough to be Lego.
Hands:
Lego hands are just plain fun. ½” foam board sliced many times on one side to get it to curve around. Filled the slices with glue, placed poster board over the cuts and held them on something big and round until the glue set. Wrist was made from 3/16” foam board also sliced many times to form the curve. The hands had an opening so you could stick your fingers through – very important for holding a candy bag.
Feet:
I did build blocky shoe coverings, shown in the pic. However, the feet were dangerous. Since it was still tough to see your feet with the head on, having big blocky feet was a recipe to take a nice header into the ground. I even slimmed down my son’s a bit, but in the end he didn’t wear them much. I wore mine more, and had a few close calls – yeah helmet!
Artwork:
Since I’m a terrible free hand artist, I did all the artwork by spray painting over stencils, one for each color. To make the stencils, I traced imported Lego character pictures in Visio software, scaled the drawings, and then printed them on paper. To make the stencils more robust I laminated the paper to poster board with a glue stick and cut them out together. Worked pretty well I think.
The Result:
After 40+ hours of design, construction, and test piloting, we were done, just in time. My son (and all his friends) loved his costume. He was a real trooper, too. Despite my design mods, the costumes were still pretty challenging to wear, and he didn’t complain a bit. The costumes showed up at my work, we went to Boo at the Zoo night (and probably had 80 people take pics of us with their kids), went trick-or-treating in style, and overall had a great Halloween. Now what does he want to be next year…

Related costumes:
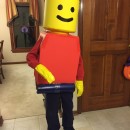 Cool Lego Minifig Costume
 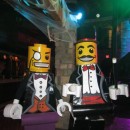 Coolest Lego Minfigure Costumes: LEGO Magician and Lego Sir
  Coolest Homemade Lego Spiderman Costume
 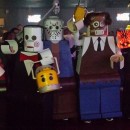 Amazing Lego Men Horror Villians Group Costume!
 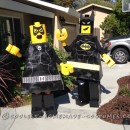 Homemade Batman Lego Couple Costume
 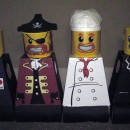 Cool Homemade Lego Minifig Halloween Group Costume
 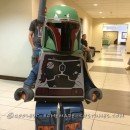 Coolest Lego Boba Fett Costume
 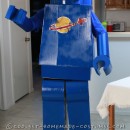 Awesome Lego Benny Costume from the Lego Movie
Your comment has been sent successfully.