My family loves, loves, LOVES Halloween. Costume ideas are discussed all year. This year my son decided to be a dragon…not at cute, fuzzy, wings under his armpits dragon, but a D-R-A-G-O-N!! He told me it had to have a frame that he can stand in and control all the parts. After much thought and discussion (and a slight accident where I crushed my hand requiring me to get a large amount of stitches and fractured the tip of my thumb), we came up with a plan that might work. I figured we could make the legs out of PVC pipes and the head out of cardboard so that he could be inside but it was not terribly heavy.
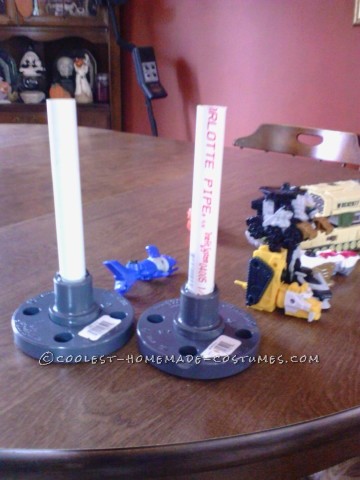
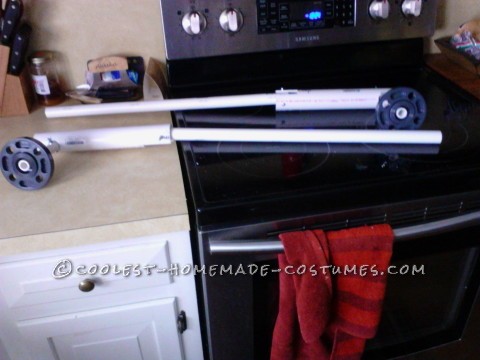
I searched and searched for 1 inch PVC flanges as the base for the hip joints figuring I could grommet them to a nylon belt. I finally found some online. When they arrived, they were not what I expected…the bases were too thick and the holes in the base were almost a half in wide, too wide to use grommets. Once again, some things only exist in my head. I was determined to make them work, though. I cut holes in a nylon belt and glued ¾ inch PVC pipe coming out of the flange on which to slide the thigh “bone.” I then used one inch and two inch PVC to build the thigh, two shins (of course dragons have two knees of sorts…one forward and one backward like a dog), and the foot bone. I cut notches and drilled holes into the PVC so that one bone would be able to fit inside the notches to form a joint and bolted them together. The foot piece I screwed into a pair of my son’s old sandals.
We strapped the belt onto my son, feet in sandals, and WAHLAH! Okay, no. I wish it is was that easy. The knees were locking straight if he did certain things. The one screw came out of the sandal. The angle wasn’t right on the thigh bone. The nuts on the bolts were turning and were eventually going to come off. I had to trim down the long shin, put “bumpers,” shall we call them, in the joints made of screws, froze the hip joint at an angle, re-screwed the foot bone to the one sandal, had to glue the center of the flanges because it turns out they turn and that was not helping things, and glued the nuts onto the bolts….along with my hand to my cheek and my upper lip. We didn’t figure this all out after trying them on once either….my son was in and out of those legs what felt like a bazillion times, but after much trial an error, they worked! They may not have been perfect, but they worked.
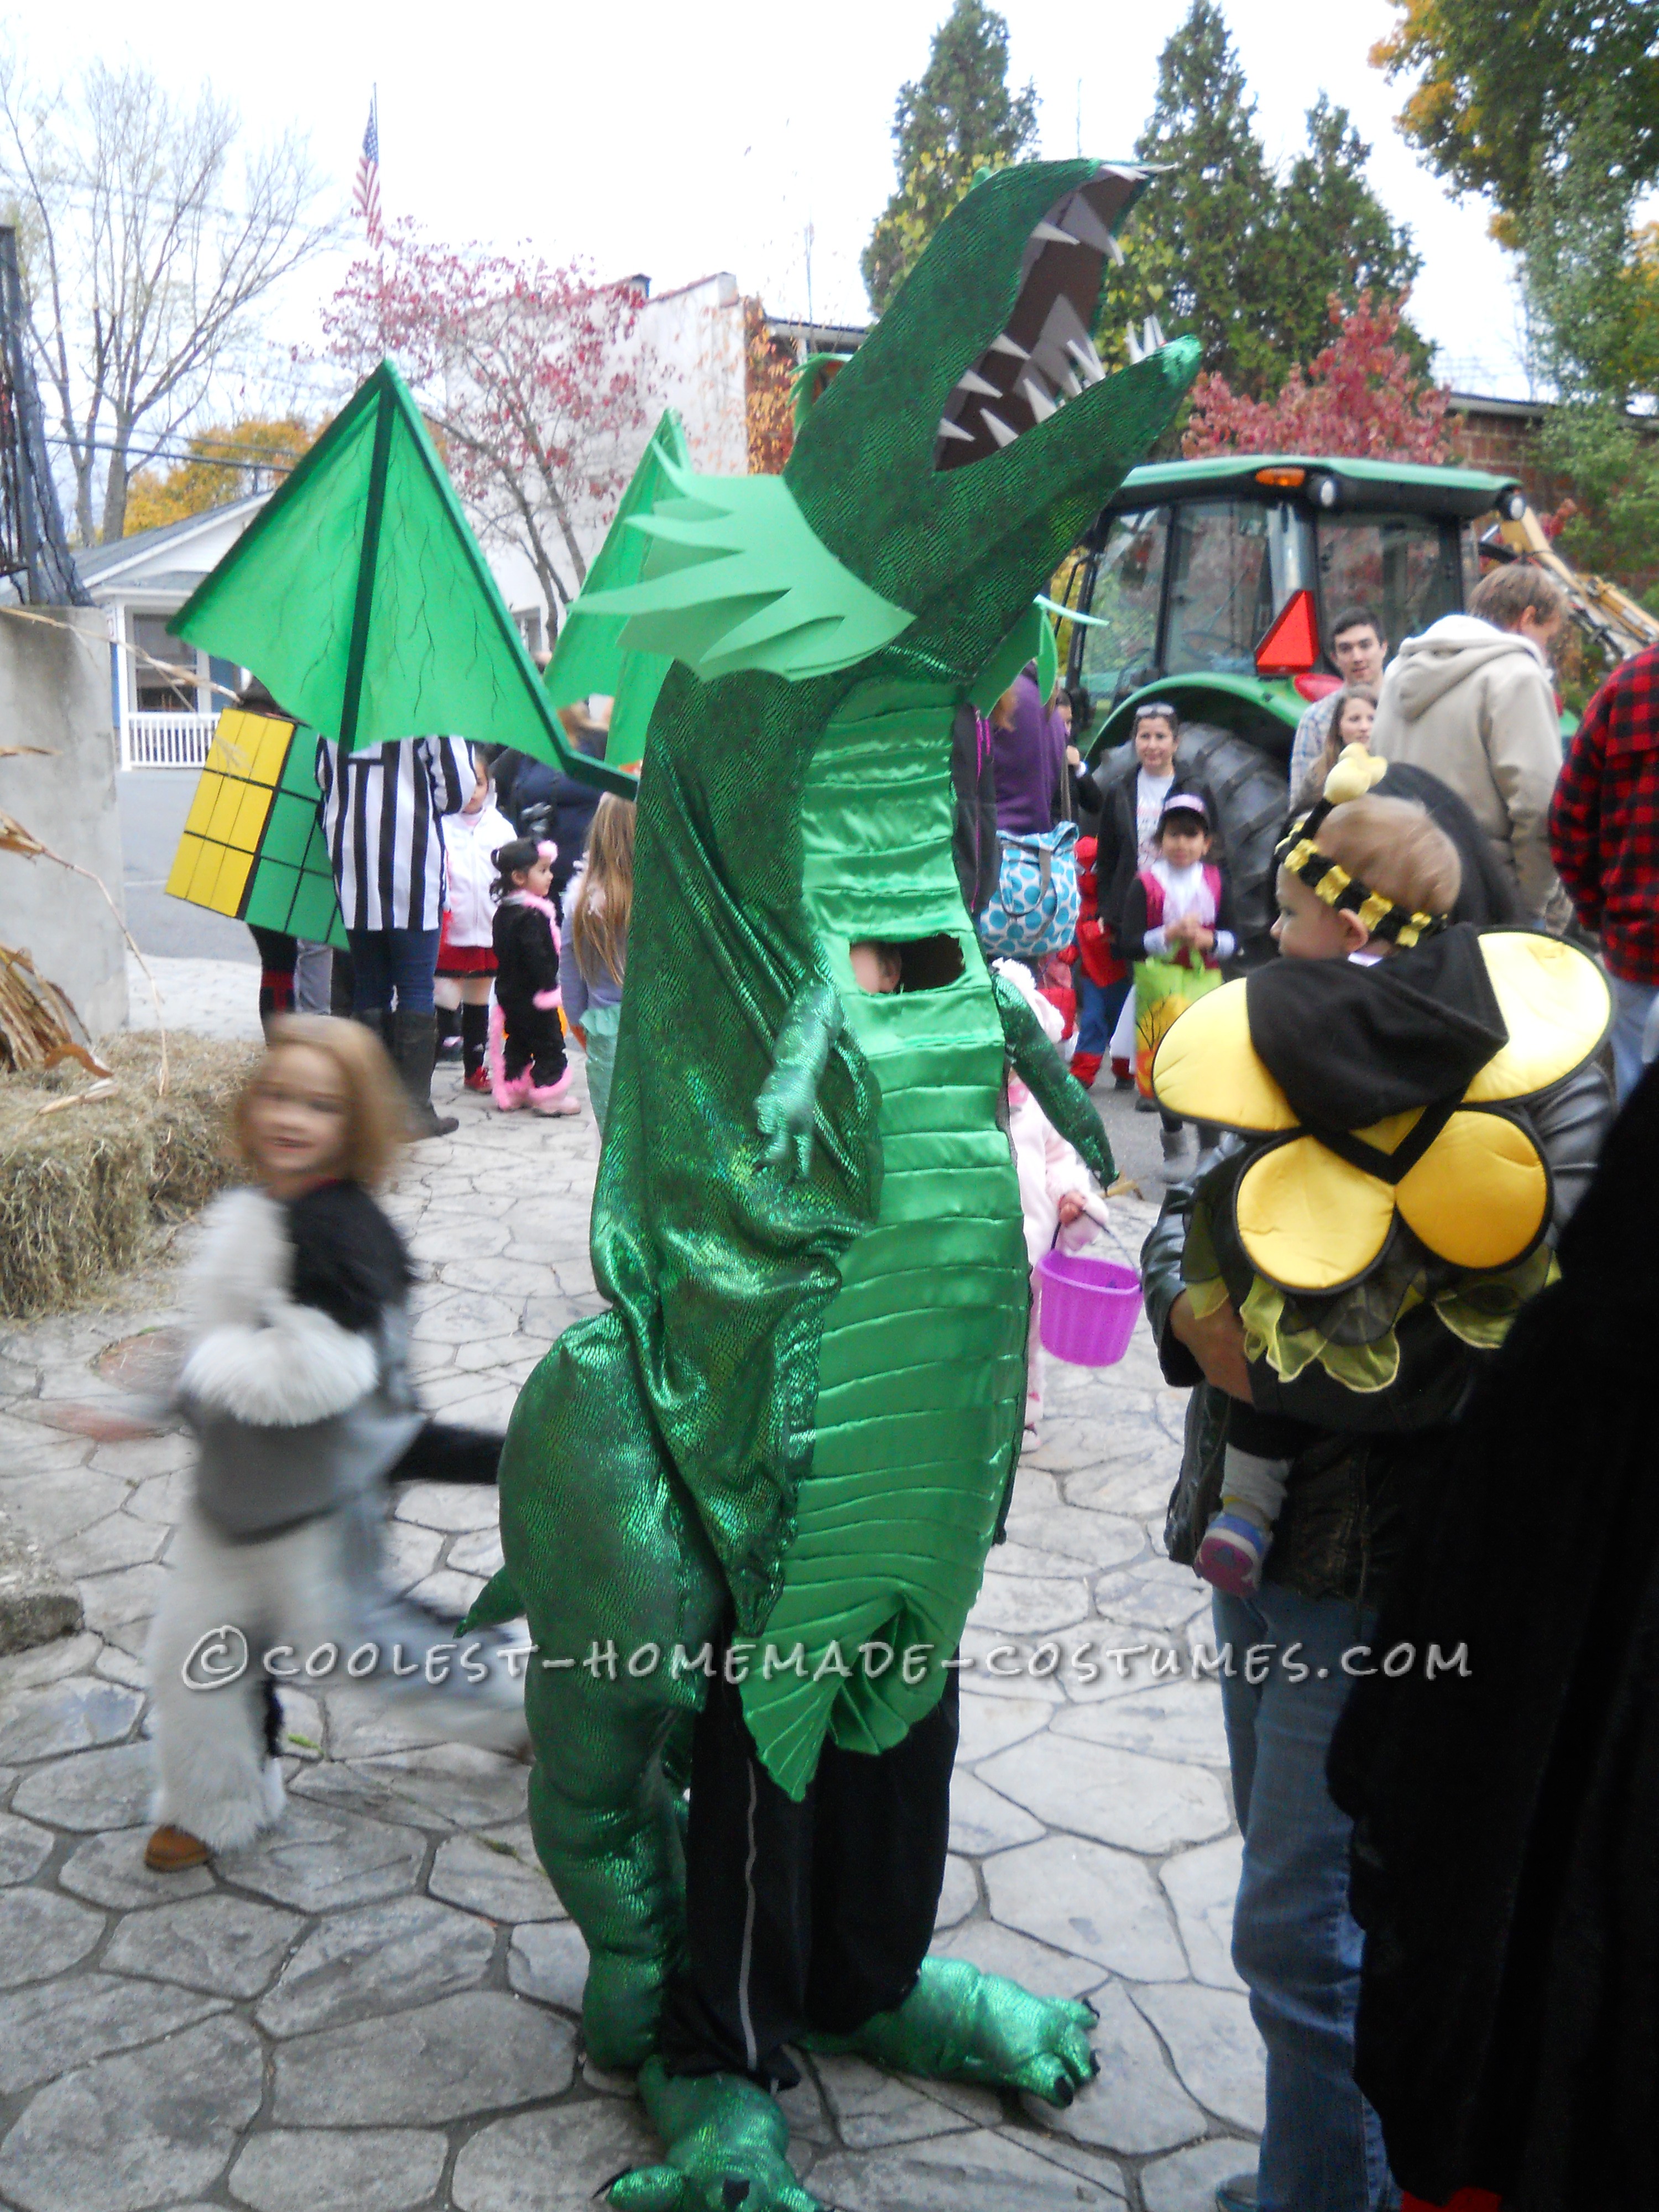
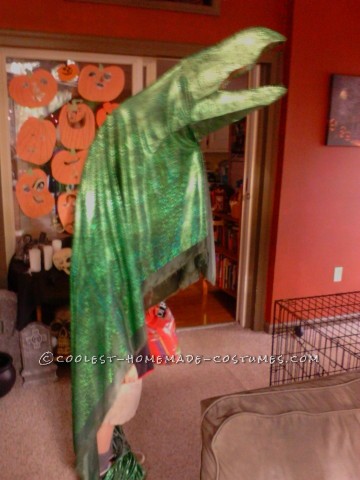
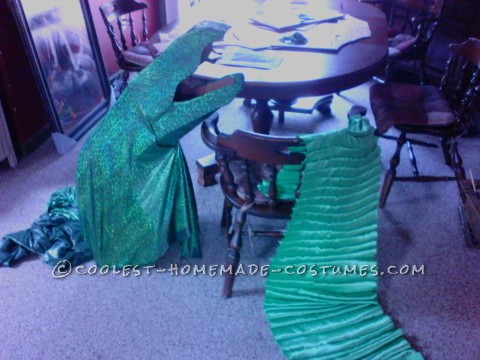
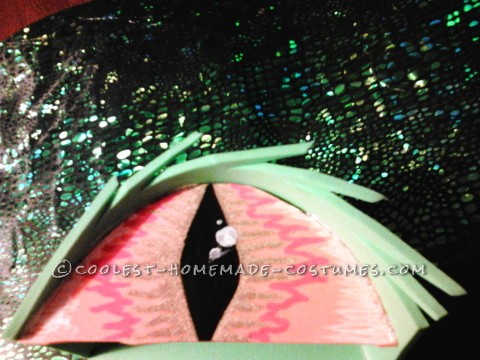
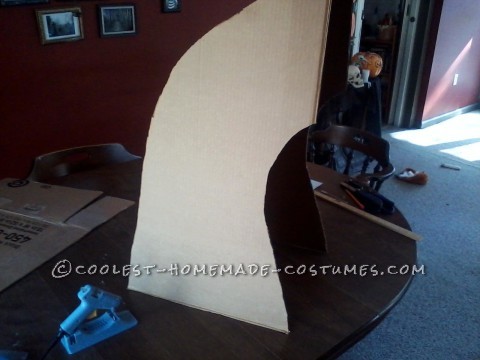
In between working on the legs, I was also working on the head. I built a frame out of cut cardboard. Cut notches in the bottom for my son’s shoulders. Cut a hole in the chest for his eyes. He was going to keep his arms inside to help the head in place and steady. I covered the back and sides in scaly fabric. I took lighter green fabric and hot glued it together every few inches to make is look like the wider armor part on the belly of a dragon and glued that on the front leaving a trail hanging. I used those foam sheets to make the eyes, frills, nostrils, and teeth. I lined the bottom jaw with red felt. I decided that since his arms were going to be inside the costume I would make it that people had to feed the dragon the candy. I attached a bag onto the back of the mouth/throat area so that the treats would be able to collect and not rain down on his head.
I then cut out pieces of fabric in the shape of the legs and feet…two pieces of fabric for the four parts. I have to be honest….I used hot glue….A LOT of hot glue for this project. My sewing is never great and with my thumb not moving it is even worse! I hot glued around the side edges of the legs, slid the skeleton in, and stuffed around them. It was the same idea with the feet. I glued the toes shut, flipped them right side out, stuffed them, and glued them to the sides of the soles of the sandals. I attached the tops and bottoms of the fabric and made a few patches here and there where the PVC was kind of showing.
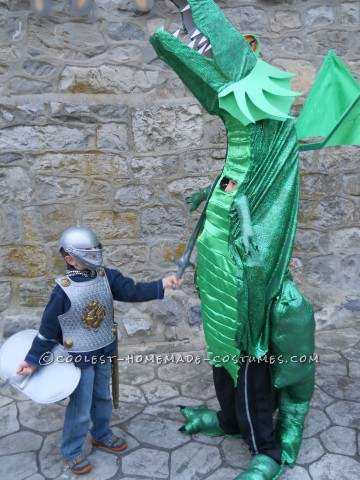
There were only a few more little things I had to do. I built little tiny arms out of dowels and fabric. I cut holes in the box, stuck the bottoms of the dowels, hot glued and duct taped them to the box. Of course, they didn’t stay stuck to the insides of the box, but they stayed attached to the outside. My son said it was okay. I couldn’t figure out why he said it was okay, but at this point, I wasn’t going to argue with him. I took a dinosaur tail we had used for another costume and covered it in the scaly fabric. I sewed it to the nylon belt to which the legs were attached. I also put Velcro on both the trailing chest armor and the bottom of the tail so it looked like the stomach and the tail were connected. I used balsa wood, left over fabric from the chest, glue, and screws to create wings for the dragon, which I attached from the inside using extra balsa wood and screws. Finally, I sewed nylon straps that went on his shoulders to the nylon belt to help support the weight of the legs.
Now, this whole time, I put everything on and off my son again and again and again. He was a human dress dummy. My daughters were thoroughly entertained by the whole costume, and I think a bit jealous because they kept asking me to let them try it for them to “show Evan what it looks like.” There was A LOT of dragon on, dragon off, dragon on, and dragon off, but finally it really was WAAAHHHH LAAAHHHHH!!!!! We got it. It worked. He LOVED it and that was all that really mattered.
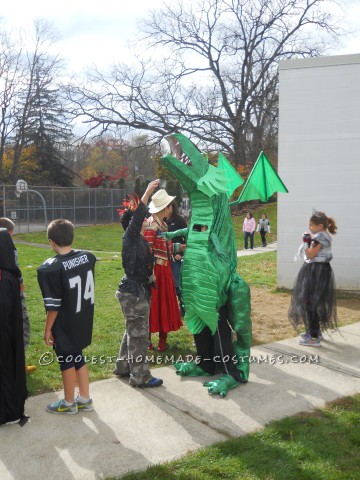
I had to bring his costume to school for the Halloween parade. I got him ready downstairs so we didn’t have to navigate the stairs with all this crazy paraphernalia on him. While we were waiting and all the older classes were walking by OOOOO-ing and AAAHHHHHH-ing, I found out why he said it was okay that the arms were not attached on the inside. He was able to grab the dowel with his mouth and wave his arm. He greeted all the students waving and waving. It was really fun. He was greeted by lots of how cool’s and best costumes ever’s. He was in his glory! While waiting for the second parade in town, he spent his time amusing and playing the little kids who were just enamored and in awe of him. He put on a dance show too….which I must admit was terribly funny. While trick or treating, I think he made out better than my other 2 kids. People were so amused with having to feed the dragon. They kept throwing in more candy!
So, there is our story of the crazy dragon saga. It took a long time, a lot of supplies, and A LOT of trial and error, but we got it! My mother kept asking me if all this work was worth three or four hours of use. My answer was simple. I told her,” One day, ma, he is going to tell his kids about his costumes. He is going to pull out pictures and show his kids and my nieces and nephews the crazy stuff I used to make him. It will be one of his greatest memories! It will definitely all be worth it.”

Related costumes:
 Dragon Trainer Gone Wrong Costume
 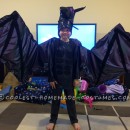 Coolest Minecraft Ender Dragon Costume with Articulated Wings
 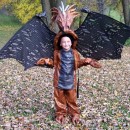 Original Homemade Winged Dragon Halloween Costume
  Coolest Homemade Play on Sushi Costume – Dragon Roll and Rainbow Roll
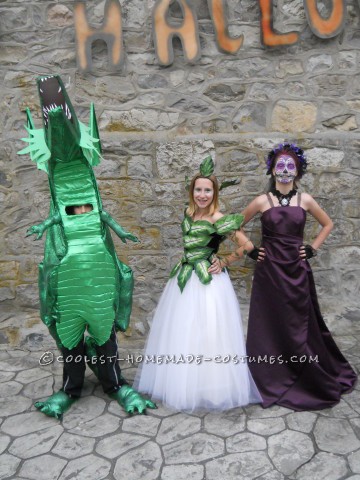
  Dramatic Dragon Group Costume
  Coolest Mythical Creatures (Unicorn and Dragon) Couple Costume
  Creative Tim Burton’s 9 the Movie Costume
  Tallest Fire Breathing Dragon Costume Ever!
This costume is great! Definitely THE best homemade costume I’ve seen!
This costume is great! Definitely THE best homemade costume I’ve seen!
Hands down THE best homemade costume ever! Much much better than the ones from the retail stores!
Hands down THE best homemade costume ever! Much much better than the ones from the retail stores!