
This year we decided to make a mermaid and pirate costume… however everyone dresses like pirates so we thought it would be cool to be a mermaid and deep sea diver. The only problem I found is that every deep sea diver costume is really lame. The best helmets I found were home made. But before I get into any of these steps I have to thank the other users on blogs that’s made deep sea diver helmets. I would have never completed this costume without the help of those write ups. Seeing how they made their helmets helped me with ideas for mine.
Prep Work
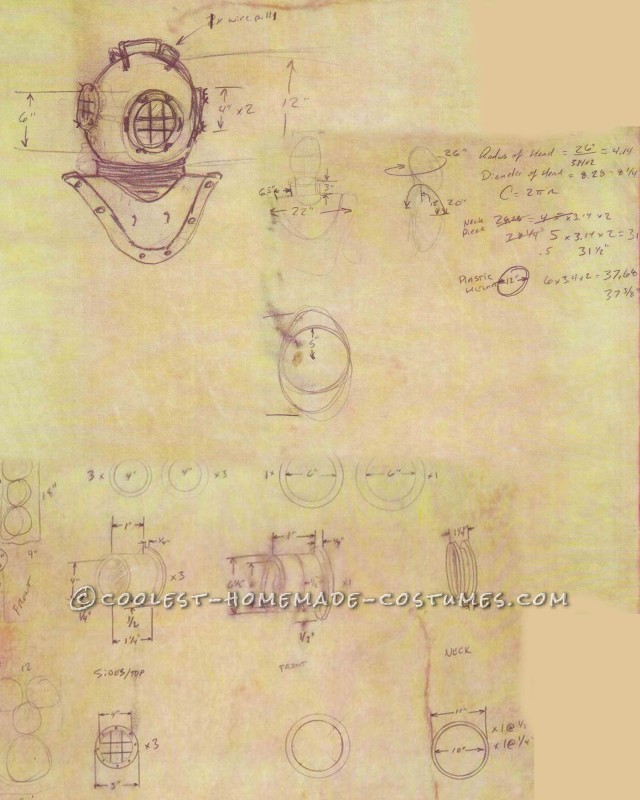
This portion probably took about 60% of the time. I started the helmet in mid September maybe working on it an hour here and there and finished 10-19-12. Much of the time was spent surfing the internet to decide what style helmet I was going to make along with what parts are on a deep sea helmet and trying to hunt down materials. But I’m a firm believer that being prepared for the task at hand will end in a good result. After I decided to choose a style that looked like the Mark V diving helmet I had to take measurements to figure out ratios needed for parts.
The only drastic change I made from my plans was the height of the collar. It started off at 3″ and ended at 3/4″. Also the width from the neck to the side of the shoulder. It went from 6.5″ down to 2.5″ at the narrowest section. I decided to use a 12″ acrylic light globe for the helm. It was the cheapest to get and the size worked out perfect with my math
Parts List
12″ Light globe $17.00
Dickies Coveralls $19.00
Suspenders $21.54
LBE belt $7.68
Gold paint $5.98
Bronze paint $5.98
Killz paint $4.99
Liquid nails $4.99
PVC 1/2 elbow $0.79
PVC 1/2 cap $0.25
Oak buttons 2packs $1.78
2 blue leds $3.99
Toggle Switch $0.89
9v battery housing $0.39
9v battery $2.64
galvanized sheet 3’x2′ $9.99
1/2 wood screws $1.49
L fasteners 3 packs $6.97
machine screws 1/2 $3.98
machine nuts $3.98
small brass hinge $1.49
$125.79
Helmet Prep
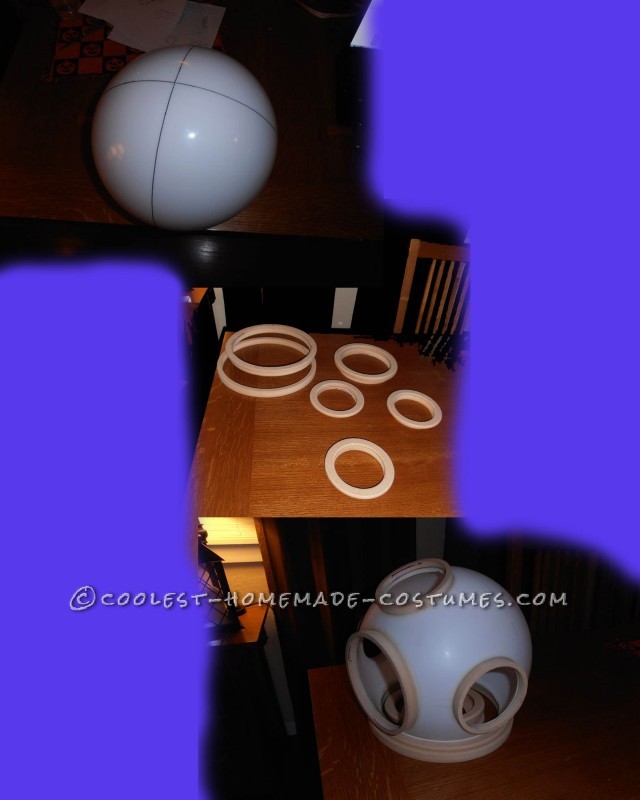
The globe was perfect, I set up an x y grid on it in order to cut all of the holes. After searching everywhere I decided to make my own parts for ports out of 1/2 and 3/4 MDF. One thing I have access to is a huge CNC machine that can cut any shapes. I took the MDF circles I cut and taped them to the globe, then used a sharpie to outline the inside of the circles. I played with each side and top circle for a while and finally worked out a spacing of the width of two fingers. I don’t recall the exact measurements but in the end it was perfect.
Having them placed more forward facing gave almost perfect 180 view. The best way I can describe it is if you took your hands made a circle connecting your thumbs and index fingers together and looking through it. My view was barley obstructed. Once the outlines were done I used a rotozip and cut everything out. The rotozip cut through the acrylic like butter. Before I glued the ports to the helm I sanded everything with 80 grit sand paper to rough it up. I also cut the hole for the PVC elbow I used as a pressure valve in back, and the small 1/4 hole for the toggle switch behind the right ear. After everything was cut I used liquid nails to glue the MDF to the acrylic. Also at this stage I did crack the back portion of the acrylic globe putting in the PVC elbows. I made the hole to snug and as a result had a 5″ crack. I used the PVC glue to glue the helmet back together and re sanded that area. It bonded perfect and doesn’t show any sign of damage. Also in the second picture you will see three large MDF rings, this is for the neck to allow it to mount to the collar and be removed.
Port Holes
For all of the port holes I drilled 1/2″ holes half way through the rings and glued the oak wood buttons to look like bolts on a bulk head. To hold the wire in place I marked each ring with the locations I wanted my grills to go and then ran them across a table saw cutting a reveal so that I could liquid nails them in place before gluing to the helmet. I used wood putty to fill in the outside edge of the reliefs I cut but ended up chipping it out and just using liquid nails as a filler. Once the liquid nails dried when the grills were in place I just roughly hand sanded the edge. I also cut two of the rings that cover the face so that I could mount a small brass hinge and mount a brass bolt along with a brass wing nut so the face port actually opens and closes.
This step was so frustrating because after everything was done and primered I couldn’t glue it until the final colors were painted on. At the end of the project I planned on antiquing the helmet to make it look more rugged and real so I used a route 1/4″ corner round and set it high on the router table so it left a 1/16″ ledge around the rings. This would be a good grove to collect black paint for antiquing and give the ring extra “wow” details. Also where the wingnut on the face port goes to open and close I used a 1/4″ drill bit and routed into it making it look like a relief for the locking clasp. They aren’t on these pictures but for the bars I tried to use metal coat hangers but the gauge and density of the hangers were not working well. I ended up using an old metal laundry basket that had perfect square grids. It was coated with white rubbery material I just sanded off.
Bib and Collar
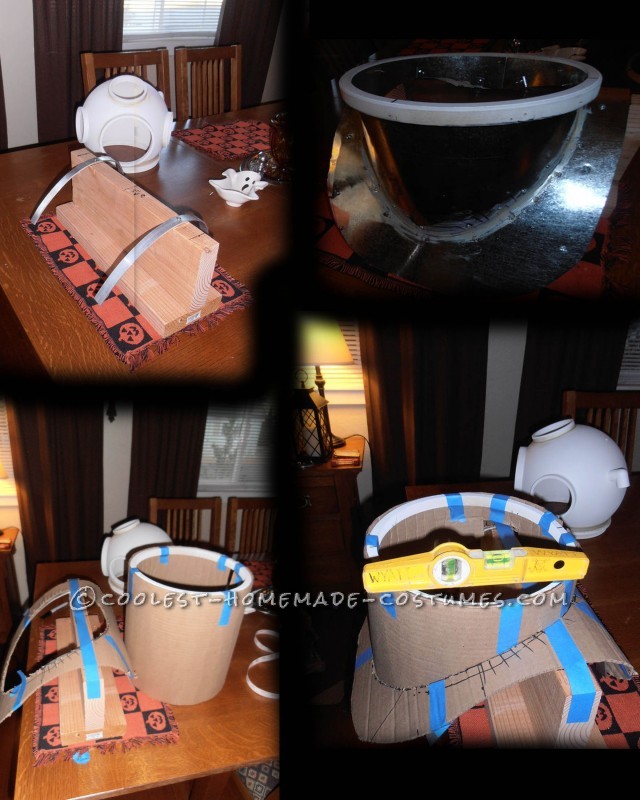
This was a very time consuming part. Partially because I started with poor material and then changed my process. I started with cardboard to create my templates for cutting out metal laminate. However after cutting he laminate getting it to bend made it very brittle and broke the edges. I resulted in using galvanized sheet metal which was very cheap. But if you try to paint galvanized (zinc) with spray paint it will create a slippery contact and will not bond. I scored the galvanized with sandpaper then washed it down with vinegar and denatured alcohol. This allowed for the Killz spray paint to easily bond to it.
But first I made a stand to hold the collar in place while I worked on it. I also used strips of aluminum to mount the bib in order to hold its shape and give support. I bent the aluminum to match the contour of my shoulders so it would be comfortable to wear. I mounted the cardboard to the outside of the MDF collar adapter and after making the laminate model and mounting it, the neck looked to bulky so when I did it a second time with the galvanized I mounted the galvanized inside of the MDF collar.
Since the galvanized increased the inner diameter of the collar this made it so the helmets MDF collar adapter would not sit inside of the bib I had to rout out the helmets collar adapter while it was glued and pin nailed to the helmet (little nerve wrecking). It made the helmet fit loosely into the collar so to help secure it I used two brass linch pins on each side which gave it a nice look.
Making the bib would have been much faster if I could recall the trig equations used to draw a circle on a slope. Since I couldn’t, I went ahead and mounted a sharpie to a straight edge and used it to mark my line on the galvanized. After I cut everything out with tin snips I went ahead and marked all of my mounting holes and drilled them out. I used machine screws with bolts to mount the bib to the aluminum supports, and to mount the little 1/2″ elbows to join the bib and collar. I didn’t have any locktite so I used some of my mermaids finger nail polish. After everything was dry I used a grinder to flush all of the excess screws. I was also presented with a small 1/32 to 1/16 gap at the seam where the collar met the bib. I’m going to cover this area but wanted it to be solid when I paint it so I used liquid nails to seem around the contact layer.
Final Assembly
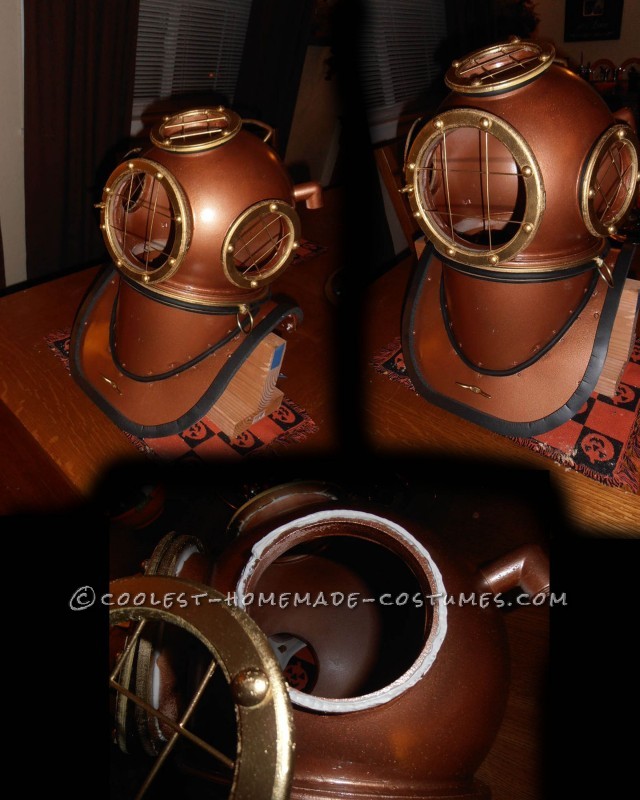
Now that everything was primed and ready to go I needed to paint the bronze pieces and the brass pieces separately. I did about three light coats of each color on all of the pieces both inside and out. After the painting was done it took about 6 days for the spray paint smell to go away. The bronze paint I used was the Krylon Hammered Bronze. When sprayed this naturally gave a metal appearance. The gold was krylon metallic brass color with several coats. After everything was dried I used liquid nails on the ports to mount the bulk heads. You will notice there isn’t any plexi glass in the ports. I wanted to be able to have enough ventilation and be able to hear with the helmet on. Earlier I mentioned that I shortened the height of the collar. This was to give me a centered view from the front of the helmet, enable me to drink through the front port, but most of all it increased the comfort level.
I decided to mount the top and side port holes at an angle to give the helmet a little bit of a different look so it wasn’t to symmetrical. One of the coolest things was what I used to look like gaskets. I had extra weather stripping laying around and used 1/4 round around the ports and thick door weather stripping on the bib. I sanded all of the edges on the galvanized so nothing was sharp, but putting on the stripping made it that much more user friendly. I only planned on using the stripping around the ports and bib, but with left over I outlined the joint at the neck and the problem area I had where the collar meets the bib. Putting the stripping here gave the helmet extra detail.
Another helpful item I added in was a 4″ wire pull in the top back portion of the helmet. It was in the perfect spot that enabled me to hold the helmet easily when I wasn’t wearing it.
My mermaid came up with a great idea… what if it lit up like under the sea? After stopping by Fry’s and spending a few dollars, I had bright blue LEDS, a on/off toggle and 9volt batter holder. I first mounted them with tape so I could move them around within the helmet to find the best place that it doesn’t interfere with anything. Once the locations were found I used hot glue to mount all of the electronics. The LED placements looked best having one behind my head pointing up and one above my forehead so that it illuminated my face. I tried putting it lower below my chin, but the blue LED was in my field of view and washed out my vision when wearing the helmet. With it up high I couldn’t see it in my peripheral vision so I was fine.
One of the best surprises was the use of the linch pins. They gave it that extra look and cool factor. Down on the front of the bib I also mounted a small rope tie just to give it some more detail. One of the most fun parts was antiquing it. I used black latex paint and brushed it on. My mermaid was freaking out as I painted it black but then wiping it down shocked her. The result was just amazing. It looks just like a heavy duty cast helmet but being built out of the light material it only weighs as much as a work boot.
Summary
I wanted a look that was a mix of 20,000 leagues under the sea along with modern real deep sea suits. I had looked all over eBay at Tivex suits, NBC suits, flight suits… but then stumbled over the Dickies fisher stripe coverall. Its navy blue and light blue stripes made the suit look like it was from the old Jules Verne book. Also the blue with the bronze colors and the black accessories was a good match. I had a hard time finding brown belts and suspenders that looked good so I went with black. I used black concrete rubber boots, black concrete gloves and some cheap $3 black foam knee pads I covered with galvanized.
I taped off the boots and painted the trim along the toes back to the heels with Killz then silver Krylon. Ontop of the boots and gloves I used some brass fabric rivets I had from a while back to mount brass edge banding from my friends cabinet shop. I then antiqued these items also to make all the pieces match. For the tactical pistol belt I needed to make weights. I used a 6′ rip of MDF 3″ wide and put 2 1/2″ rips under each side making a U like shape then put a 6′ rip of 3″ 1/4″ on the back. Once it dried using titebond and pin nails I cut the 6′ rip into 2″ pieces.
I took the pieces and rand them on a router using a 1/4 corner round bit on the top and bottoms. I then used a double step side bit and routed all the vertical sides making the weights look like real lead. I then painted them with Killz and silver before antiquing them like the rest of the painted items. In all I made a total of 6 belt weights, two on each side in the front and two in the back.
The knee pads were easy because after folding a piece of paper in half to get the pattern I wanted I just drilled two slits in each side with the rotozip so the elastic straps on the knee pads could go right through the metal. They were also painted brass and antiqued as well. I took an extra black carabiner from one of my military back packs and latched on the suspenders by the belt. Since I wasn’t excited about wearing big black rubber gloves all night it gave me a good place to latch them on my costume.
After looking everywhere for suspenders I found these from a company through ebay. Originally I was going to use fabric button snaps to mount to the bottom of the bib and to the coveralls. After thinking about it the best way was to use suspenders to hold it down. It not only made it look more real, but gave me the piece of mind that it couldn’t be knocked off of my shoulders. I had also drilled holes on the bib under the outside weather stripping for the brass wing nuts and screws, but decided not to install them after trimming out the neck with weather stripping. I’m on the fence if putting in 8 wing nuts around the stripping on the bib would be to busy or not.
Overall it was very comfortable, light and easy to dance in.
I listed all of the items on the first page that I bought for this costume. Many other items I already had or had access to free parts such as the metal laminate so I didn’t mention them in the price. If anyone has any questions or wants to see more pictures just let me know.

Related costumes:
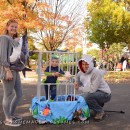 Coolest Under the Sea Costumes for the Family
 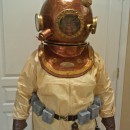 Awesome Homemade Antique Deep Sea Diver Halloween Costume
  Sexy Sea Siren Homemade Costume
 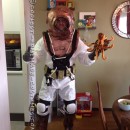 Vintage Deep Sea Diver Costume
 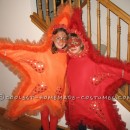 Awesome DIY Sea Star Costumes for two Girls
 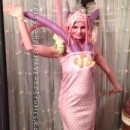 Feminine Sea Anemone Halloween Costume
 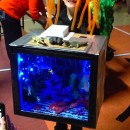 Glowing Deep Sea Aquarium Child’s Costume
  Coolest Homemade Deep Sea Clam Diver Costume
Your comment has been sent successfully.