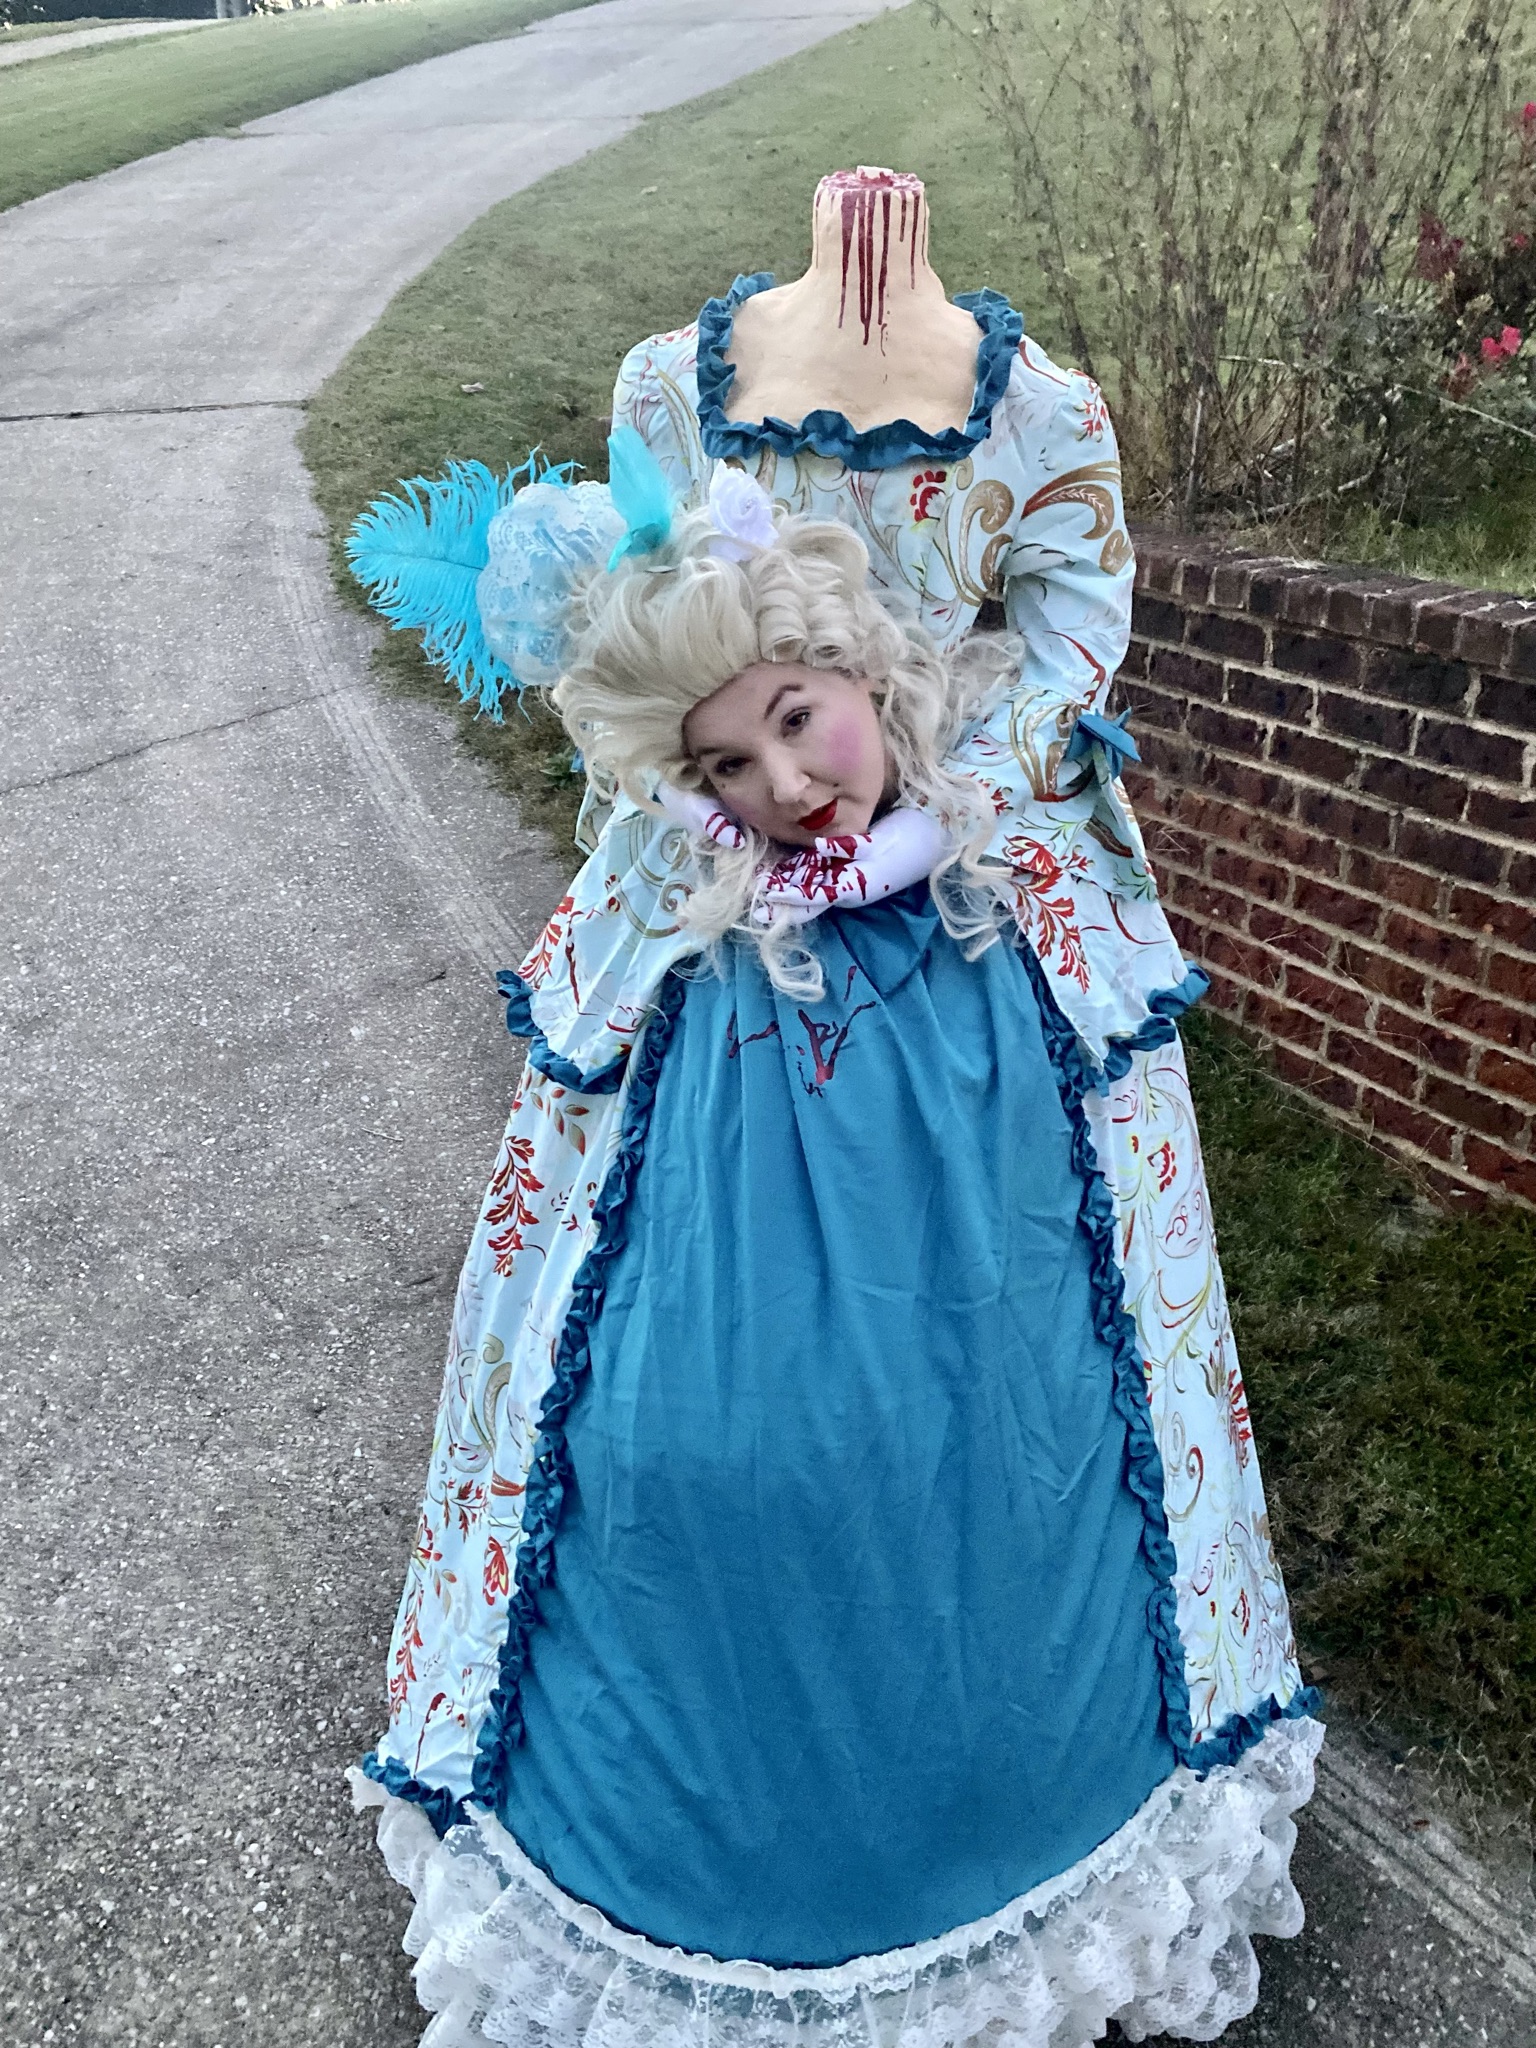
Here’s the story behind my headless Marie Antoinette costume. Every Halloween my neighborhood hosts an adults only Halloween party with cash prizes for the best Halloween costumes. I had won the contest in 2020 and knew if I wanted to win back to back years I would have to really step up my game! I pride myself on making my own costumes and thankfully started planning in September, because this costume took a long time but I was so happy with the results!
I’m a bit obsessed with the 1700s! I’ve always been fascinated with the American Revolution, Catherine the Great, and of course Marie Antoinette. I decided I wanted to be Marie Antoinette for Halloween but didn’t think my neighbors would have enough appreciation for just a really fantastic period costume. I’ve also always been partial to illusion costumes, so I decided I wanted to be Marie Antoinette after her head was chopped off! When I searched the internet for ideas I found most of the “headless Marie Antoinette” costumes were more headless corpse bride than Marie Antoinette. I wanted a dress that was more historically accurate and of course a fancy Marie Antoinette hair style! I preferred to look like her head had just been chopped off seconds before and wasn’t already in a zombie state.
When planning the headless Marie Antoinette costume I knew I would need the following basic components:
Marie Antoinette Costume Dress
- A fake bust
- A rig to hold the bust up
- Fake hands to hold my head
- Wig (since I have brown hair and didn’t want to dye it and style it)
I started my planning with the dress since it was important to me to have the dress look at least remotely period accurate and knew if I was going to sew it that it would take awhile. Originally, I had planned to sew the dress since I am a pretty good seamstress, but after looking at patterns and fabric options I realized it would not only be very time consuming but also very expensive to achieve the look I was going for. After a little looking, I found a dress online for a lot less than I would have spent on materials to make a dress from scratch and I would save myself all the time I would have spent sewing it from scratch.
I made the bust from brown paper bag paper mache and filled the neck hole with tissues dipped in liquid silicone. I used red nail polish to create the fake blood.
When building the rig, just like the bust, I wanted something light weight but didn’t want to worry about it breaking when putting the costume on or during the party. I ultimately decided to use Bamboo sticks to make my rig. The other thing I needed for my rig was a backpack, I just used an old beat up one that belonged to my youngest daughter. I wanted the bust to sit directly above my head, and the bottom of the rig needed to sit in the bottom of the backpack.
With the backpack on my back, I measured from the bottom of the bag to the top of my head and then added 5 inches. This would allow the rig to go inside the bust by about 4 inches and have an inch of clearance above my head. I had my husband use his power saw to cut 4 bamboo sticks to this height and asked for a bunch of smaller pieces that were 4-8 inches each.
Using a combination of wood glue and hot glue (the hot glue bonds instantly and the wood glue provides a stronger long term hold once dry) I built 2 ladder pieces and then attached them to each other with the smaller pieces he cut (the 8 inch pieces worked as steps and braces between each side of the ladder and the 4 inch pieces helped connect the 2 ladders to each other). I drilled 4 holes through the duct tape and giant sponge in the bottom of the bust, filled the holes with e6000 glue and hot glue then inserted the 4 bamboo sticks. I used more duct tape to secure the sticks to each other and to the bust (this didn’t have to be pretty, no one can see it and I wanted to know it would be strong). Then, I put the bottom of the sticks into the backpack (the front of the bust should be facing the back of the backpack/the side with the straps). I duct taped the sticks to the inside of the backpack, added a little polyfil between the sticks, and the wrapped duct tape tightly around the entire backpack (leaving the straps free).
The Marie Antoinette costume dress I purchased had a corset back, so I slipped the dress onto the fake bust and tightened the corset until it fit decently (I will secure the dress to the bust later, but just needed a rough fit for now). I now went up under the skirt of the dress and put the backpack on. I needed to mark where my neck hit underneath the dress (for me this was about 2 inches above the seam at the waist in the dress). Have someone help cut a slit in this spot, or mark it, take the rig off, cut the slit and then try it back on.
Start small with your cut, you can always make it bigger but if you cut it too large it’s hard to un-do! You want the slit to be as small as possible while allowing you to fit your own head through the hole. With my head through the hole I could now make the final determination on length for the dress. The dress I purchased had a long train in the back, while I loved the look of the train, I knew it was an accident waiting to happen at our Halloween party. If someone accidentally stepped on the train it would apply pressure to the rig and could pull the whole bust down, so the train had to go!
I marked where I wanted to cut and hem the dress in the back, and measured how much length I needed to add to the front to keep the dress floor length (I needed about 8 inches). Then, I took the rig off and removed the dress from the bust. I sewed a piece of blue bias tape around the hole I cut for my head to keep the cotton fabric from fraying later especially when taking my head in and out. I cut and hemmed the back of the dress (I saved the extra fabric from the train and found a great use for it later… I’ll tell you about below). Then, I took a piece of blue muslin fabric that was close in color to the blue on the dress.
With the dress laying flat I placed the fabric inside the dress and marked roughly what the piece needed to look like to fill the void on the front and make the front length the same as the length in the back (I added .25 inches all around for seam allowances) and then stitched this piece of fabric in place, again it doesn’t have to be perfect as the piece will be mostly covered which will not only hide the seams but also the fact the fabric wasn’t a perfect match. I then sewed on slightly overlapping rows of ivory lace over the entire fabric piece I added. Now my Marie Antoinette costume dress was floor length again even with my head starting at the waist.
The bust has been made, dress altered, rig assembled, what is the costume missing? Oh yeah, arms!! The fake arms are needed to fill out the dress and will “hold” my real head to create the illusion that Marie’s head has been cut off and caught in her hands. I started with a pair of elbow length white gloves, I put some craft wire inside along with polyfil to shape each finger, and then I used 2 chopsticks along with craft wire to make the arms and filled with polyfil.
The gloves only went slightly above where the elbow would be, so I filled a pair of knee high socks with a chopstick and polyfil to make the top half of the arms, then overlapped the gloves and sewed them in place together. I glued the top of the sock to the bust at the shoulder. Once again I tried the costume on and arranged the hands how I thought they looked best, tightly under my chin and slightly overlapping with each other. I hand stitched the gloves to each other and to the dress just below the hole. I poured more of the nail polish over both gloves after stitching them in place.
At this point, the Marie Antoinette costume was mostly done, but I had a few observations when trying it on. First of all, I realized what a pain it was to never have use of my arms. I realized how it would be impossible to eat or drink anything on my own and that bathroom trips would be difficult. I needed a way to break the illusion when necessary and get my arms out. So, I decided to cut arm holes in the skirt for when I needed my arms, but didn’t want the holes visible the rest of the time.
Then I had a brilliant idea! I would use the leftover pieces from the train I cut off to create flounces at the waist that would hide my arm holes. The rounded shape of the train was absolutely perfect. They perfectly covered the holes I made for my arms and looked like an original design element of the dress (while still fitting the time period appropriately). Once the costume was finished, I applied hot glue just inside the seam around the neckline to hold the dress perfectly in place on the bodice.
The second observation I had was when watching myself walk in the costume, I felt like I could see my legs hit the inside of the dress and the illusion was slightly disrupted, plus I have a larger chest and I could see my chest slightly under the skirt. I had spent so much time on this costume already that I wanted it to be absolutely perfect. I decided to buy a hoop skirt to wear under the dress and help fill out the skirt.
The final piece needed to complete my look was the wig! I struggled finding a reasonably priced wig that I liked, and ultimately ended up buying a white colonial man wig. I undid the band in the back, scooped most of the curls to the top of the head and pinned in place. Marie Antoinette was known for her elaborate hair styles so I knew I needed to add a few feathers and I folded some of the extra lace into a fan that I pinned with the feathers into the wig.
On the night of the party I started by doing my makeup. I used the palest concealer I had all over my face along with very white heavy powder. Next, I applied pink blush in large circles on my cheeks, drew my lips smaller and used a red lip stain. I kept the eyes simple to try and be more historically accurate (although I did wear a little mascara), and drew on a couple of fake beauty marks.
After my makeup was done I put on a wig cap to hold my hair. I then put on the backpack and slipped my head through the hole in the dress (I thought I would need help getting the costume on but surprisingly didn’t, the rig was super sturdy and I had no trouble putting this on alone). With my arms through the arm holes, I put the wig on and used a few loose curls to help hide any trace of the hole my head was through. I then stepped into the hoop skirt and tied it tight right under my armpits.
The costume was surprisingly comfortable! I could wear anything I wanted underneath including tennis shoes! My body was free to move about under the skirt and when I needed I could pop an arm out. The whole thing felt very secure with the backpack and was very lightweight. I did win first place at our neighborhood costume party, and decided to wear it once more to a local brewery’s Halloween party where I won first place again! Everyone wanted to take a picture with me and people were shocked all night to know I made it!
You can see my full tutorial and more pictures here...
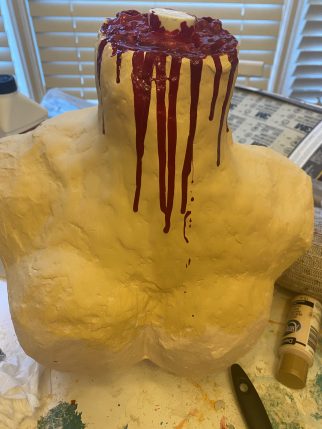
Painted Bust 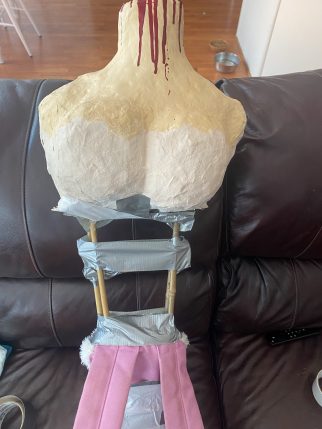
Rig attached to bust 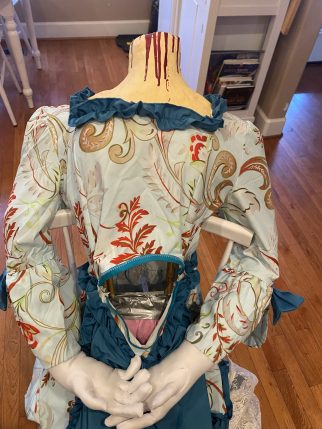
Dress on rig with head hole cut 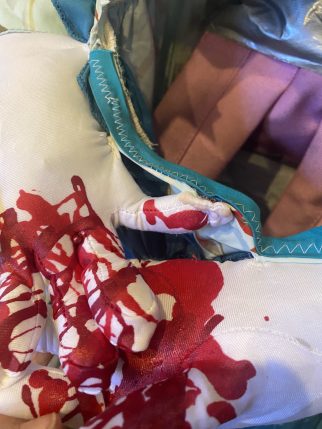
Gloves stitched to dress 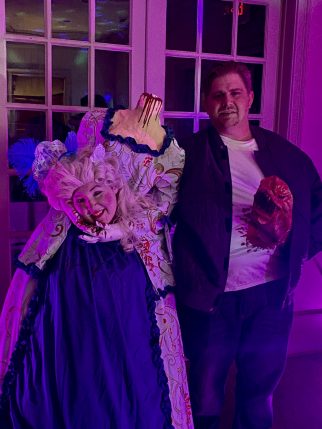
Halloween Party

Related costumes:
 Amazing Marie Antoinette Costume: “Let Them Eat Cake!”
  140+ Mesmerizing Headless Scary Halloween Costume Ideas
  Prize-Winning Headless Marie Antoinette Halloween Costume
 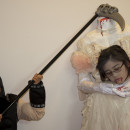 Scary Headless Marie Antoinette, Louis XVI and Executioner Costumes!
 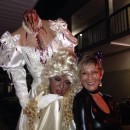 Homemade Headless Marie Antoinette Costume
 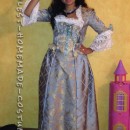 Cool Homemade Marie Antoinette Costume
 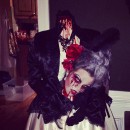 Bloody Headless Marie Antoinette Costume
 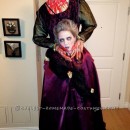 Scary Headless Marie Antoinette Homemade Halloween Costume
Your comment has been sent successfully.