I do not own Mater or Disney/Pixar’s Cars/Cars2. Please do not sue me.
Our “Road Trip” to Mater
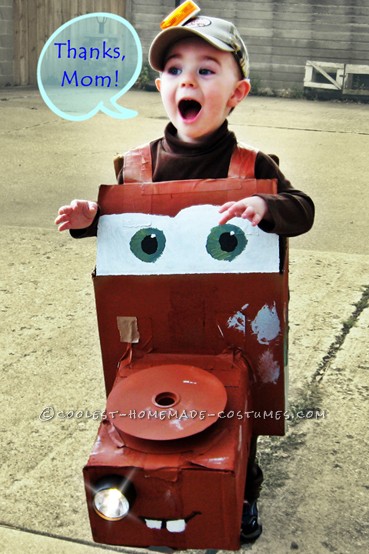
I made this amazing homemade 3D Mater costume because my toddler is crazy about the Disney/Pixar Cars franchise, and all of the Mater costumes on the market were a)too big for him, b) too expensive, and c) not as 3-D as I wanted. This costume took me 2 or 3 days to make, but only due to the time needed to let the paint dry. I think the final cost came to about $25, but that included things that we are using for other projects, such as painter’s tape. The most expensive component was the spray paint.
Well, we haven’t gone trick-or-treating yet, so I have yet to see the reactions of my neighbors, but I can tell you, my 2 year old son ADORES his costume, and all of the friends and relatives who have seen it at our house have paid me a lot of compliments. This wasn’t the easiest costume I have ever made, but so far it is the most fun and rewarding. The hardest part by far has been keeping my son from playing with it before Halloween night!
Supplies
- 3 cardboard boxes of various sizes
- 1 roll of tan duct tape
- 1 roll of yellow painters’, electrical, or duct tape
- 1 can of Terra Cotta spray paint
- 1 empty paper towel tube
- 1 lightweight flashlight with batteries
- 1 small bungee cord
- 1 brown long-sleeve shirt
- 1 pair brown pants
- 1 baseball cap
- 1 orange reflector or light
- String
- 1 black permanent marker
- 1 palette or paper plate
- 1 palette knife
- 1 cardboard spool as from a large spool of ribbon
- Black, white, green, red, yellow, and blue acrylic paints
- Optional: blue latex wall paint
- Various paintbrushes
- 1 box cutter knife
- Paper towels
- Optional: tarp/drop cloth
Cab
1. Choose the biggest cardboard box. It should be large enough to fit comfortably around the wearer, but not so huge as to be difficult to walk in.
2. Cut all 4 flaps off the bottom of the box with the knife. This is where the legs will come out.
3. Cut 2 opposite flaps off the top of the box to make room for arms to come out. Leave two flaps opposite each other—these will help hold up the costume.
4. Position the wearer comfortably inside the box, with the 2 remaining flaps at chest and back. Leave the flaps open wide enough to allow the head to slip in and out easily, but not so wide as to let the costume fall off. Apply first strips of tan duct tape from one flap to the other to form 2 shoulder straps. There should be 1 strip of duct tape on each shoulder. This step takes 3 people: 1 to wear the costume, 1 to hold the costume, and 1 to tape.
5. Remove costume from wearer. Reinforce shoulder straps with another layer of duct tape, sticky sides together. This will strengthen the straps, as well as keeping them from sticking to anything else. This completes the cab.
Engine
1. Choose 1 of the smaller boxes for an engine block. This box should be completely intact and closeable. Decide which side will be Mater’s mouth.
2. Near the top of the side of the box which is to be the mouth, trace a circle about the size of your flashlight. This circle should be on the upper left of the box as it faces you. It should be big enough that most of the flashlight hides inside the box, but snug enough that the whole flashlight does not fall in. When you insert the flashlight later, Mater will have one working headlight!
3. Now, tape the box shut.
4. Tape the engine block securely to the front of Mater’s cab. You will probably need a lot of tape.
5. Remove any leftover ribbon from spool and tape securely to the top of the engine block to create Mater’s exposed air filter. This completes the engine.
Bed
1. For the final box, cut off any flaps or lid that are on the top (or you can just use an open shoe box if you have a really sturdy one). This will be Mater’s truck bed.
2. Tape the truck bed securely to the back of Mater’s cab. This is the most important bit of construction, so use a COPIOUS amount of tape—especially if you want the bed to be load bearing.
3. Put the costume back on the wearer to double check fit and maneuverability. While the wearer is in costume, fill the truck bed with several small but heavy items to test whether or not it is load bearing. If the bed starts to fall off, reinforce with more duct tape. The first time I tested the truck bed, I filled it with my son’s toys while he tried on the costume. The bed fell apart. More duct tape fixed it pretty well…until I stored it on our humid screened-in porch. Keep Mater out of humidity or you will have to add more tape. Mater is currently load bearing, but he is staying on our dining room table until we are ready for tricks or treats.
4. Remove wearer and objects from costume, and place paper towel tube at an angle from the back of the cab hanging over the truck bed. Generously duct tape into place. Give it a few good tugs to make sure it can withstand a light weight suspended from it. You have now completed the main construction phase of your Mater costume, hooray! (You may have to reinforce with more duct tape later.)
Paint Job
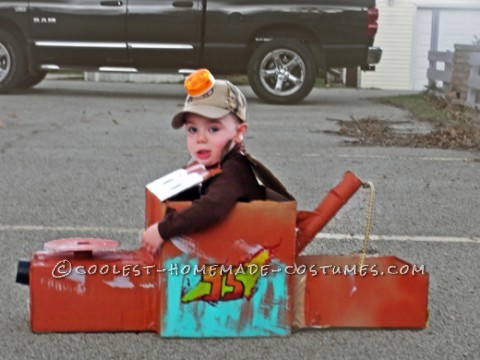
1. Take the whole costume outside or to a well-ventilated garage and spray paint it with the Terra Cotta to look like rust. Be warned that you will probably paint the ground/floor around the costume. You may use the tarp to prevent this. I didn’t remember to use the optional tarp on my driveway, so now it looks like I have a rusty Chevrolet logo on my concrete—which is especially humorous to me considering the only Chevy we own is a Hot Wheels. (I have nothing personal against Chevy, I just don’t happen to have one at the moment. I don’t own Chevy or Hot Wheels; don’t sue me)
2. Optional Step: Allow a child to splatter some blue wall paint on the costume, to be where Mater’s old paint shows through the rust. My 2 year old son enjoyed this step.
3. Allow paint to dry.
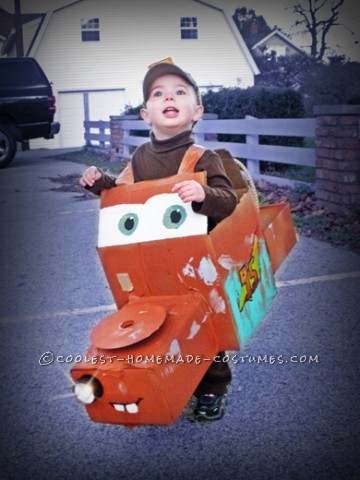
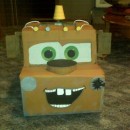
4. Use acrylics to paint Mater’s eyes, mouth, and logos. I did a lot of blending to get the green gradients in his eyes and the orange gradients in the number.
5. Allow paint to dry.
Accessories
Place a strip or so of yellow tape on the back bumper. Draw diagonal lines on it with a permanent marker. Use bungee cord hook to poke a hole through end of paper towel tube and hang the bungee cord there. This is Mater’s tow rope and hook. Mater’s body is now complete, hooray!
Use string to tie the orange reflector or light to the ball cap. Turn the flashlight on and insert it into the hole on Mater’s face when you are ready to trick-or-treat! You have finished your costume and are ready to go!

Related costumes:
 Coolest Homemade Tow Mater Truck Costume
  65+ Coolest Homemade Thomas the Train Halloween Costume Ideas
  Cool Homemade Thomas The Tank Engine Costume
 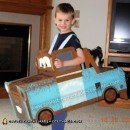 Coolest Homemade Tow Mater from Disney’s Cars Costume
  Edward the Blue Engine Train Costume
  Cool Batman, Robin and Villain Family Costumes
  Homemade Wall-E Halloween Costume
  65+ Coolest Homemade SpongeBob Costume Ideas
Your comment has been sent successfully.